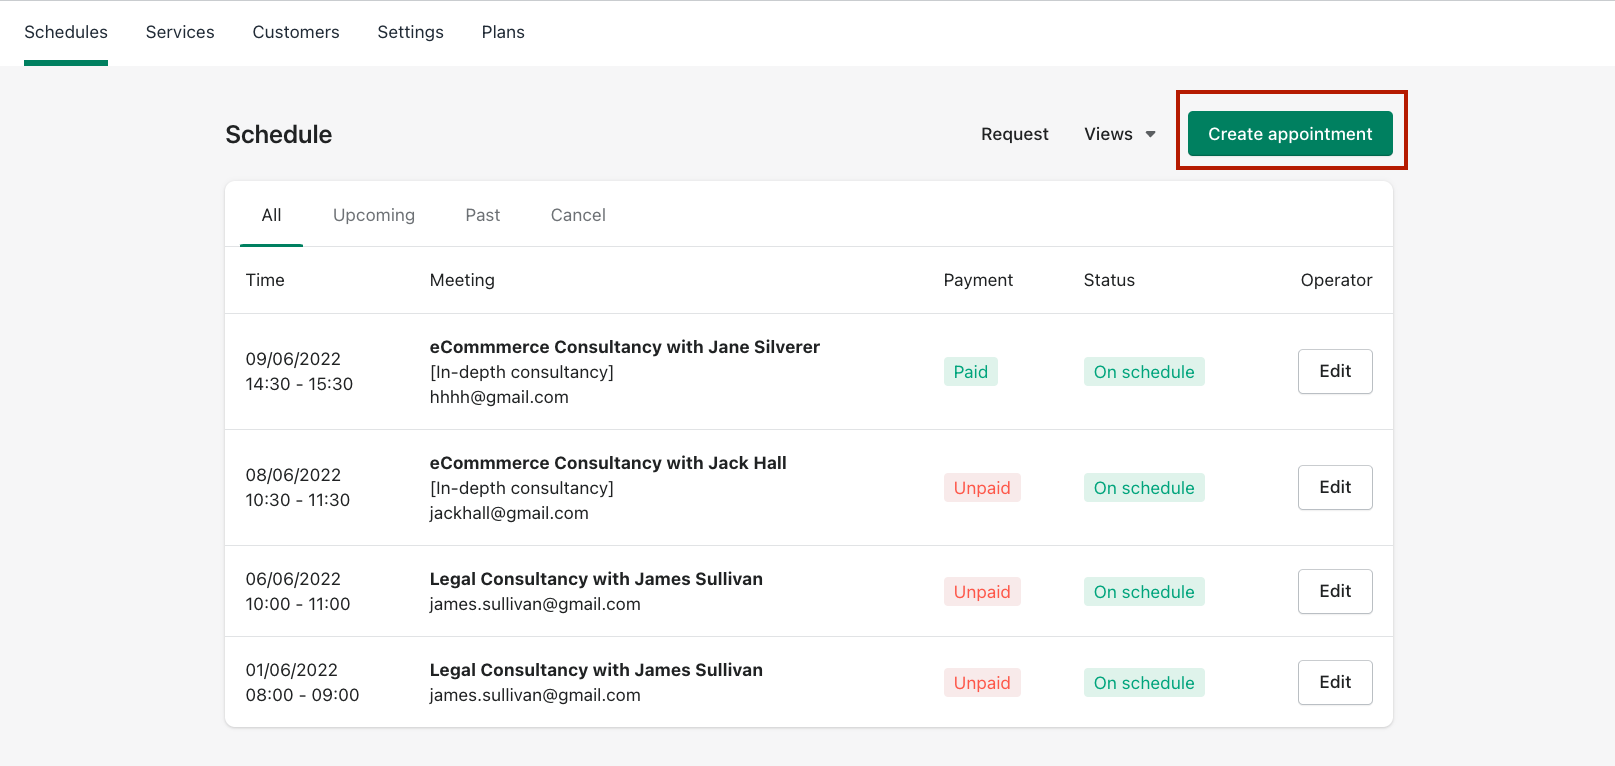
Schedules
Create a new appointment
- From
Schedules, click on the Create appointment button.
- Choose New customer or Returning customer. If it's for a new customer, please fill in the information.
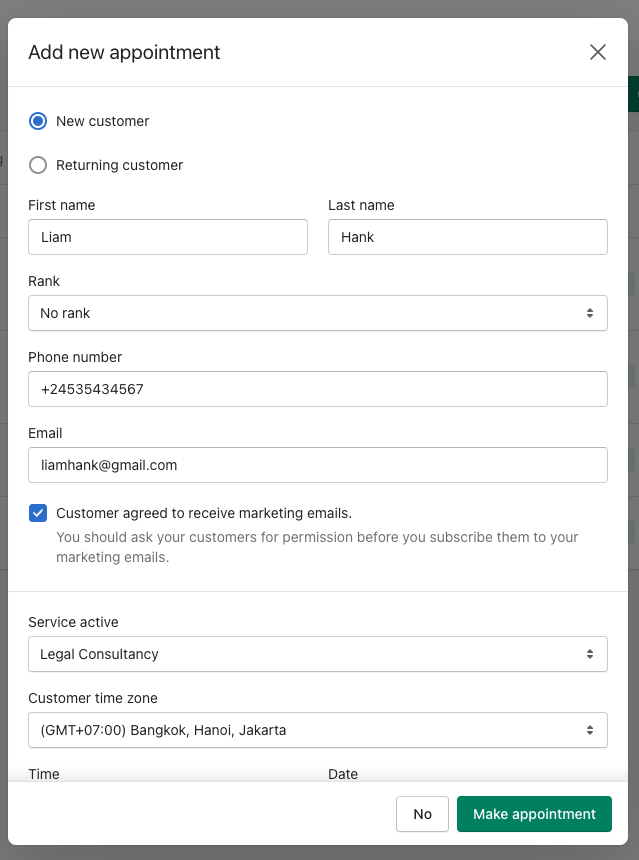
- Select the service of that the customer booked an appointement for.
- Choose time zone, date, time, and payment. Make sure you select a time that you're available.
- Choose payment status as Unpaid or Paid.
- Leave note if you want
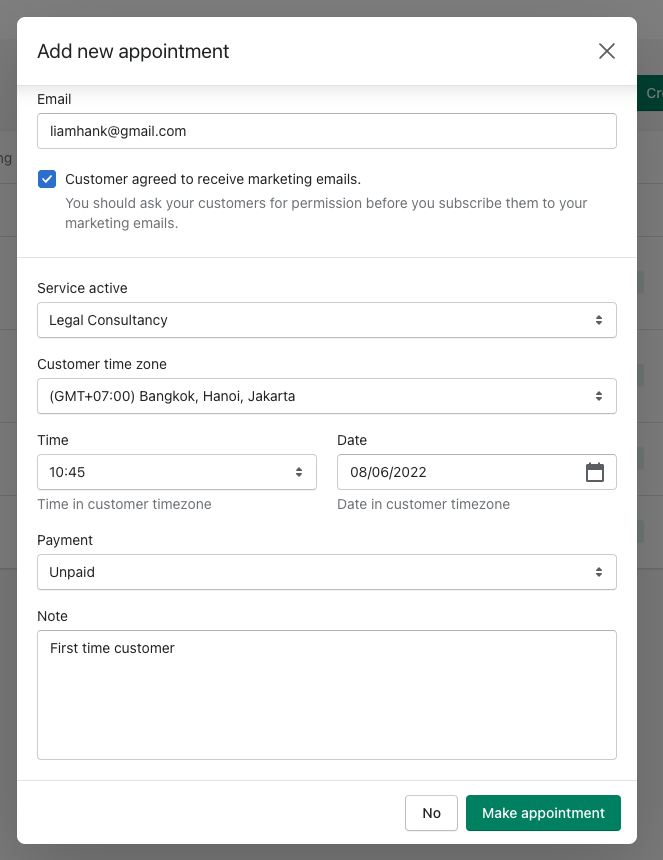
- Click on the Make appointment button.
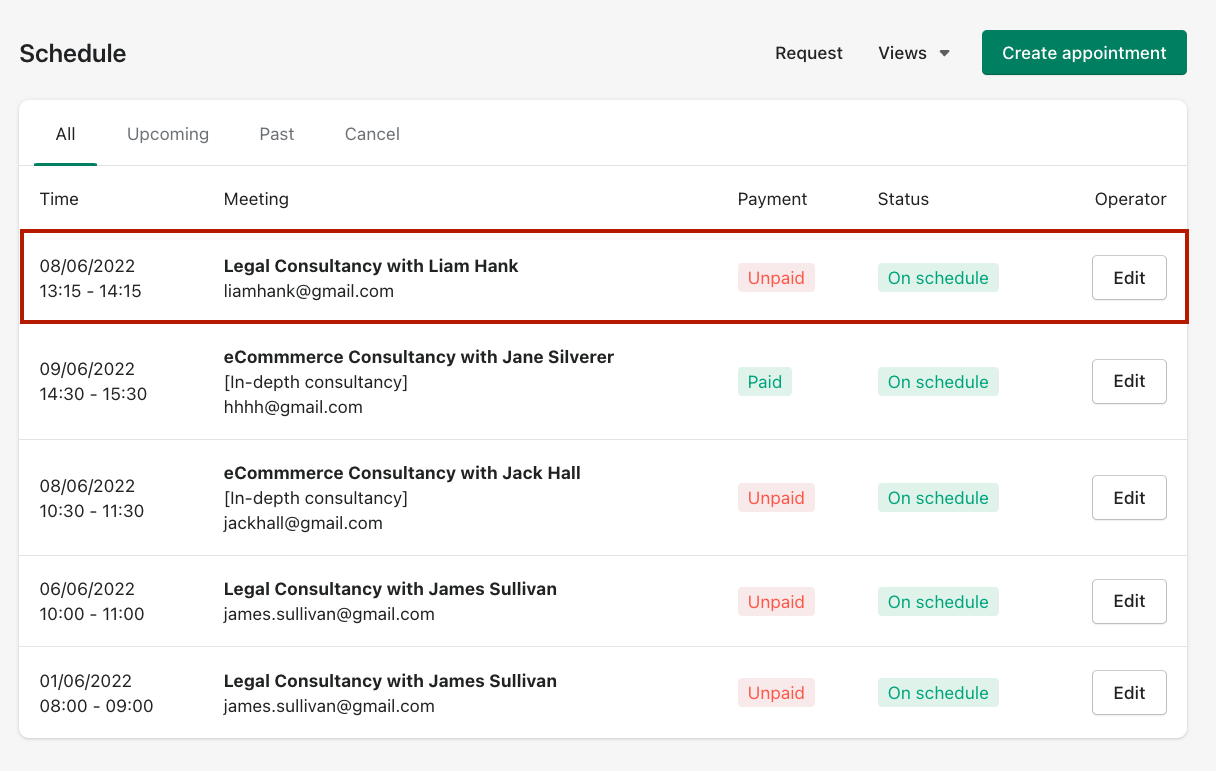
You will then see the details of the appointment in the Schedules section.
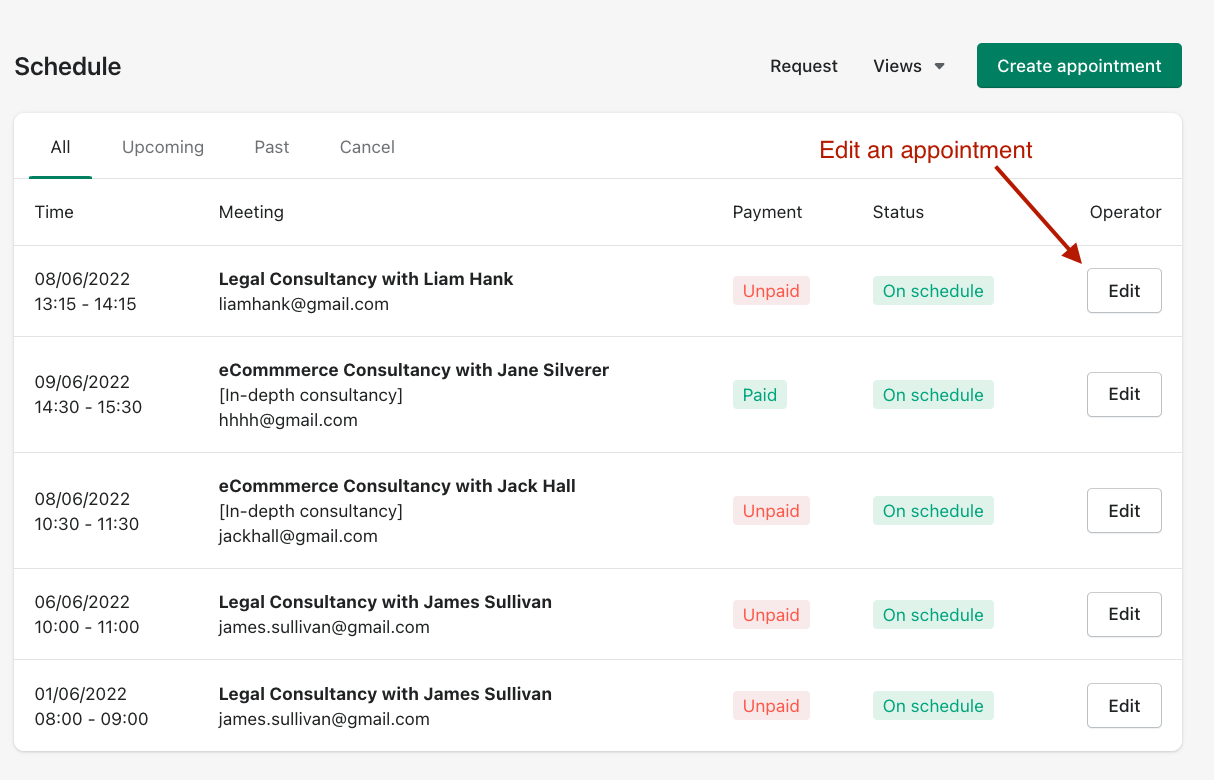
Cancel an existing appointment
- From
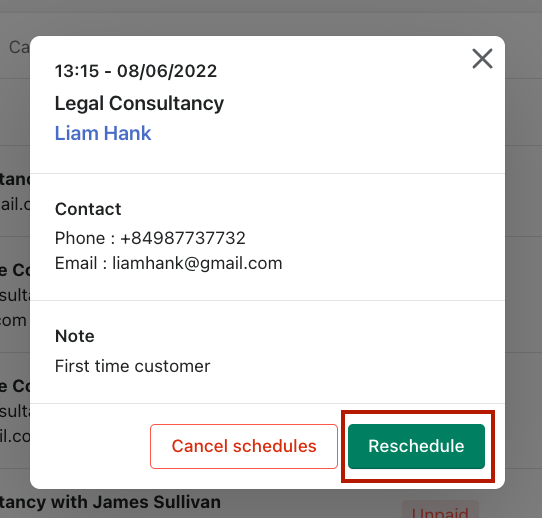
Schedules, click on the Edit button of any existing appointment
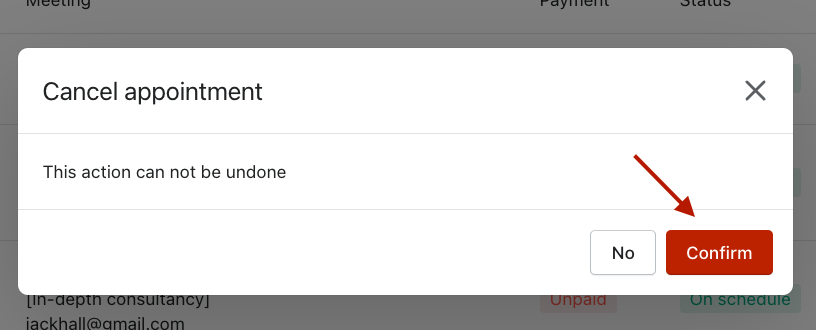
- Click on the Cancel schedules button
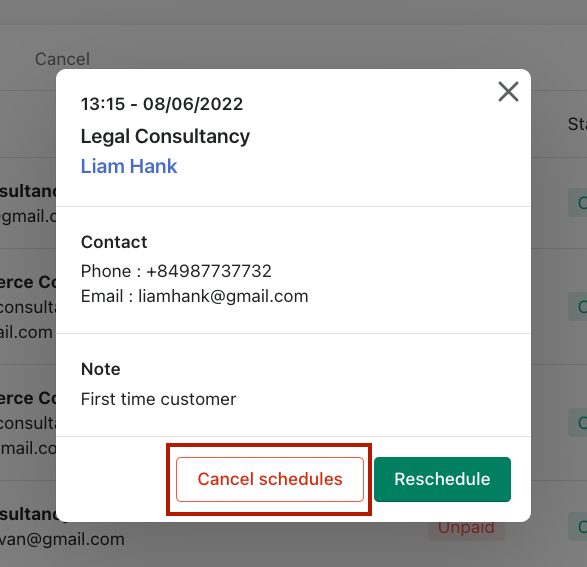
- Remember that this action can't be undone. Click on Confirm to continue
You will find the canceled appointment in All schedule tab or Cancel tab.
Reschedule an existing appointment
- From
Schedules, click on the Edit button of any existing appointment
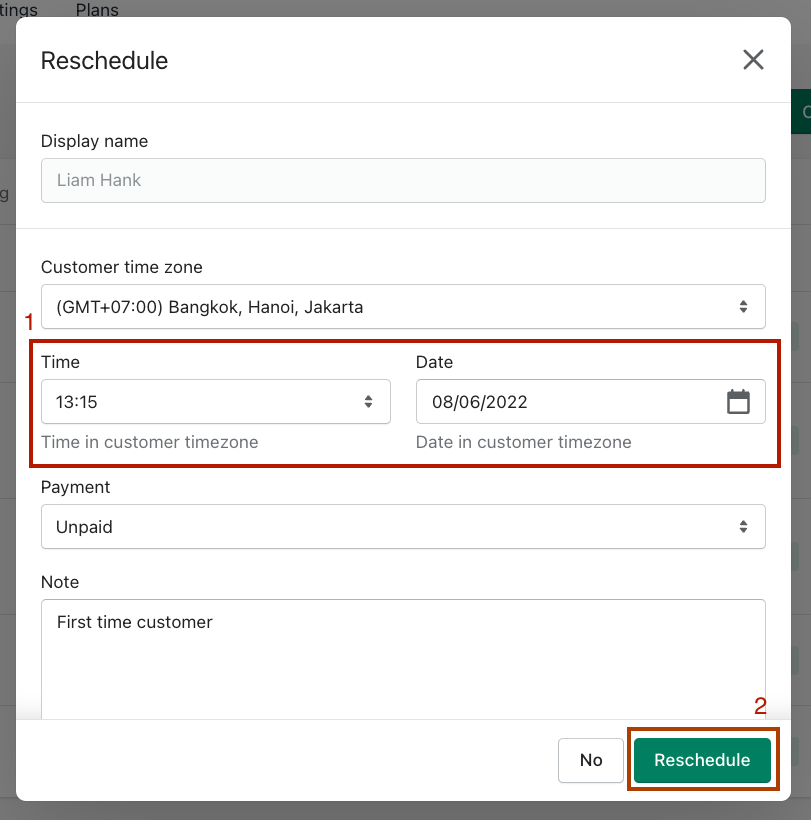
- Click on the Reschedule button
- Choose a new timing then click on the Reschedule button
Update work time
If you have days off and don't want your customers to book on these days, then you can update your work time to update the availability for your schedule both in the storefront and admin.
- From
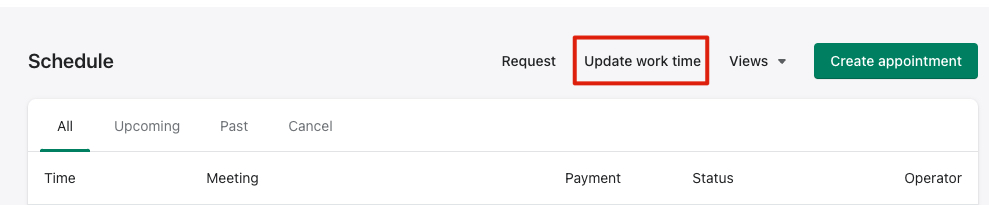
Schedules, click on the Update work time button
- Click on the Add more button

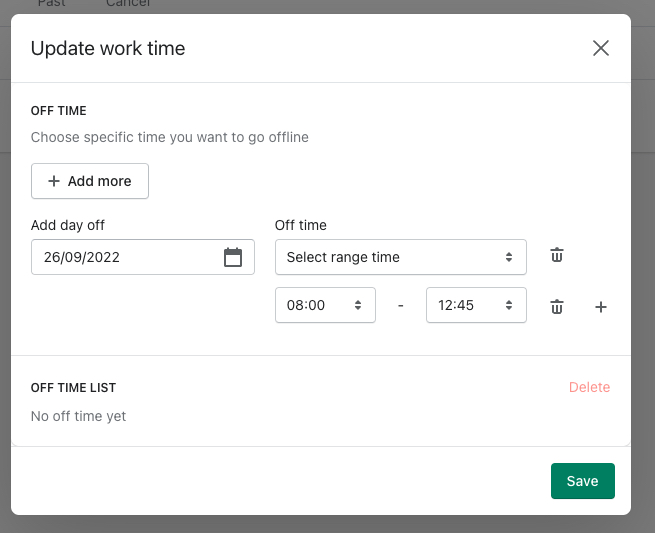
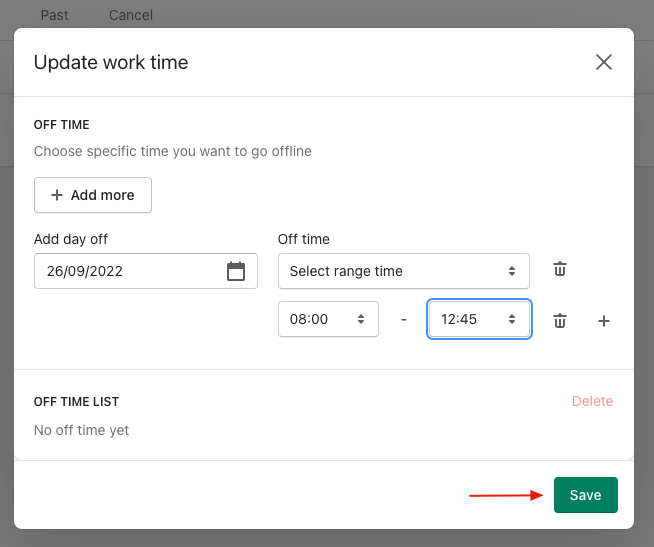
- Select the day and off time to add, you can choose Full day or Select time range
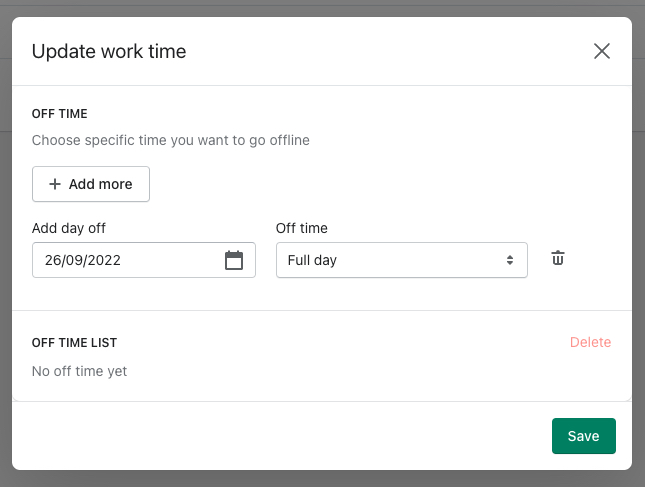
- Click on the Save button
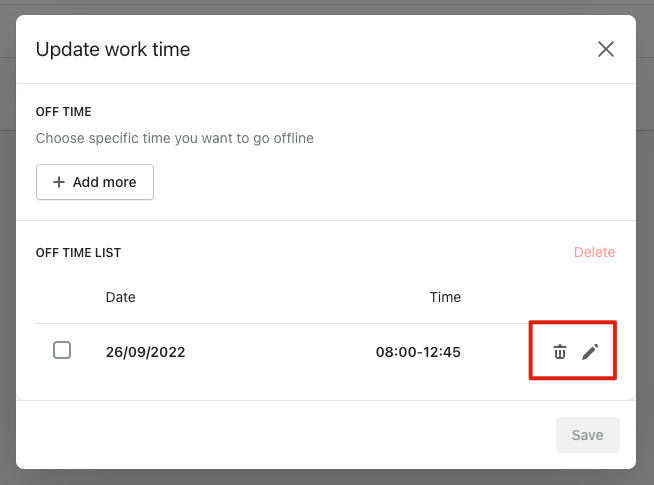
- You will see the off time in the panel. You can then delete and edit this off time through two buttons like in the image below.
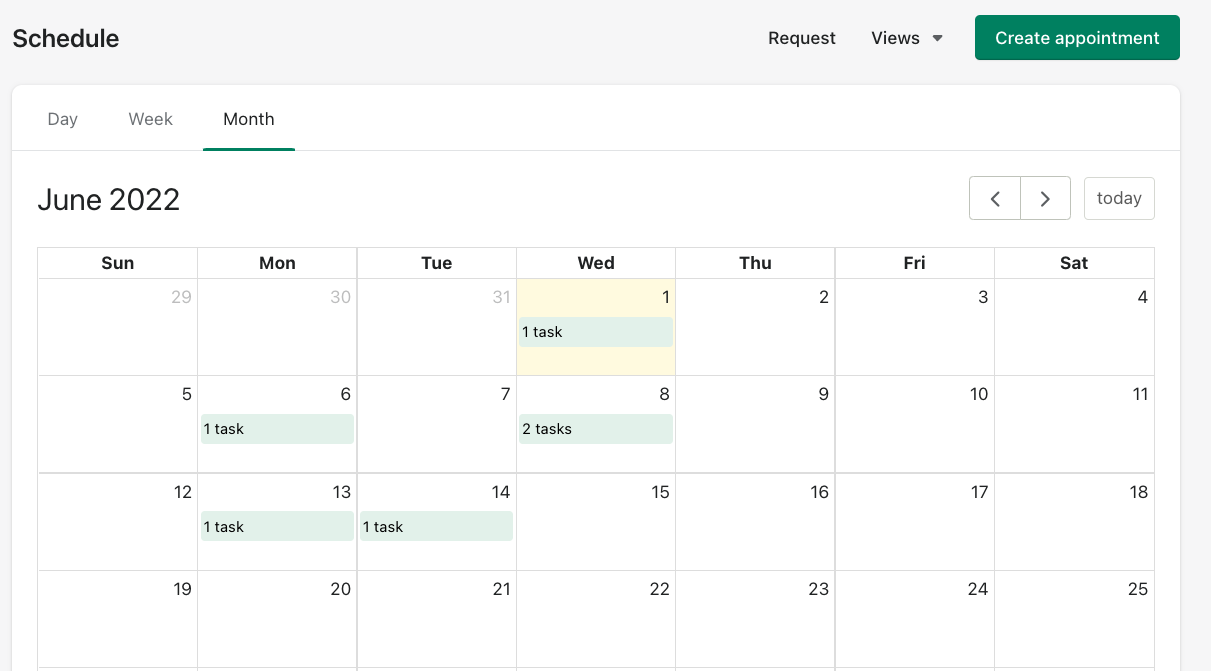
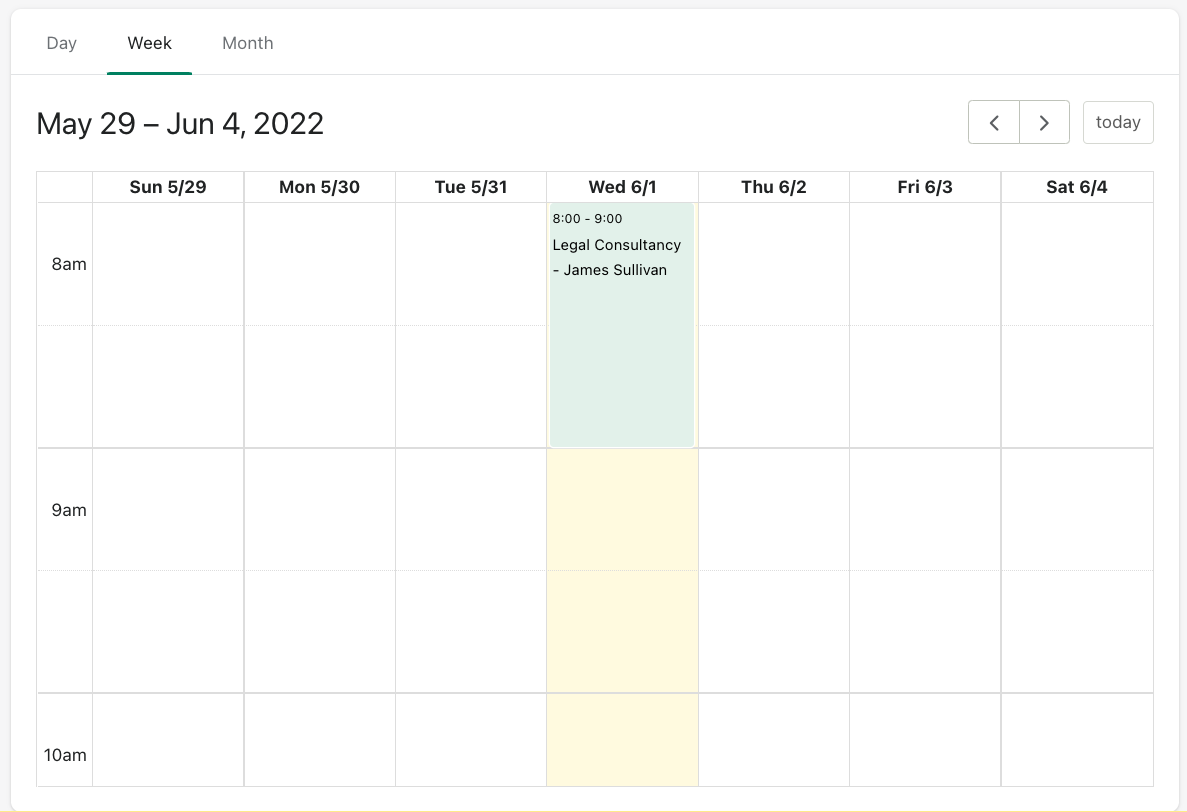
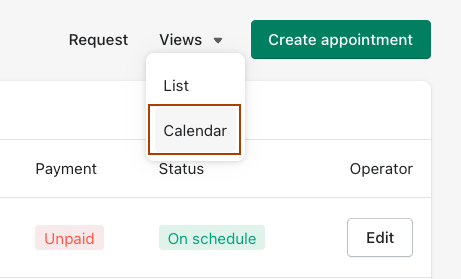
Change the view options
- From Schedules, click on the Views button. The list view is by default, but you can also view your appointments by Calendar.
- When view by Calendar, you can choose to view by Day, Week, or Month. This will give you a clear look at all your bookings and for better management.