Product metafield data
This guide describes how to create product metafields and use them with the Lotio features that read them: the Product compare modal and the Countdown timer block.
Both features look for metafields in the custom namespace, which is the namespace Shopify uses when you create a definition in the admin.
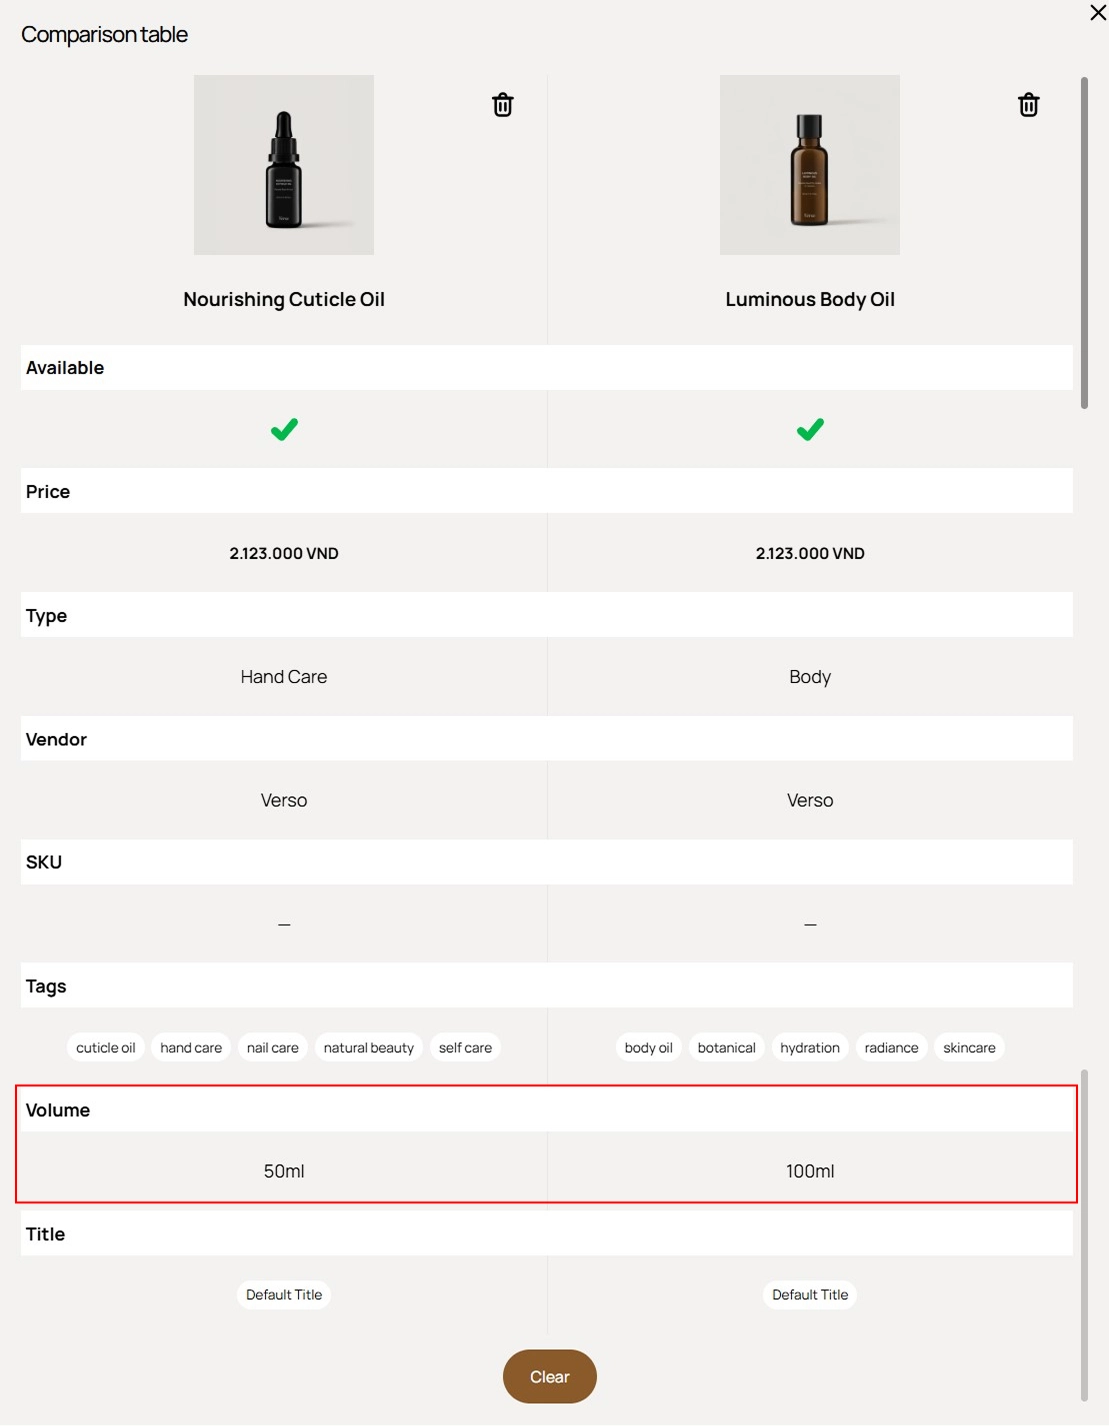
Create a product metafield definition
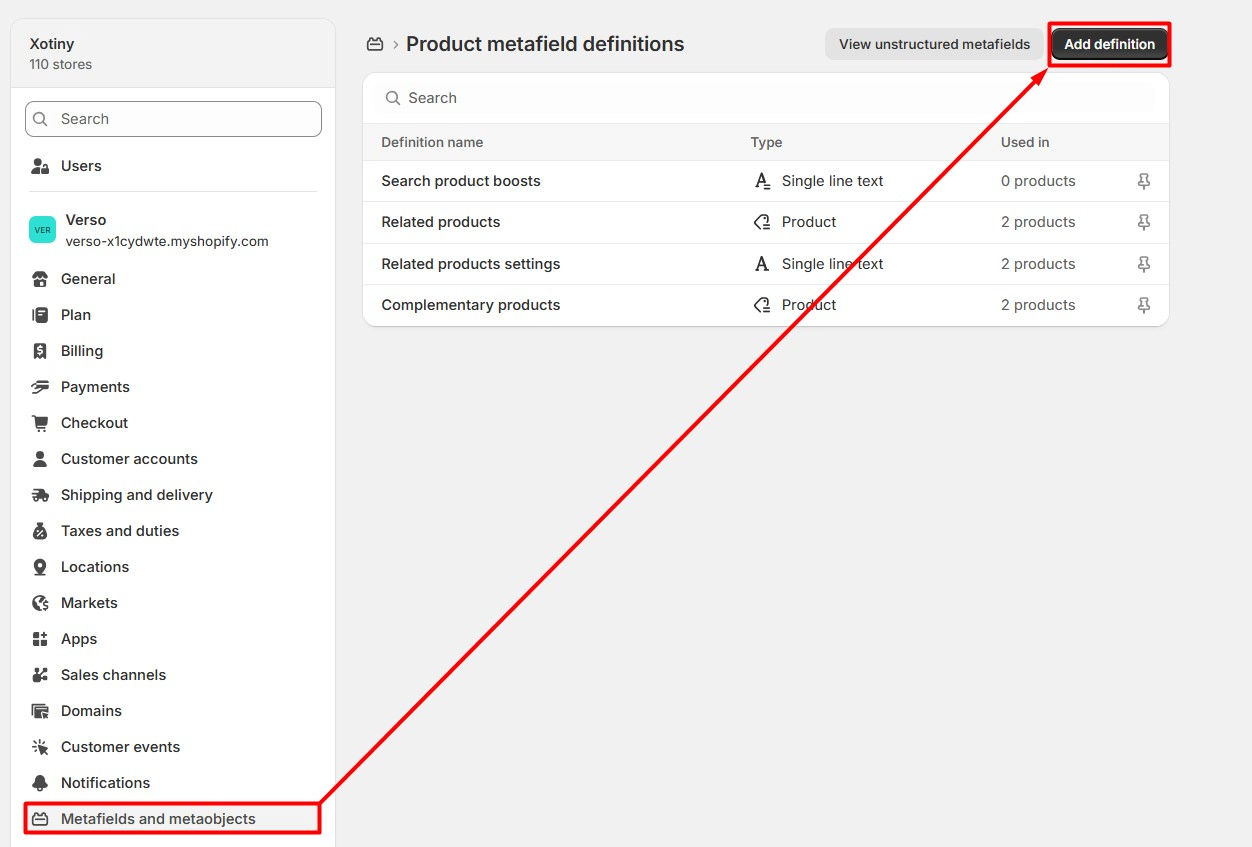
- On your store's Shopify admin page, from the left-side menu, select Settings > Custom data > Products, then select Add definition.
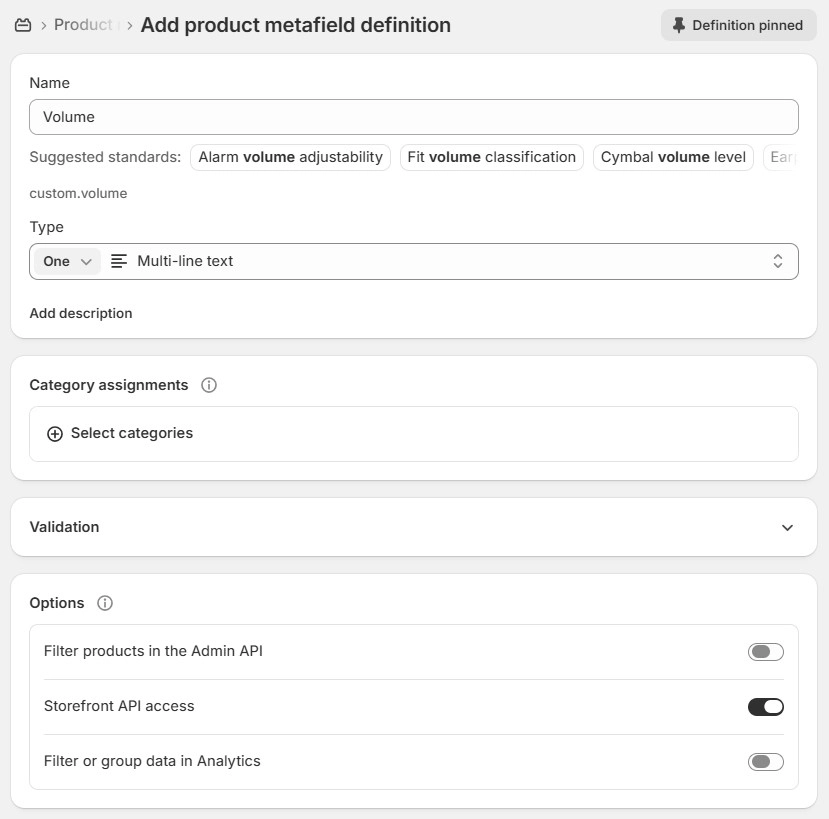
- Fill in the definition:
- Name: what you want to show as the row heading, for example
Volume. Shopify fills in Namespace and key ascustom.volume; keep that default. - Type: Single line text or Multi-line text for the compare table. Choose Date and time for the countdown timer.
- Name: what you want to show as the row heading, for example
- Select Save. Repeat for every attribute you want to compare.
Assign values to products
- Select Products from the left-side menu, then open a product.
- Scroll to the Metafields box at the bottom of the product page and enter a value for each definition.
- Select Save. Repeat for the other products you want to compare.

Show metafields in the Product compare modal
The compare modal opens when a shopper adds products to compare from product cards and then selects the Comparison button in the Floating sidebar.
-
From the left-side menu, select Sales channels > Online store > Themes, then select Customize on the current theme.
-
Make sure compare is switched on: in Theme settings > Product cards, enable Show compare, and in the Features group of the sidebar add the Comparison block to the Floating sidebar section.
-
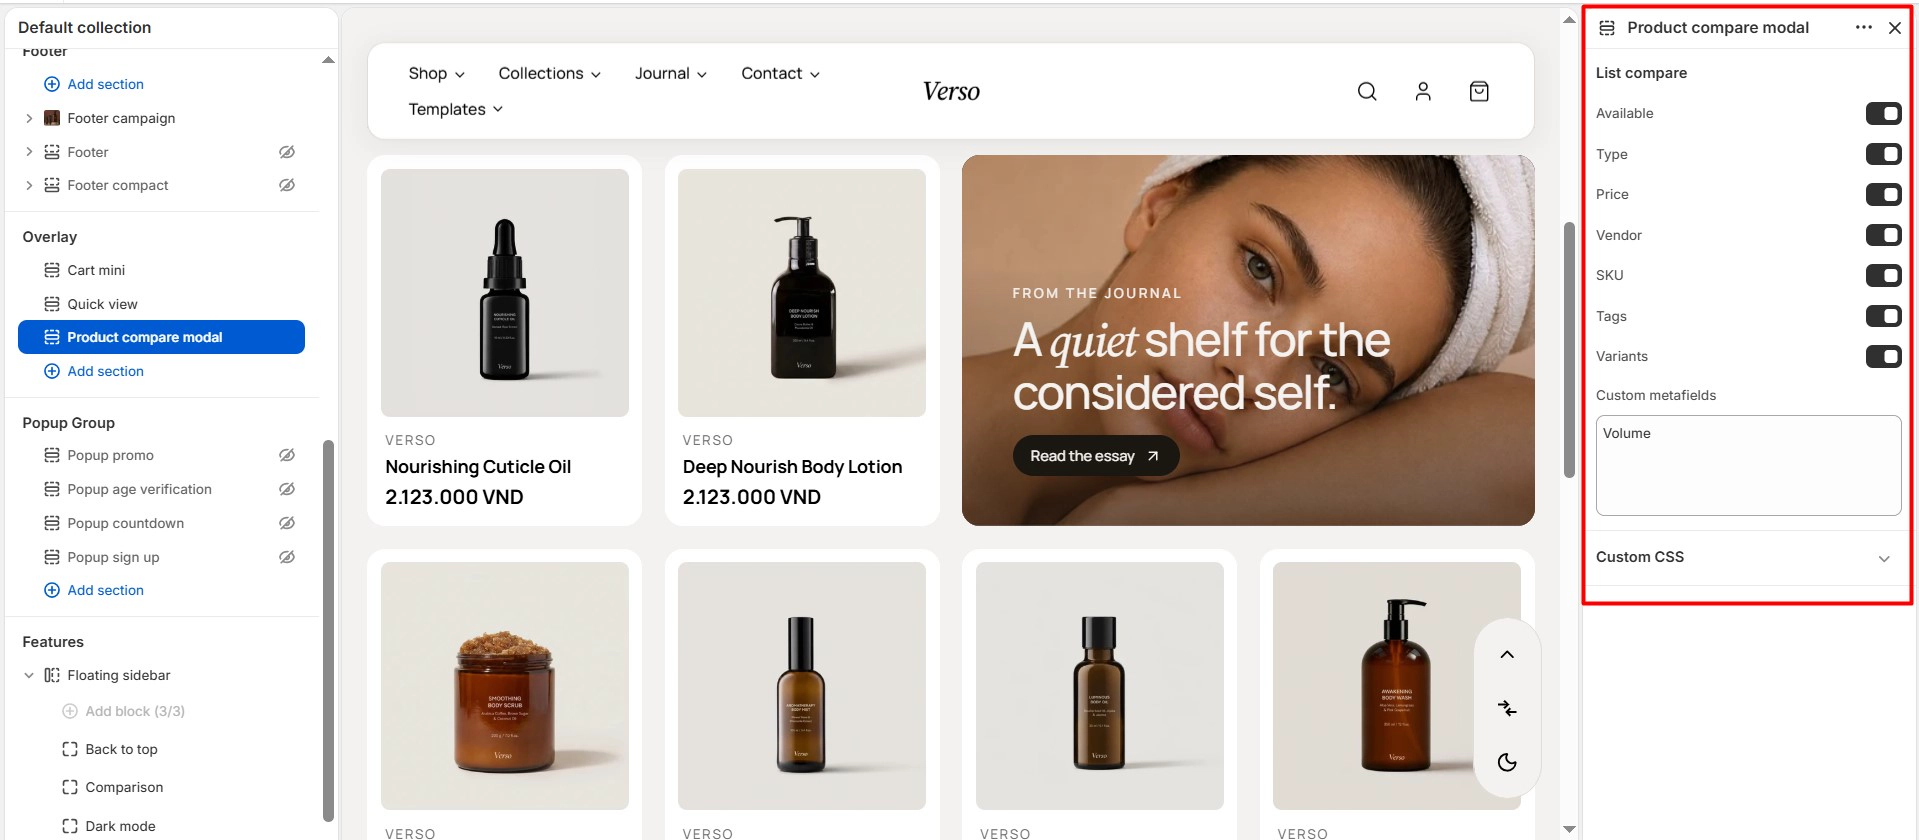
In the sidebar, scroll to the Overlay group and select the Product compare modal section.
-
Under List compare, tick the built-in rows you want (Available, Type, Price, Vendor, SKU, Tags, Variants).
-
In Custom metafields, enter the Name of each definition on its own line, exactly as you typed it in the admin:
VolumeFinishSkin typeLotio converts each line to lower case, replaces spaces with underscores and reads
custom.<key>from every product in the table (soVolumereadscustom.volume). Products without a value show a dash. -
Select Save.
Drive the Countdown timer block from a metafield
The Countdown timer block of the Product information section reads a Date and time metafield with the key custom.product_countdown and counts down to it. The block stays hidden on products where the metafield is empty.
- Create a definition named Product countdown with Type set to Date and time so the key becomes
custom.product_countdown. - On each product that needs a timer, set the end date and time in the Metafields box and select Save.
- In the Theme editor, select the Product information section on the product template, select Add block > Countdown timer, and set its Headline, Label, colors and appearance.
- Select Save.
Only these two features read metafields automatically. Elsewhere, any text setting in the Theme editor that shows the Connect dynamic source icon (for example the Content of a Collapsible row block) can be connected to a product metafield so the value changes per product.
Use the same definition names for all products in a category so that the compare table lines up. Metafield names are case-sensitive in the Custom metafields field: Skin type and Skin Type are two different rows.