Add to page
There're several ways to add a gallery to your page. You can follow one way below
Auto create/add
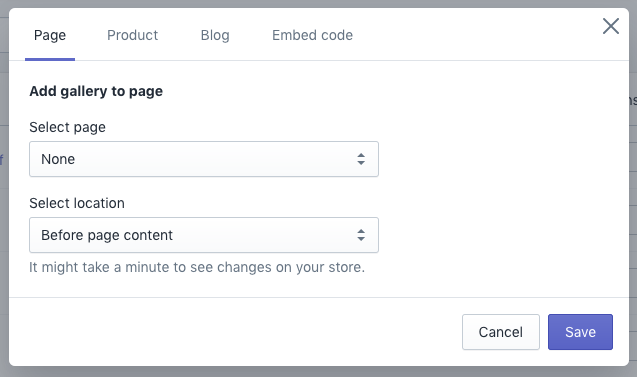
- In app galleries list, navigate the gallery that you want to show in your page and click
Publishbutton. - Choose existing or create new page
- Choose position
- Click
Save
Using embed code
-
In app galleries list, navigate the gallery that you want to show in your page and click
Publishbutton. -
Click
Embed code -
Click
Copy code -
Navigate to Online store > Pages
-
Follow this to paste code

Use page template
note
Creating a new template is only available for Online Store 2.0.
Create new page template
- From your Shopify admin, go to Online Store > Themes.
- Find the theme that you want to edit, and then click Customize.
- Open the drop-down menu at the top of the page.
- Use the dropdown menu to select a template. Click + Create template.
- Give your template a unique name (forexample
gallery) - Using the dropdown menu, select which existing template you want to base your new template on.
- Click Create template.
Add section to page template
-
Click Add section, then XO Gallery
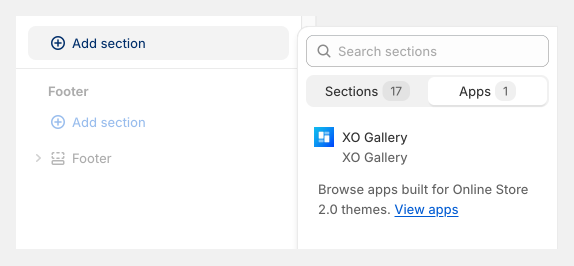
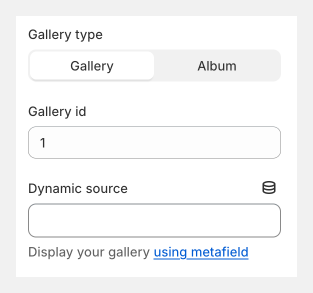
-
Fill your gallery/album id then click save to preview your gallery
Apply a new template to a page
- From your Shopify admin, go to Online Store > Pages.
- Click the title of the gallery page.
- In the Online store section, use the dropdown menu to select a new theme template to apply to the selected page.
- Click Save.
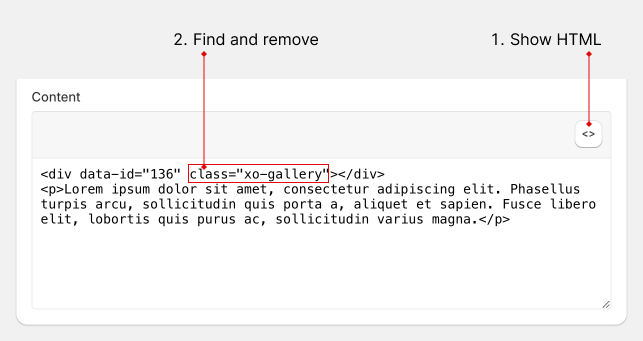
Remove from page
If you publish a gallery to a page using the publish feature or embed code, you can follow this to remove it:
- Navigate to Online store > Pages
- Edit your page
- Click Show HTML button, find
class="xo-gallery"and remove it