Product countdown
How to Add a Countdown Timer to Your Product Pages
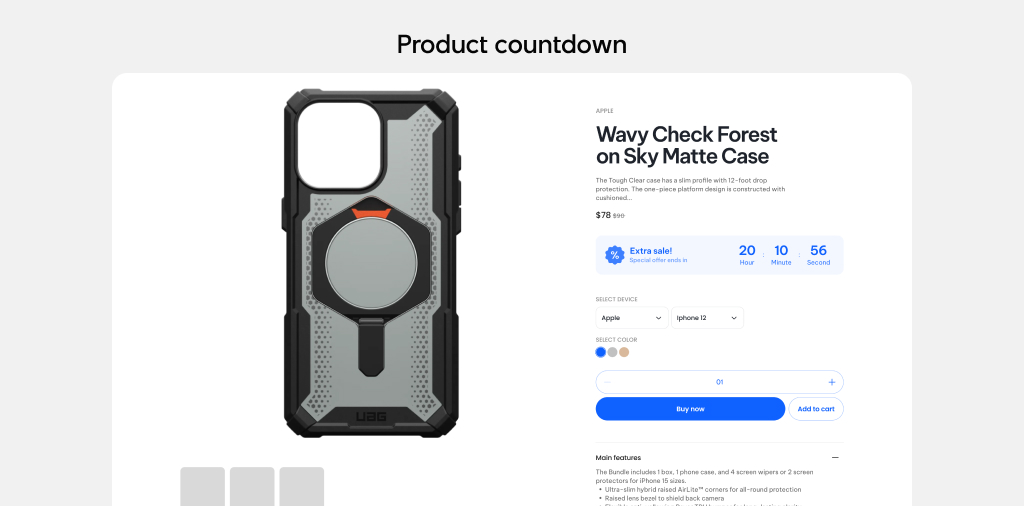
With the Futurer theme, you can add a countdown timer to product pages to create urgency and drive more sales. The countdown works by using metafields linked to your products.
Before You Start: Important Notes
- Countdowns only work for sale products. Make sure your product has a Compare at price set.
- Metafields need to be added before setting up countdowns (but this only needs to be done once).
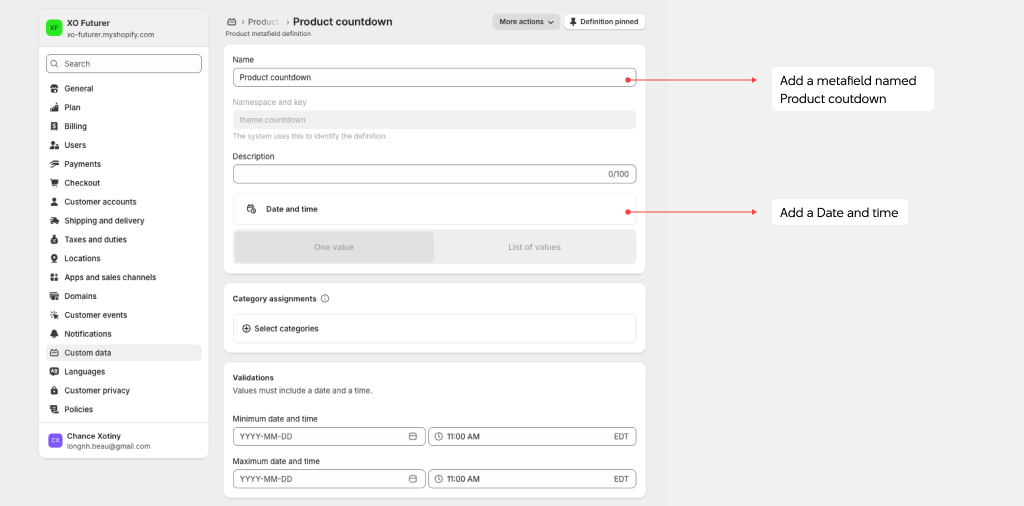
Step 1: Add a Metafield Definition
-
From your Shopify Admin, go to Settings > Metafields > Products.
-
Click Add definition.
-
Set up your new metafield:
Name: Product countdown
Namespace and key: theme.countdown
Content type: Date and time
- Click Save.
You should now see Product countdown listed in your product metafields.
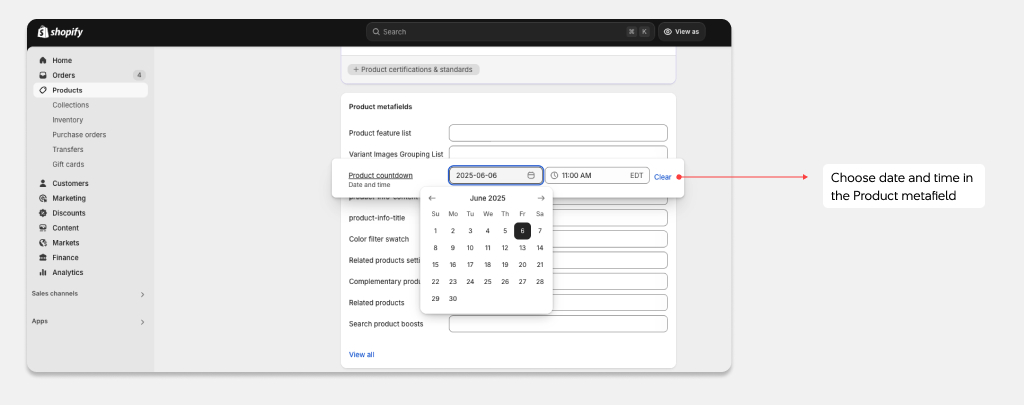
Step 2: Set the Countdown for Products
-
Go to Products in your Shopify Admin.
-
Open the product you want to add a countdown to.
-
Scroll to Metafields.
-
Find the Product countdown field.
-
Set the date and time you want the countdown to end.
-
Click Save.
Step 3: Displaying the Countdown
Compact Countdown (on Product Cards)
A small countdown will automatically appear on product cards once a countdown is set.
To enable or disable it:
- Go to the section settings where your product cards are (for example, Featured Collection).
- Find the option to Enable countdown and turn it on or off.
- Click Save.
Full Countdown (on Product Page)
To add a full countdown to a product page:
- Open the theme editor and go to a product page template.
- Inside the Product information section, click Add block > Countdown timer.
- Customize the heading, font size, and colors.
- Click Save.
::: note
Quick Reminders
- Countdown displays won’t show unless the product is on sale (has a Compare at price).
- Discounts and countdowns are separate: countdowns create urgency but don't apply discounts.
:::