Quick start
When you open XO Tunnel for the first time, the home page shows the Welcome to XO Tunnel setup guide. It walks you through two steps. Use Next and Back to move between them.
Step 1: Connect Notion
- Click Authorize. Notion opens in a new tab.
- Choose the pages to share with XO Tunnel and allow access. Notion creates template databases for you if you don't have them yet.
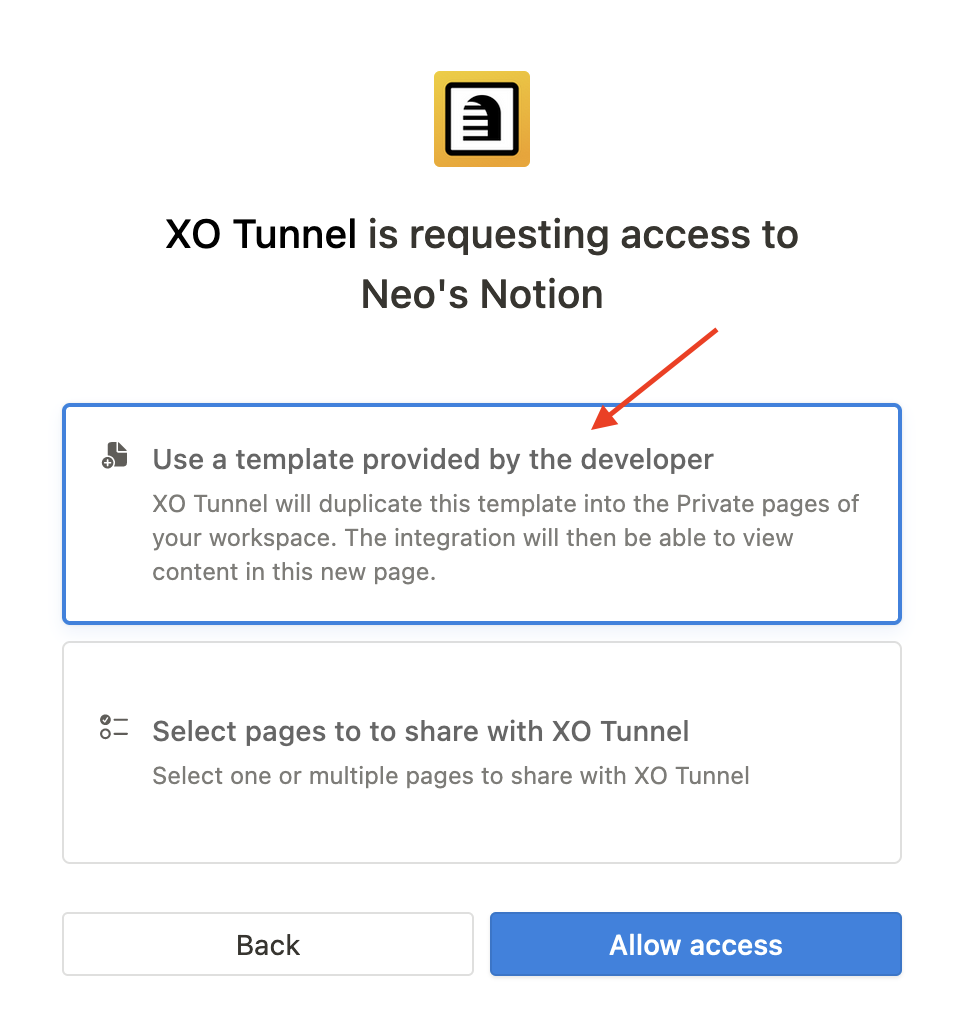
- Go back to the XO Tunnel tab. The guide moves to step 2 by itself.
tip
If you already have the template databases, choose Select pages to share with XO Tunnel and check your databases.
Your blogs, pages, products and collections only appear in the app after you connect Notion.
Step 2: Sync to a blog
- In Select blog, pick the blog you want to sync.
- Check Enable sync with Notion.
- Paste your Notion database link. See how to get the database link.
- Click Sync blog.
If the database already has posts, XO Tunnel asks if you want to publish them to Shopify now.
Finish
Click Finish to close the guide. You can now connect more databases to your other blogs, pages, products and collections.
note
You can hide the guide at any time with the ✕ button, but only after you connect Notion.