Publish your gallery
Get your gallery live on your Shopify store in minutes with these simple publishing methods.
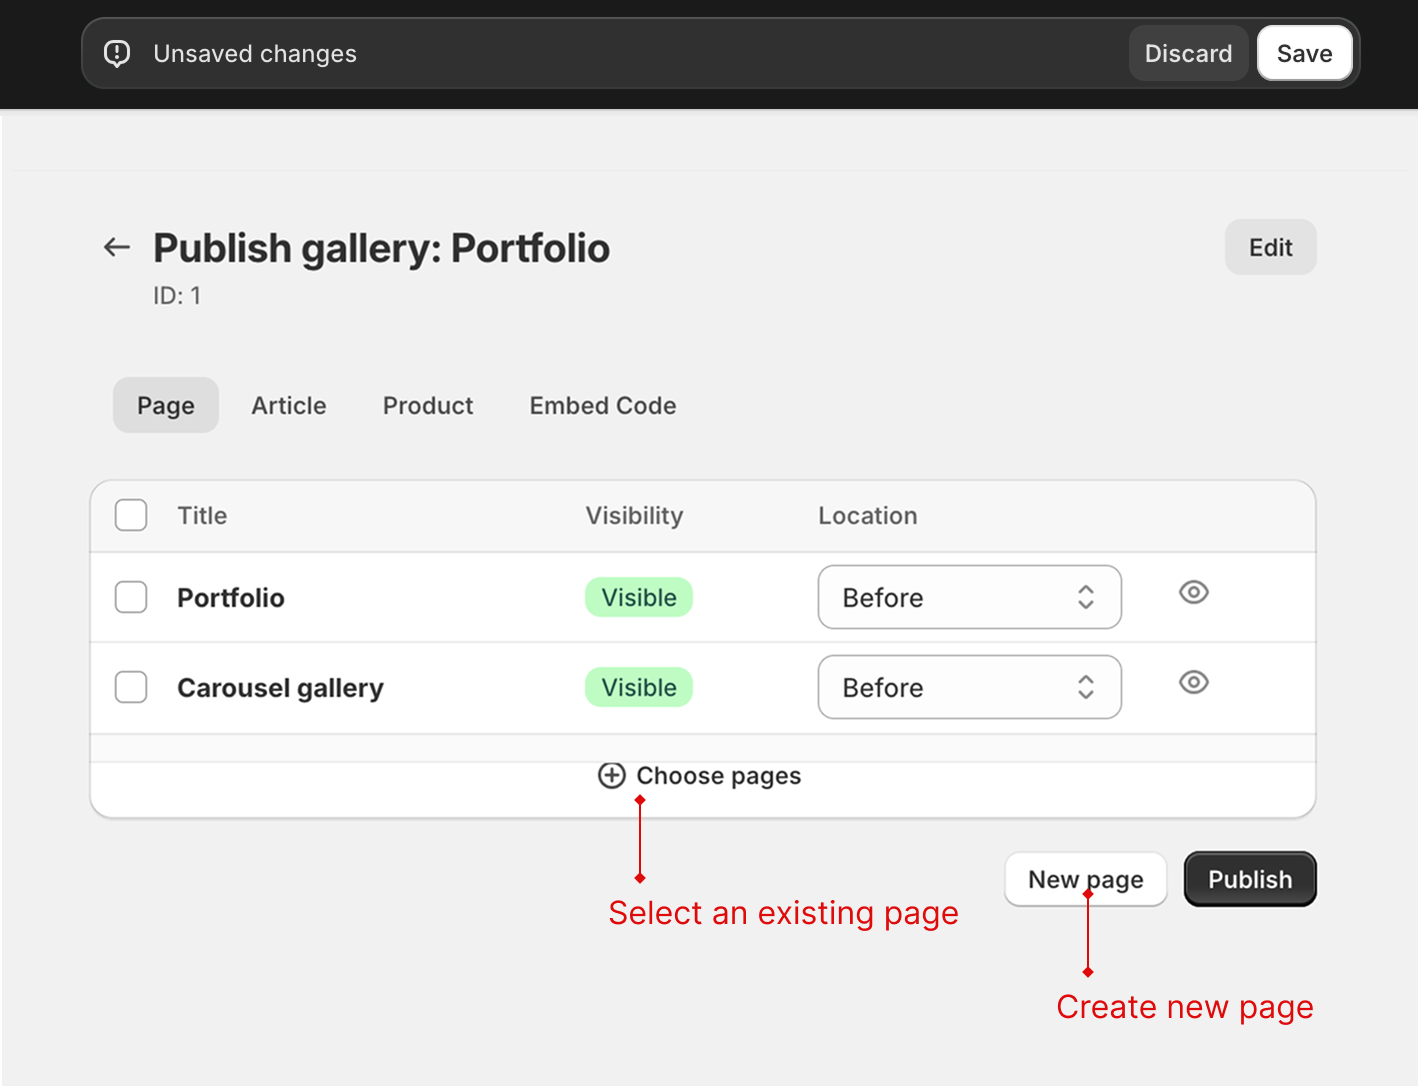
Method 1: Auto-Publish to a page (Easiest)
The fastest way to get your gallery online:
- In your gallery list, find the gallery you want to publish
- Click the Publish button
- Choose New page or select an existing page
- Choose where to place the gallery on the page
- Click Save or Publish
Your gallery is now live! Visit your store to see it in action.
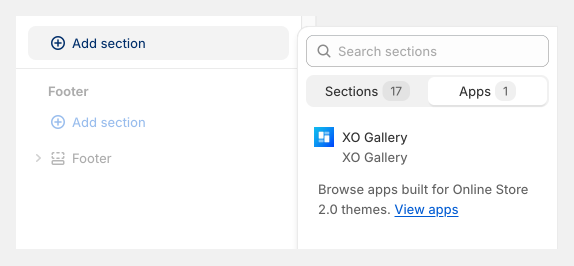
Method 2: Add to homepage with app block
Perfect for featuring galleries on your homepage:
- Go to Online Store > Themes in your Shopify admin
- Click Customize on your active theme
- Navigate to the page where you want to add the gallery
- Click Add section
- Select Apps
- Select XO Gallery
- Enter your gallery ID (found in the gallery list)
- Click Save
Method 3: Embed code (Advanced)
For more control over placement:
- Click Publish on your gallery
- Select Embed code
- Click Copy code
- Go to Online Store > Pages (or Posts for blog)
- Edit the page where you want the gallery
- Switch to HTML view and paste the code
- Save the page

Finding your gallery ID
Your gallery ID is the number shown in your gallery list. You'll need this when using the sections method.

✅ Your gallery is now live! Visit your store to see how it looks. Next, explore more gallery management features.