Metaobject
Understand Metaobject
For example, you have 10 similar products that differ only in some additional information. Normally, to display all information for each product, you'd need to create 10 product pages and assign them individually, which is not efficient.
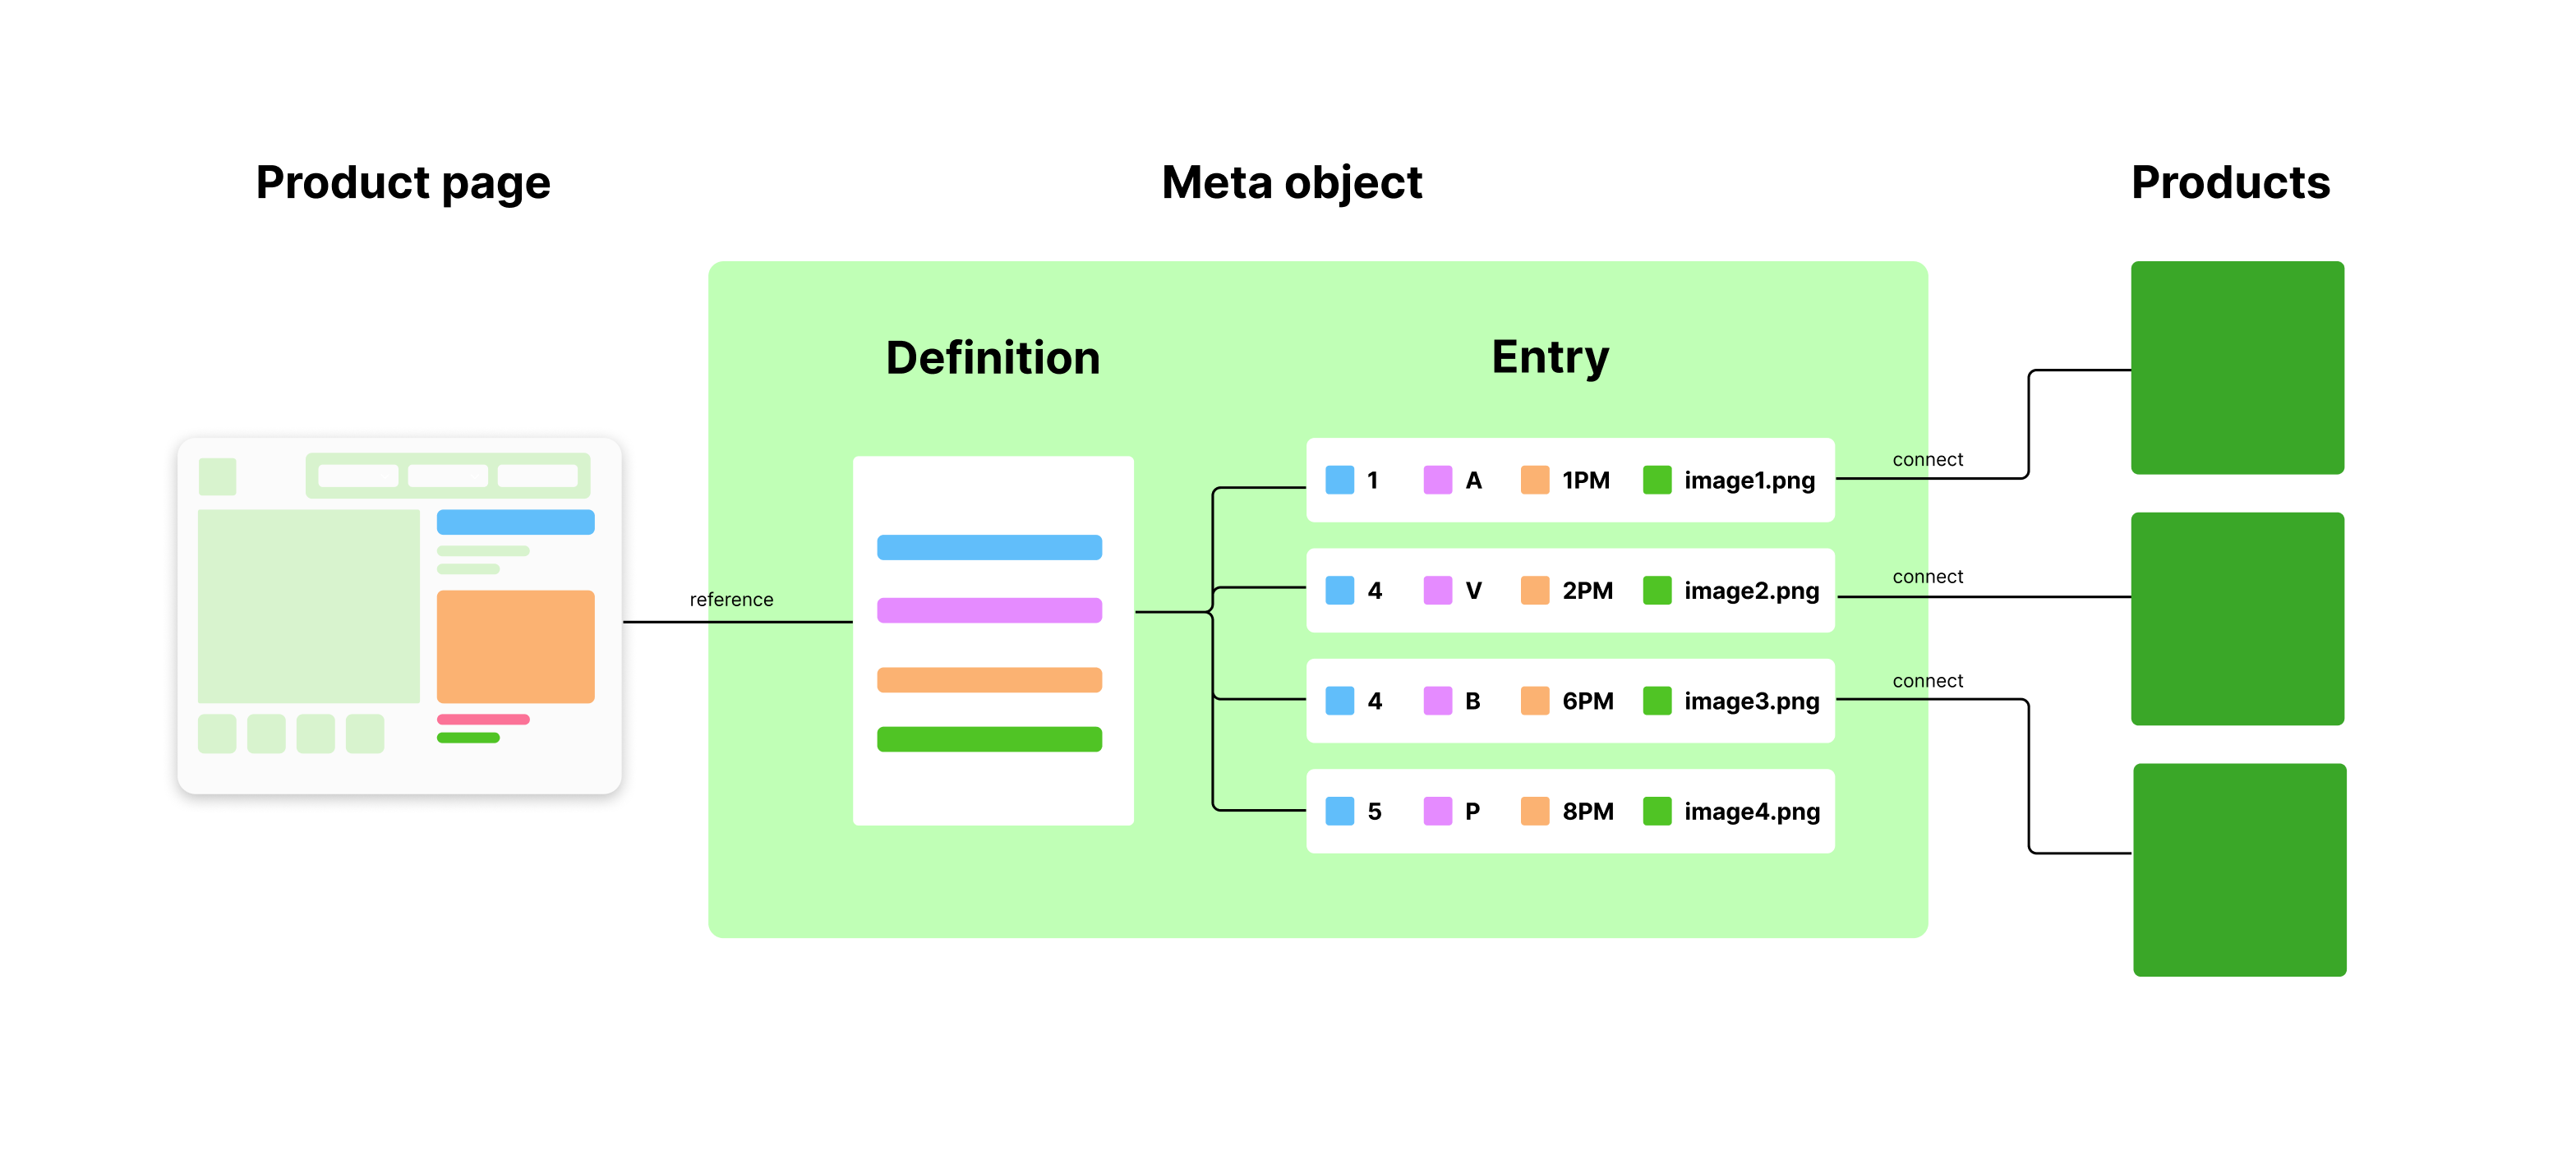
Metaobjects solve this problem. Each of the 10 products will have a unique metaobject entry added. These 10 products will be assigned to the same template with the metaobject feature enabled. The template uses a single definition to check if a product is connected to an entry and displays the information in the correct position.
The model below explains the steps to create and use a metaobject in XO Builder.
-
Create a Product Page
First, create a
product pagethat references a metaobject definition. Adefinitionacts like a template containing static fields on the page (e.g., text, images, videos) with editable values. This page will be assigned to products, so when you click on a product, it redirects to the assigned page. -
Connect Product with MetaObject Entries
A product can connect to one and only
metaobject entries(with the same structure as the definition) to add more details. When you click and access the page with the referenced definition, it will check if the product has any entries and load them correspondingly the interface.
The examples below apply to products. The same logic can be applied to collections and articles.
Create Definition
- In XO Builder → Pages, open or create a product page. Add elements to design your page.
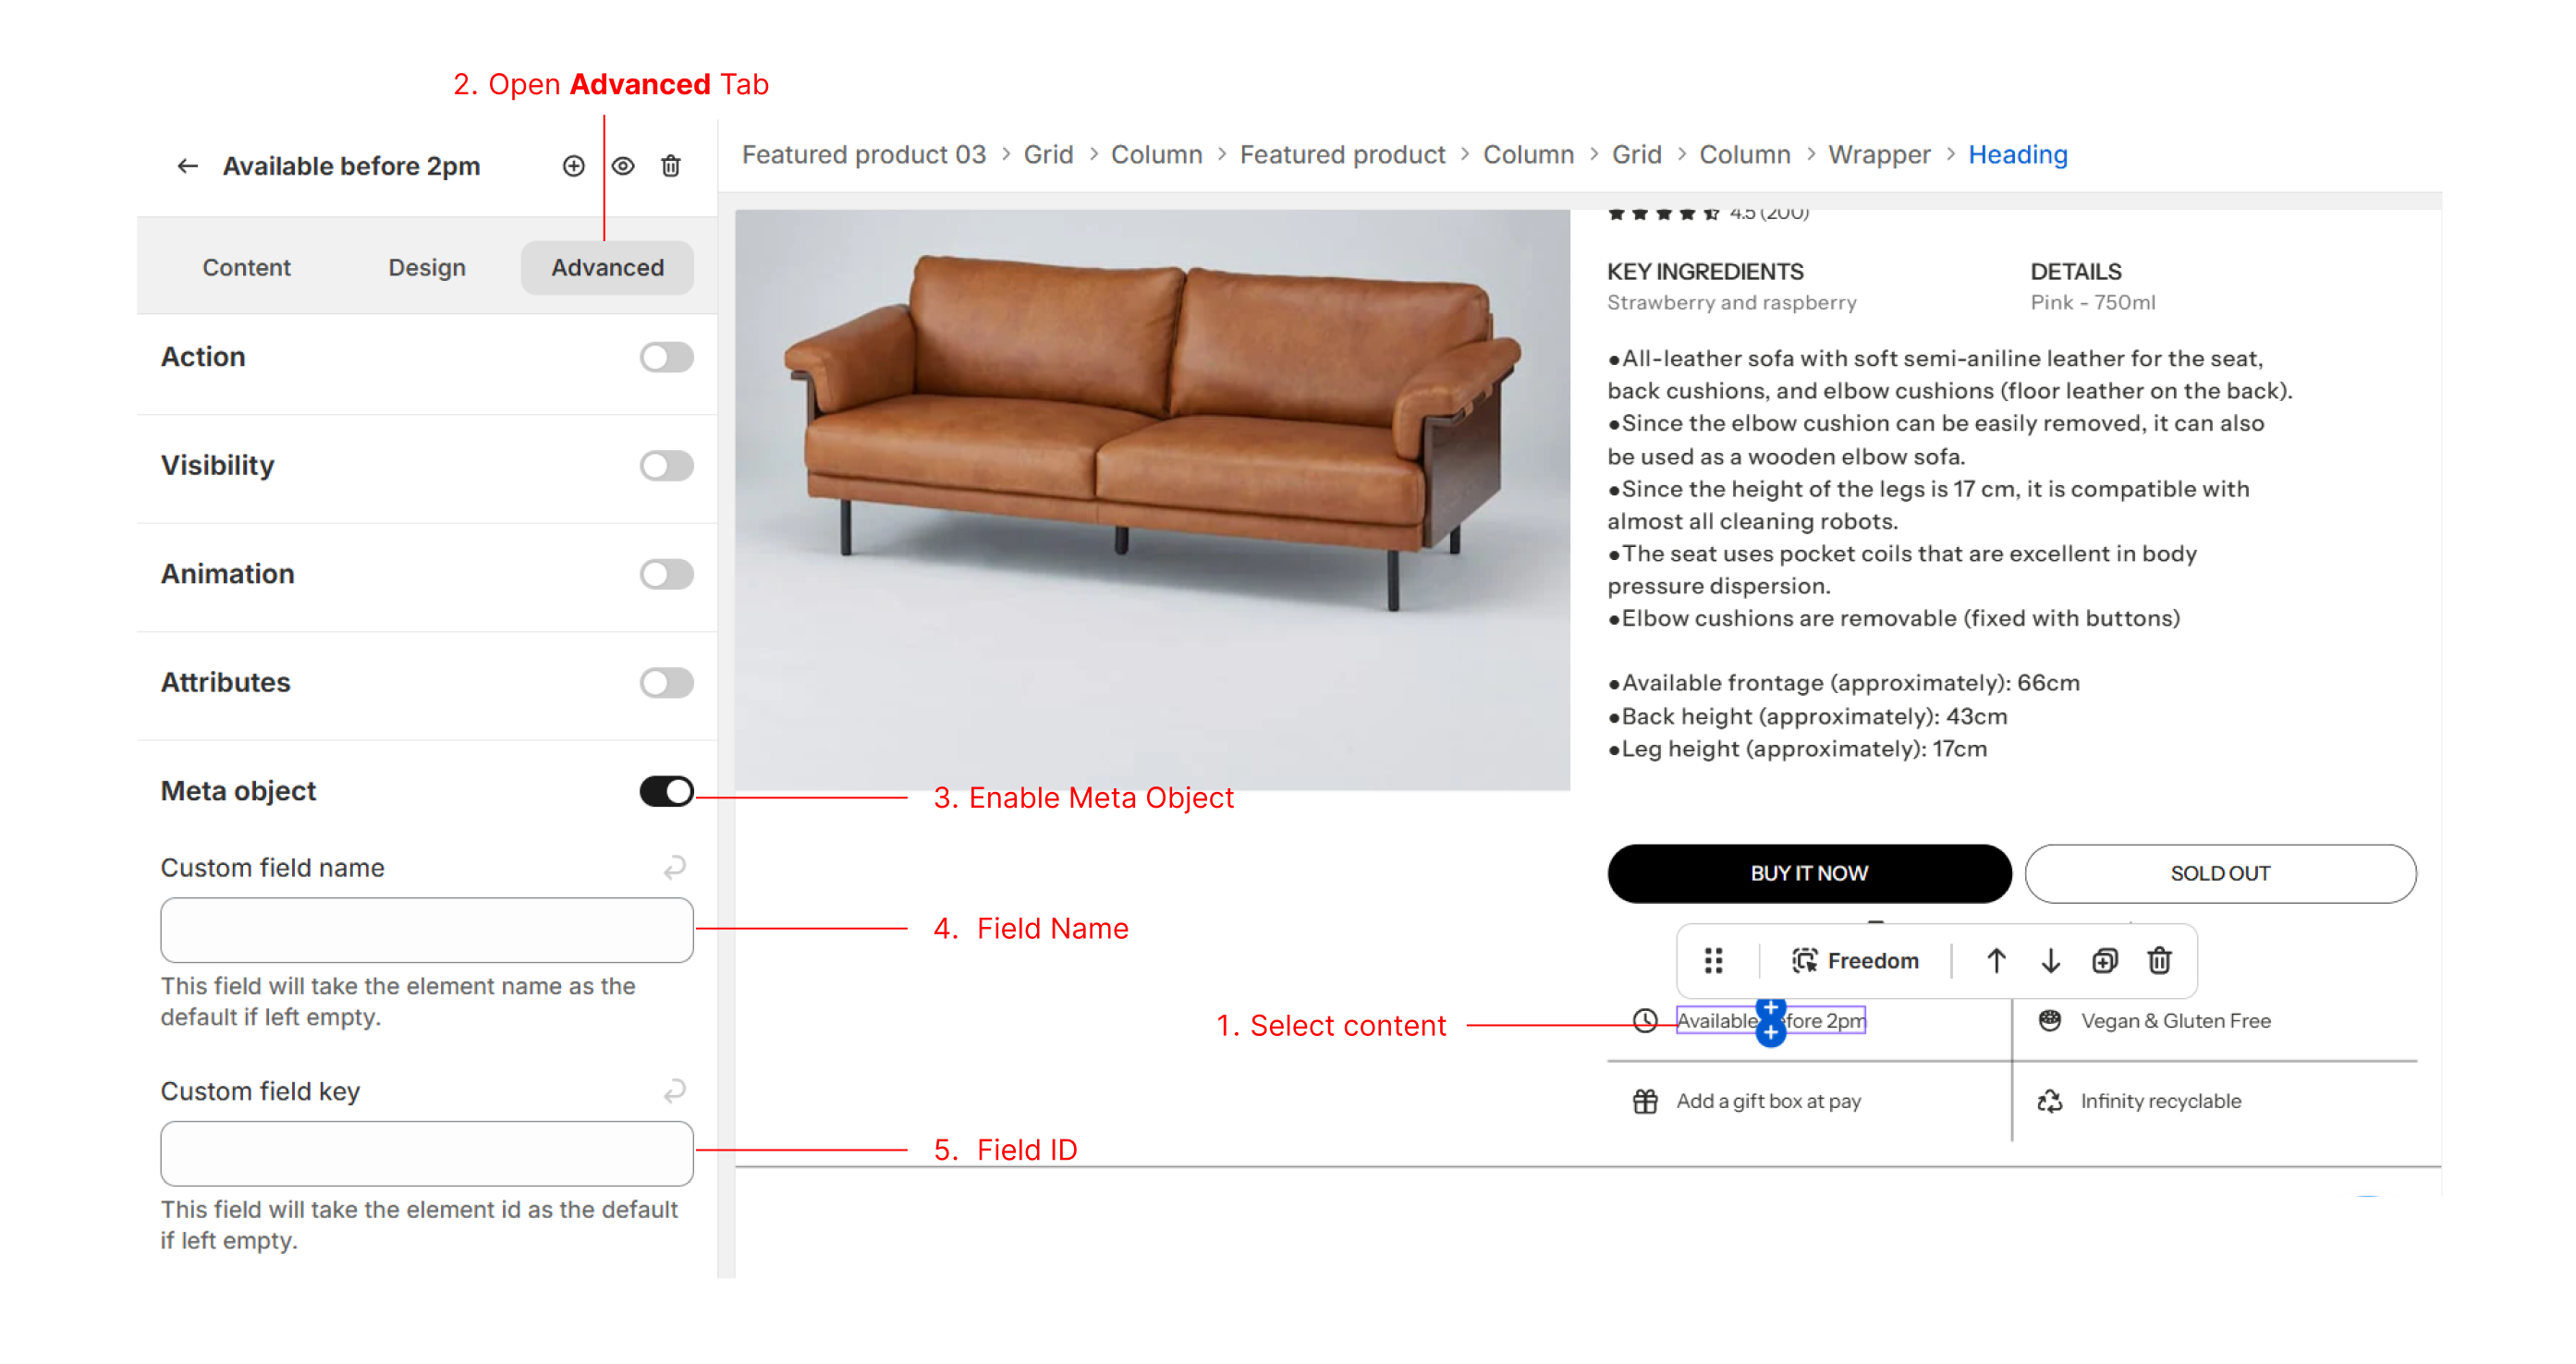
- Select a Text Element → Go to the
Advancedtab → EnableMetaobject:- Custom Field Name: Allows you to name the field for easy identification, especially when multiple elements of the same type exist. If left blank, the element name will be used (e.g., "Heading 1").
- Custom Key Name: Allows you to set an ID for the element. If left blank, a random ID will be generated.
- Other data types, such as images or videos, can also be enabled as metaobjects. These fields will be saved in the definition.
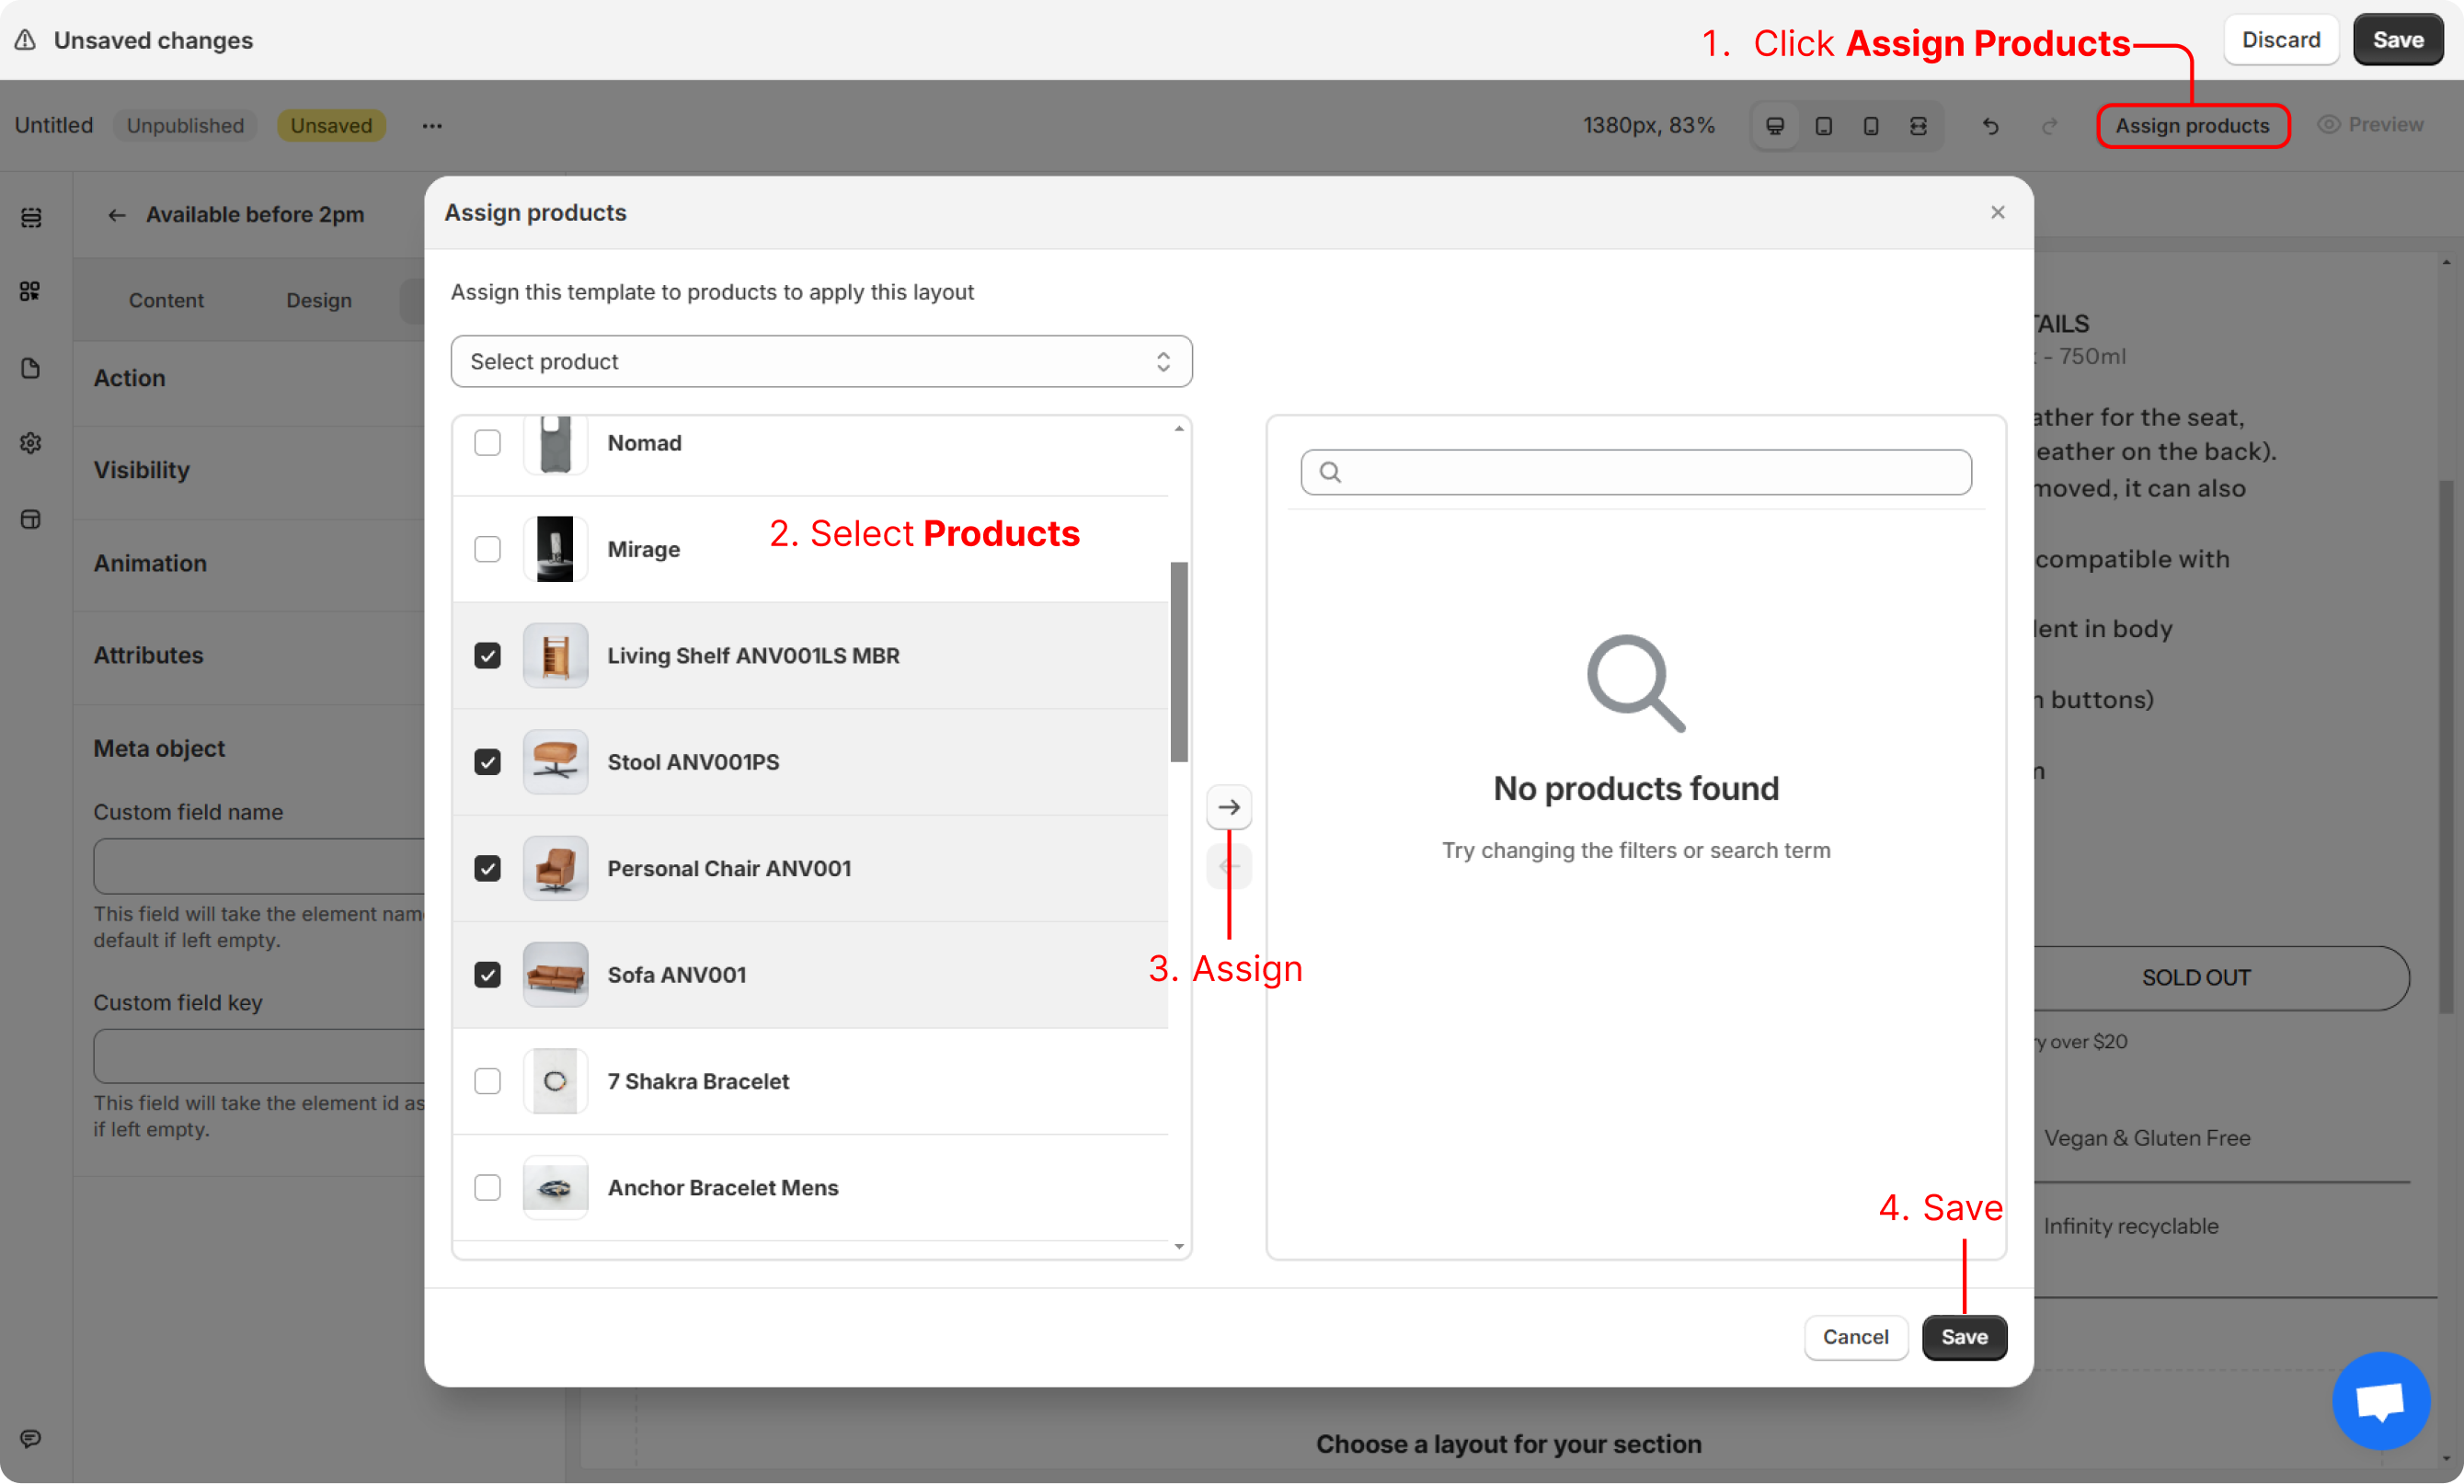
- Click Assign Products to link selected products to the current page. These products will then be connected to entries later.
- Save and publish the page to your selected theme. Publishing is required for the metaobject definition to be registered in the Shopify store.
- There are two ways to view the metaobject definition:
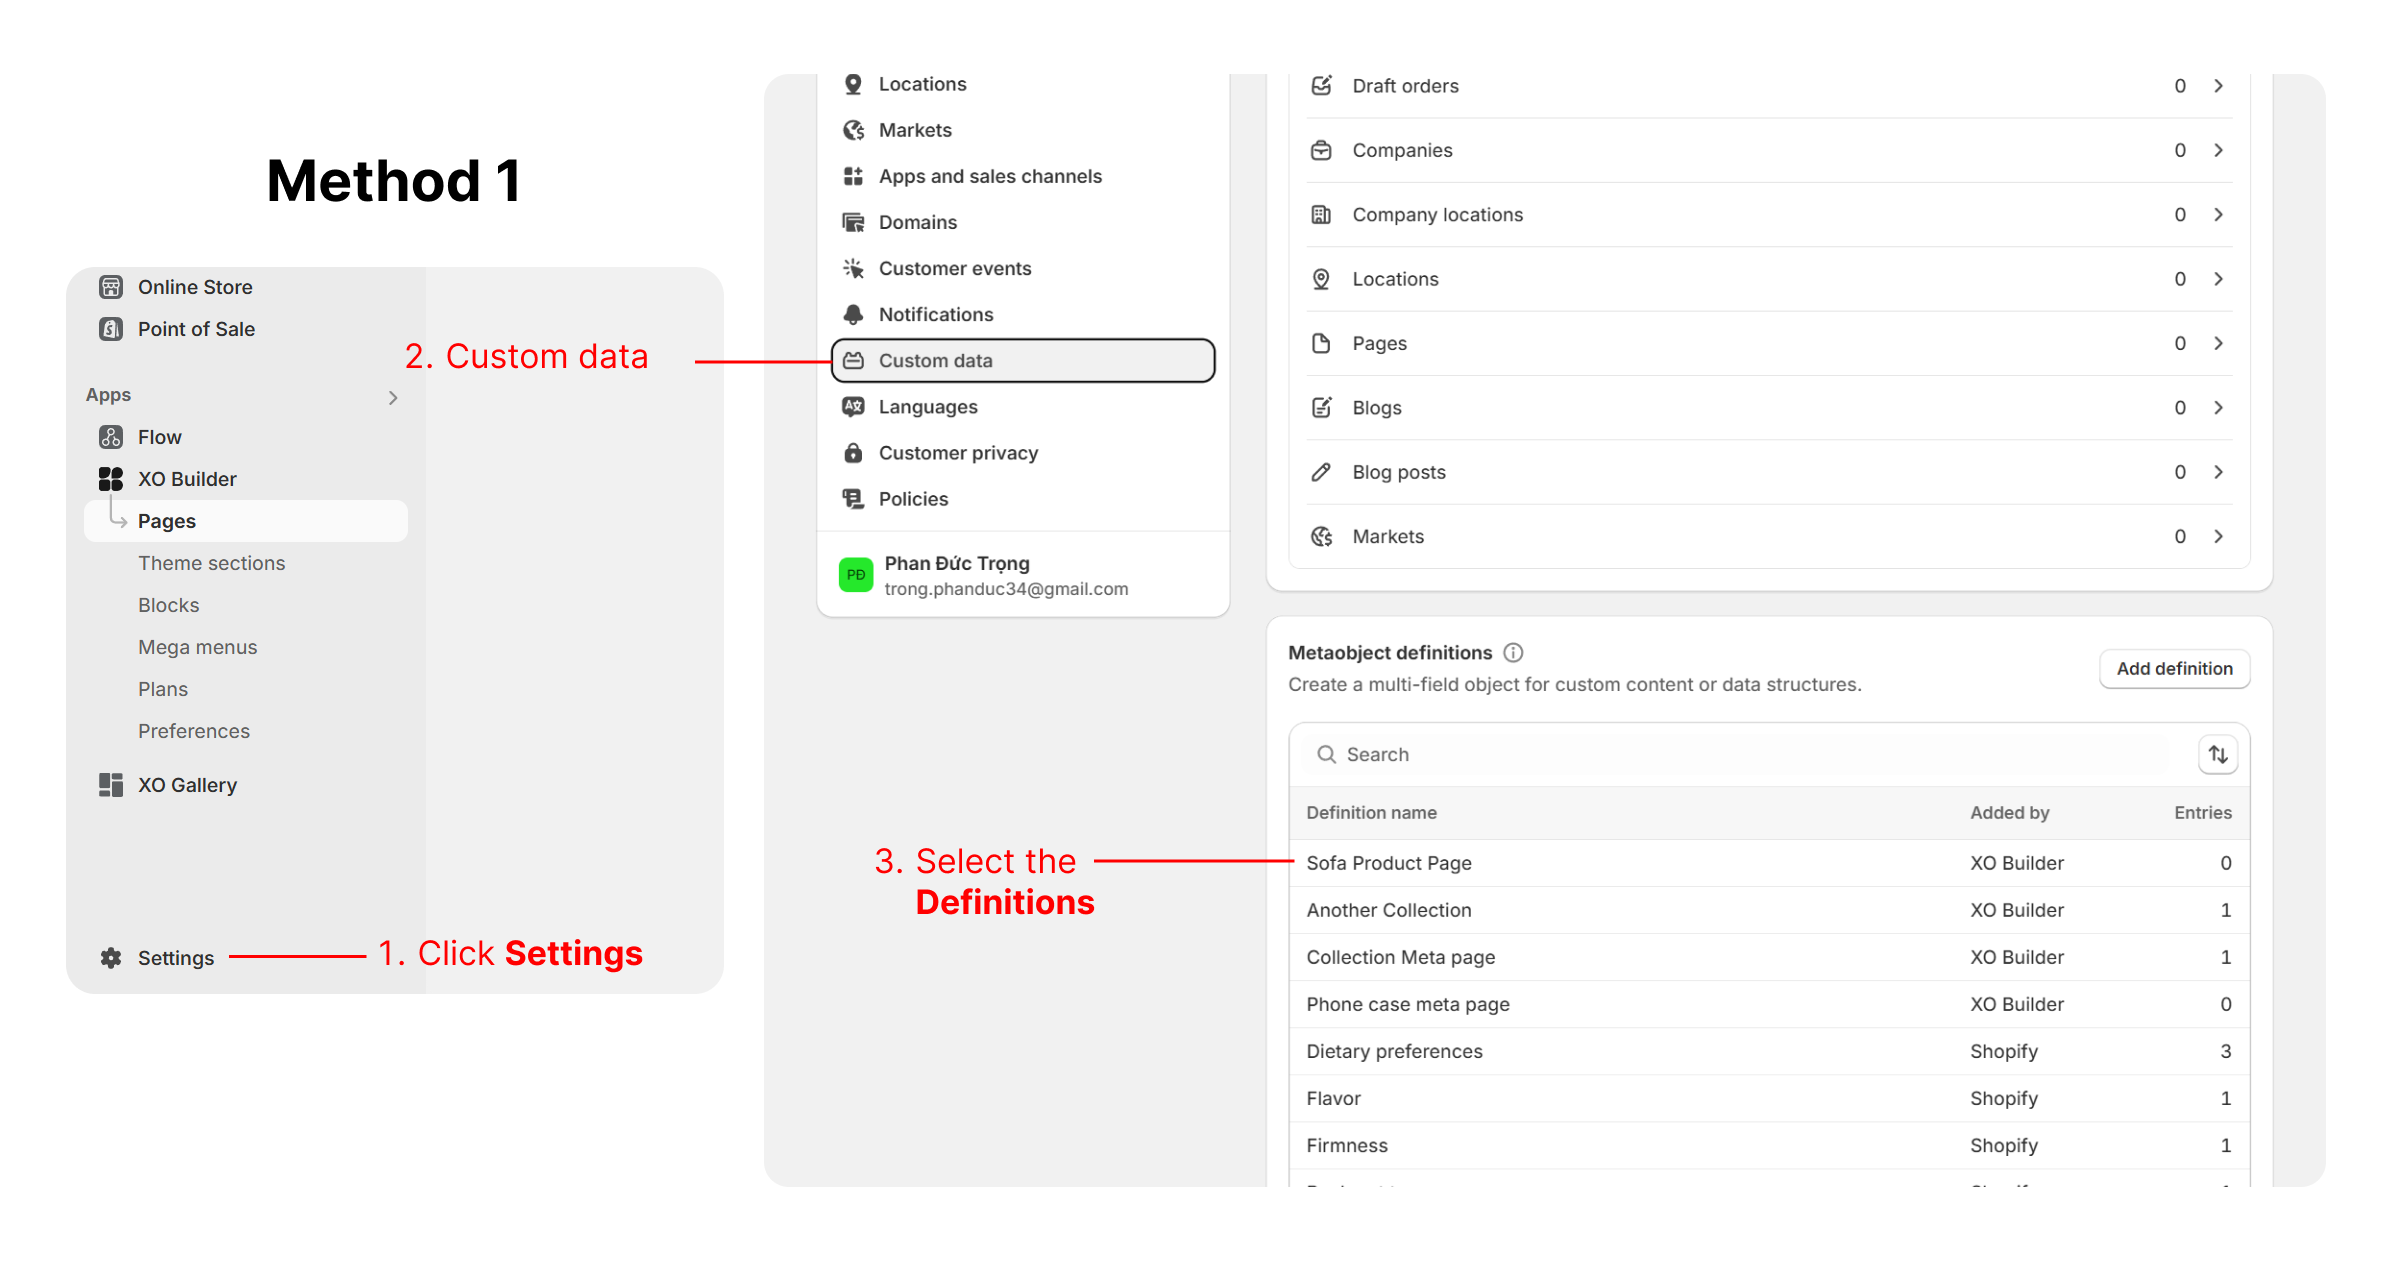
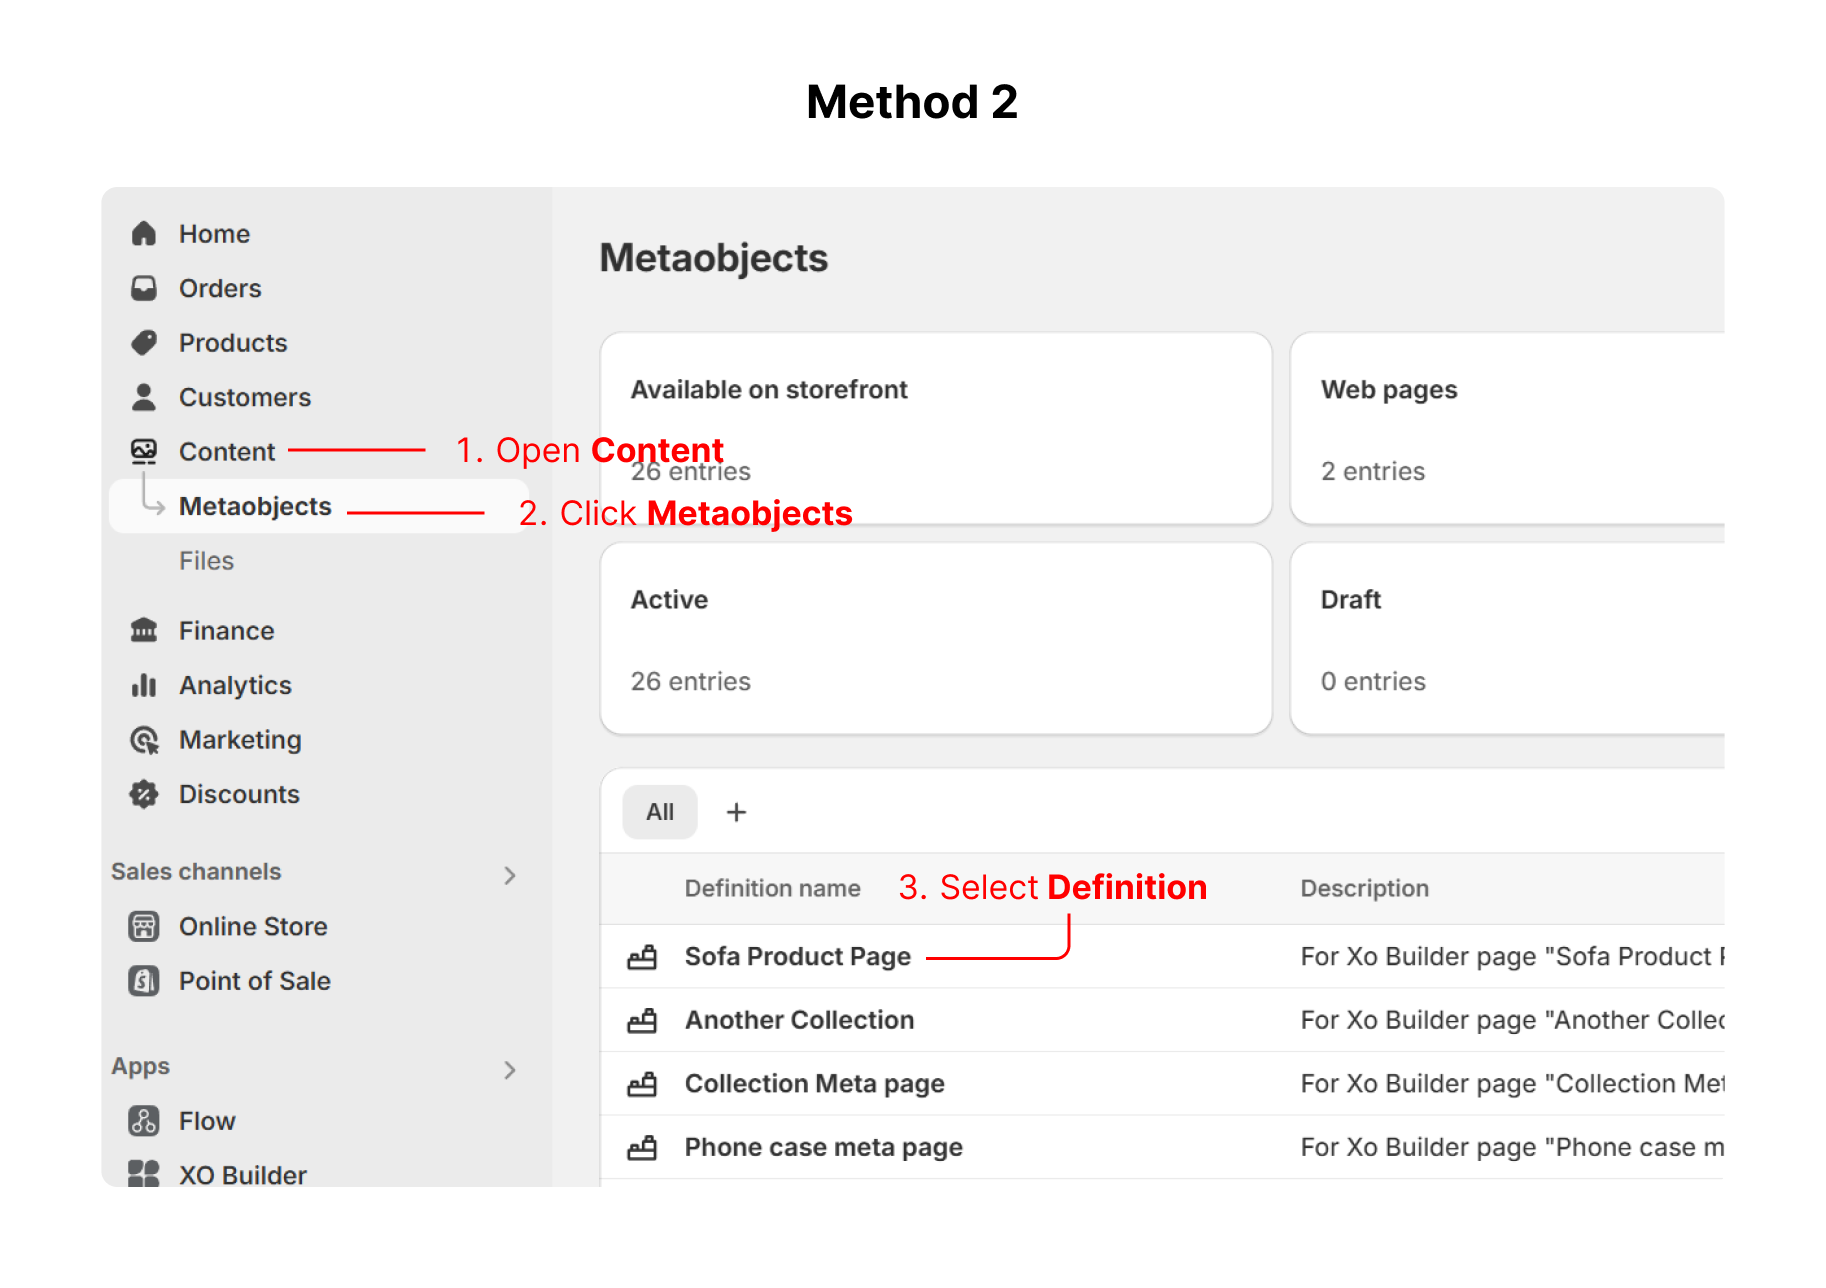
- Click Settings at the bottom-left of the Dashboard → Custom Data → Metaobject Definitions. You'll see a definition with the name matching the page you created.
- Click Contents in the left menu of the Dashboard → Metaobjects. The definition and its fields will be listed here.
Manage Definitions
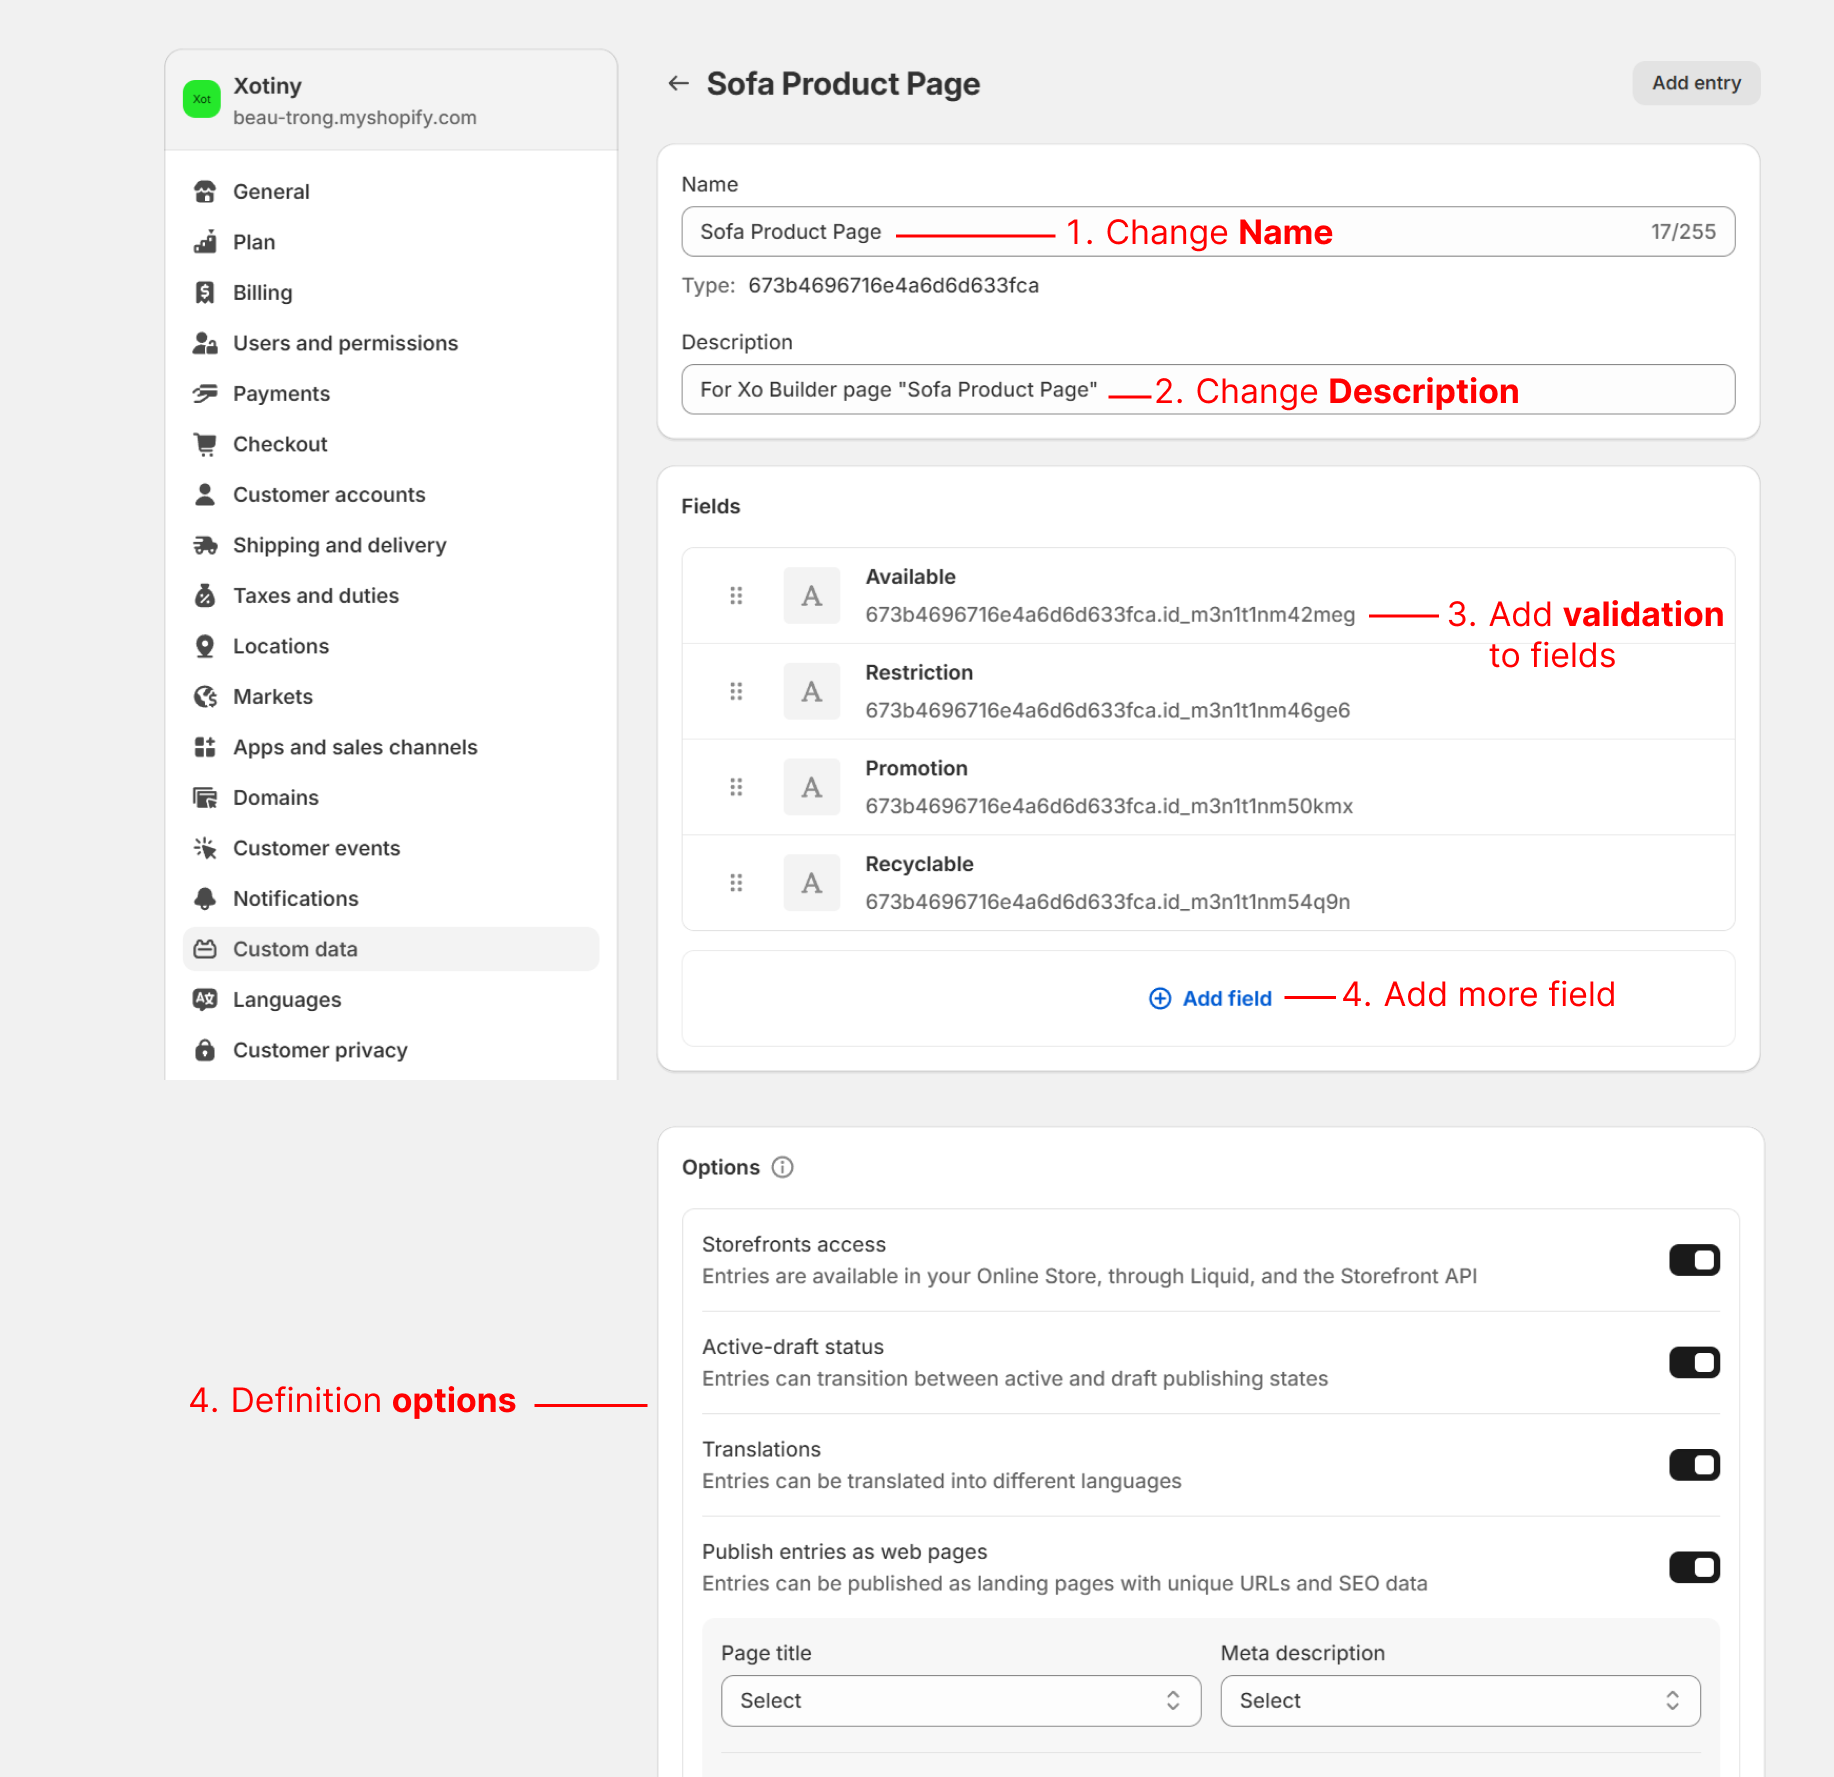
- Select the definition from method 1 or click
Manage Definitionfrom method 2. On the Manage Definition page, you can adjust the Name, Description, Field Settings, and Options. - Click on a Field. You can add validation to ensure invalid values are not accepted when creating an entry.
To learn more about Metaobject, see official Shopify documentation: https://help.shopify.com/en/manual/custom-data/metaobjects/
Add Entry
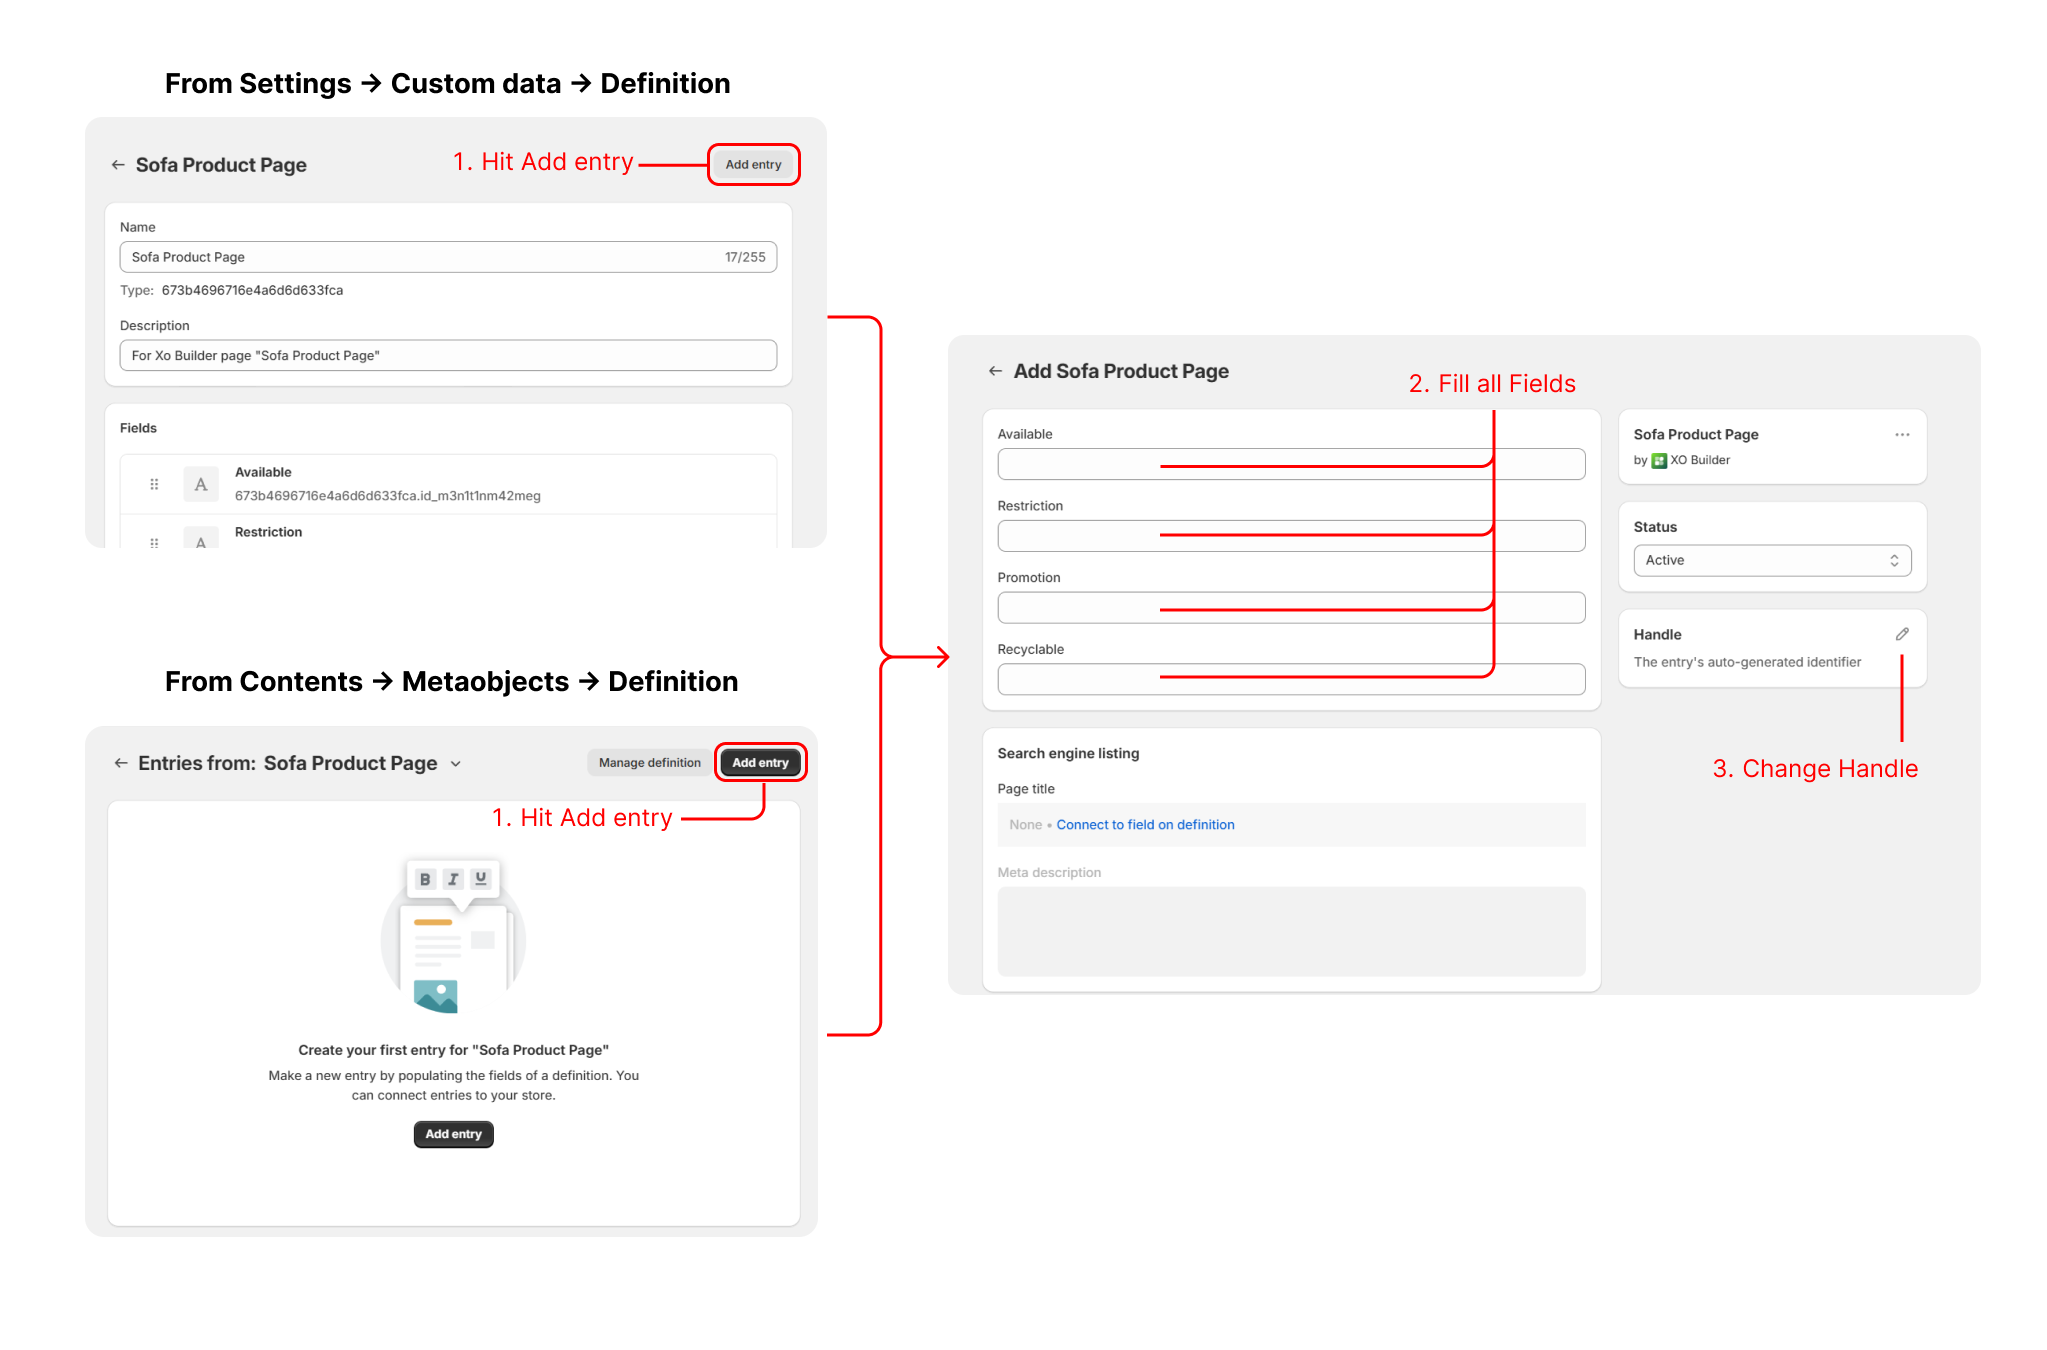
- Click Add Entry on the selected definition. You will be redirected to Dashboard → Content → Metaobjects. The entry will include all the fields you enabled earlier - fill in the values for each field.
- Edit the Handle. This is the unique ID for the entry, meaning it cannot be duplicated. You can leave it blank to auto-generate a handle, but this may make it harder to identify later.
- Click Save to save the entry. Go back to the previous page, where the list of entries for the definition will be displayed.
If you disable a metaobject for a field in the product page, the definition will lose that field, and all entries of that definition will also remove the field. If you enable the field again, the definition will treat it as a completely new field, and all entries will have that field left blank.
Connect Entry
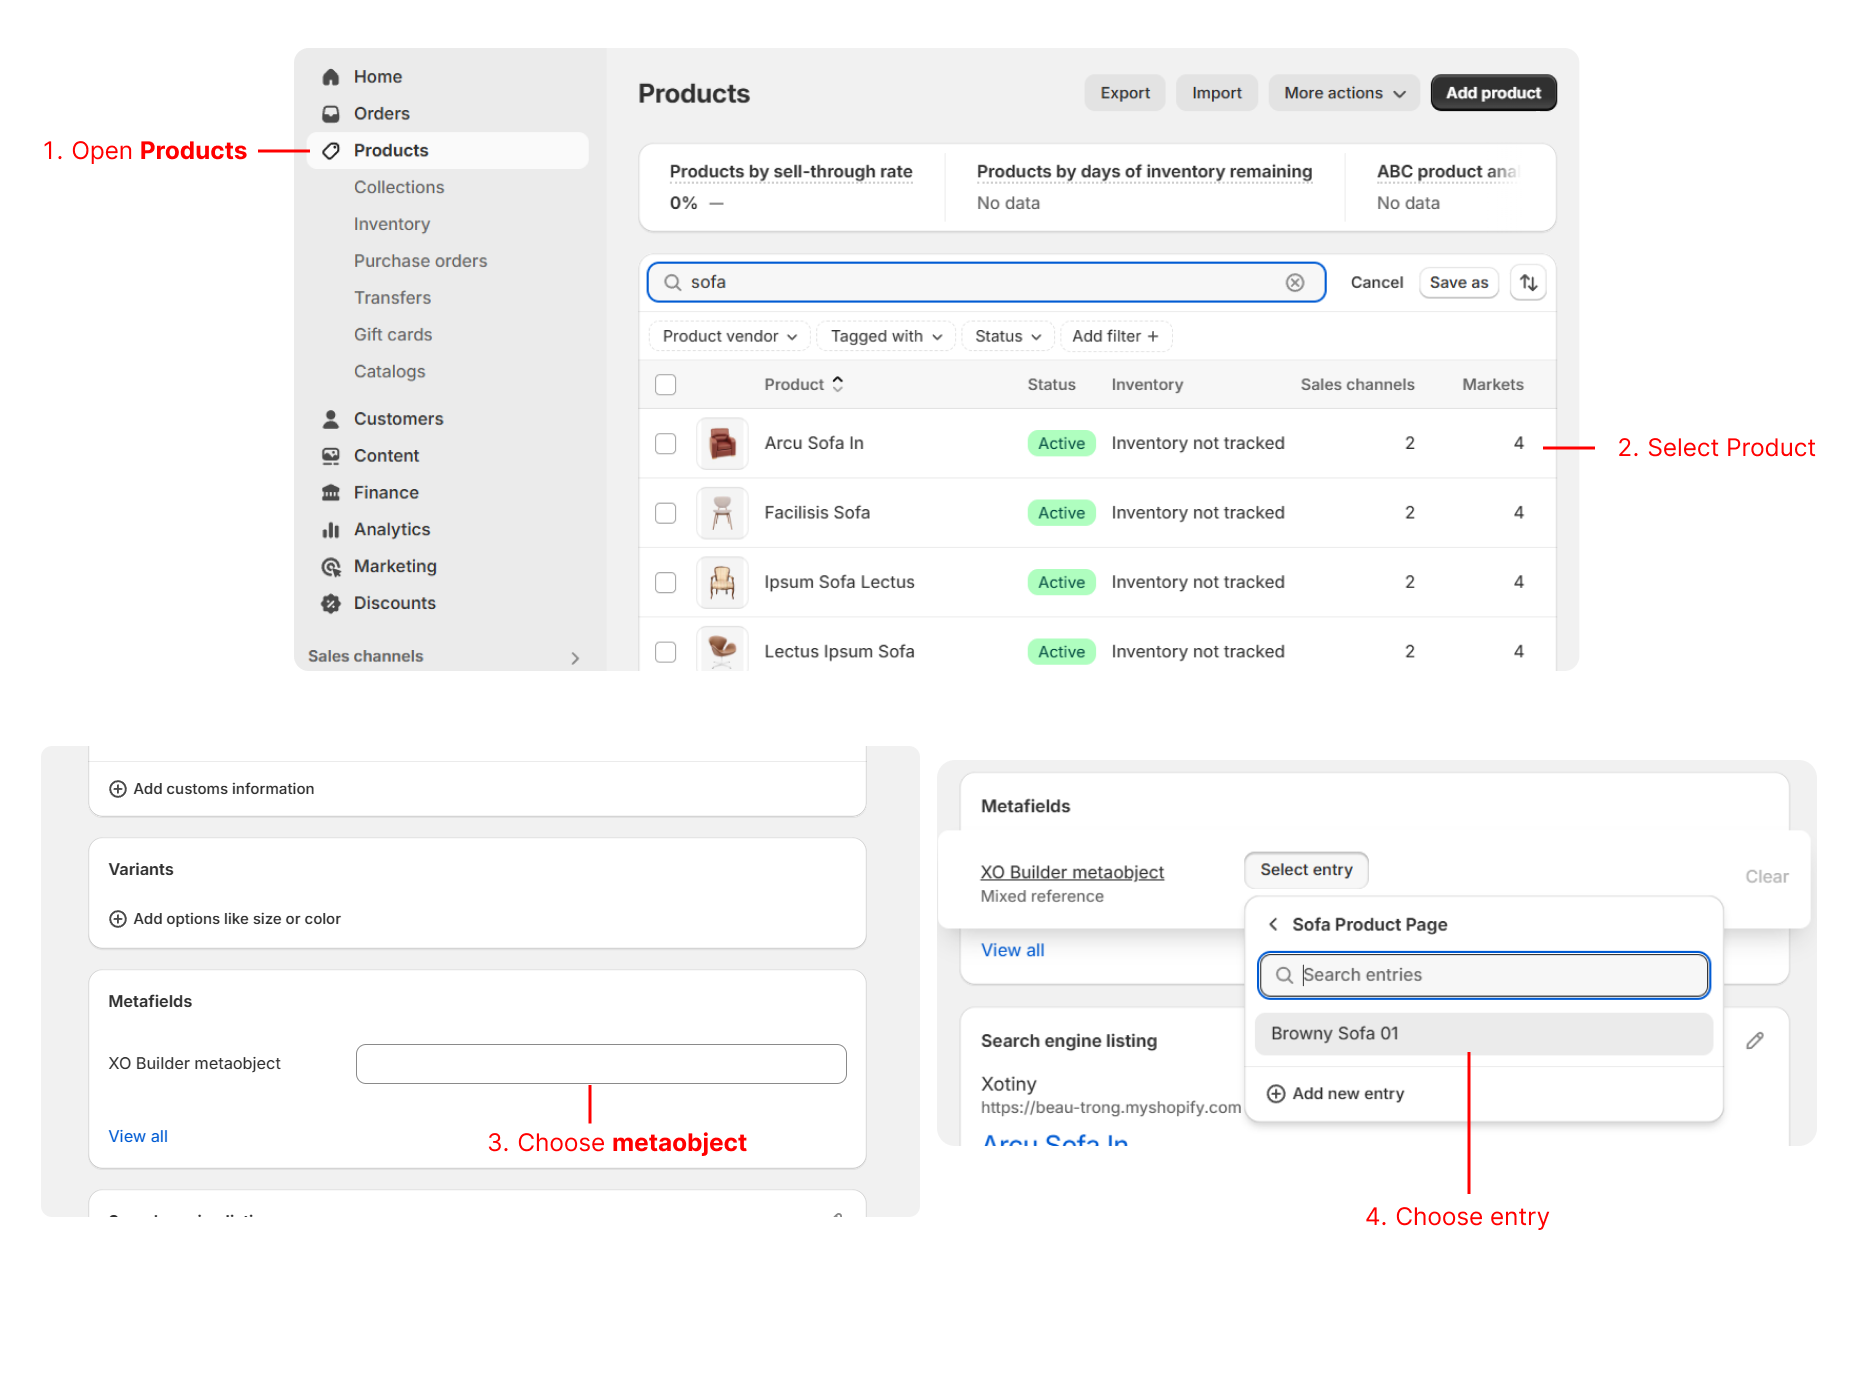
- In your Shopify admin, open a product page.
- In the Metafields section, find the custom definition you created earlier and click its name. If it's not listed, click Show All to locate it.
- Click Select Entry. In the dropdown, you'll see
XO Builder Metaobject. From here, you can select an entry from different definitions. - Repeat these steps to link entries to other products as needed.
The product connected to an entry must be assigned to a product page that references the exact definition to display the entry data.