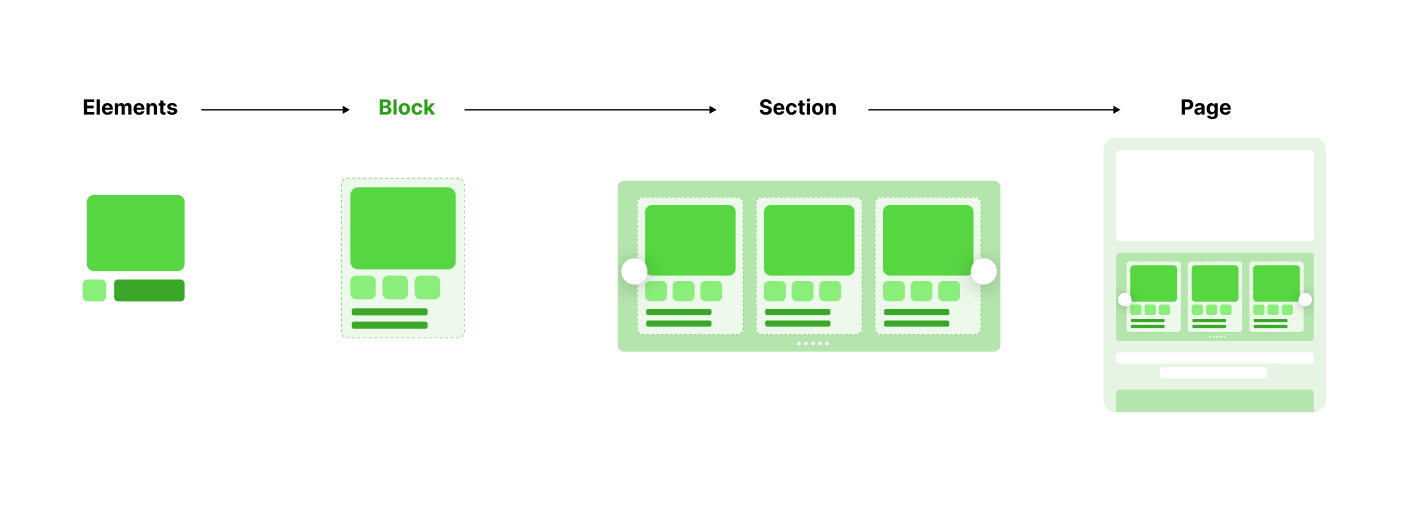
Blocks
Blocks allow you to build your own reusable components and use them when making sections or pages.
Create a block
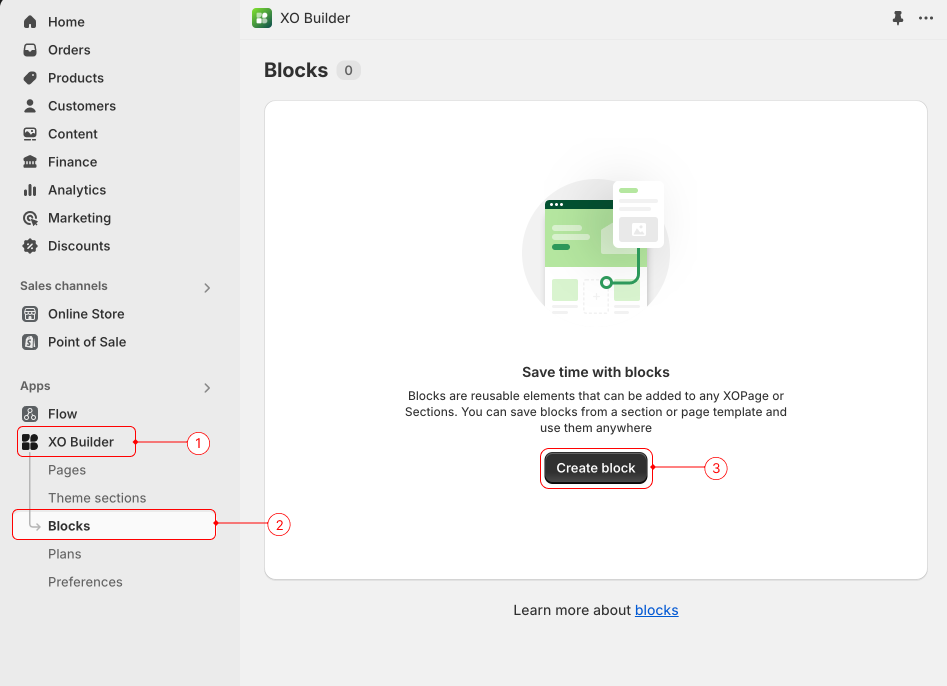
- From your Dashboard, open
XO Builder→Block→ Click theCreate Blockbutton. You will be taken to the block creation page.
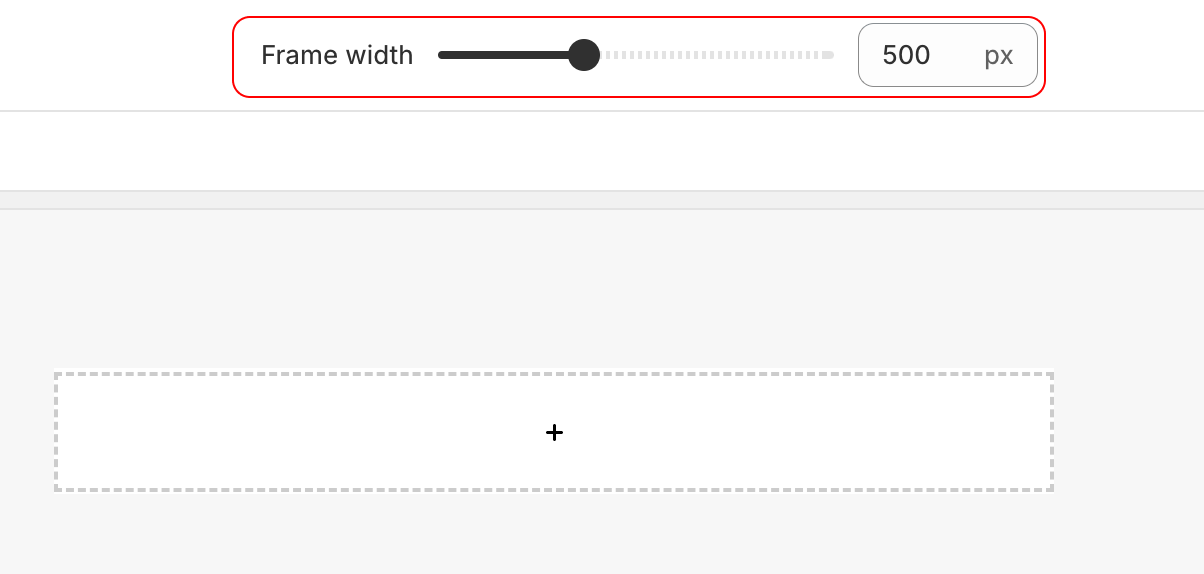
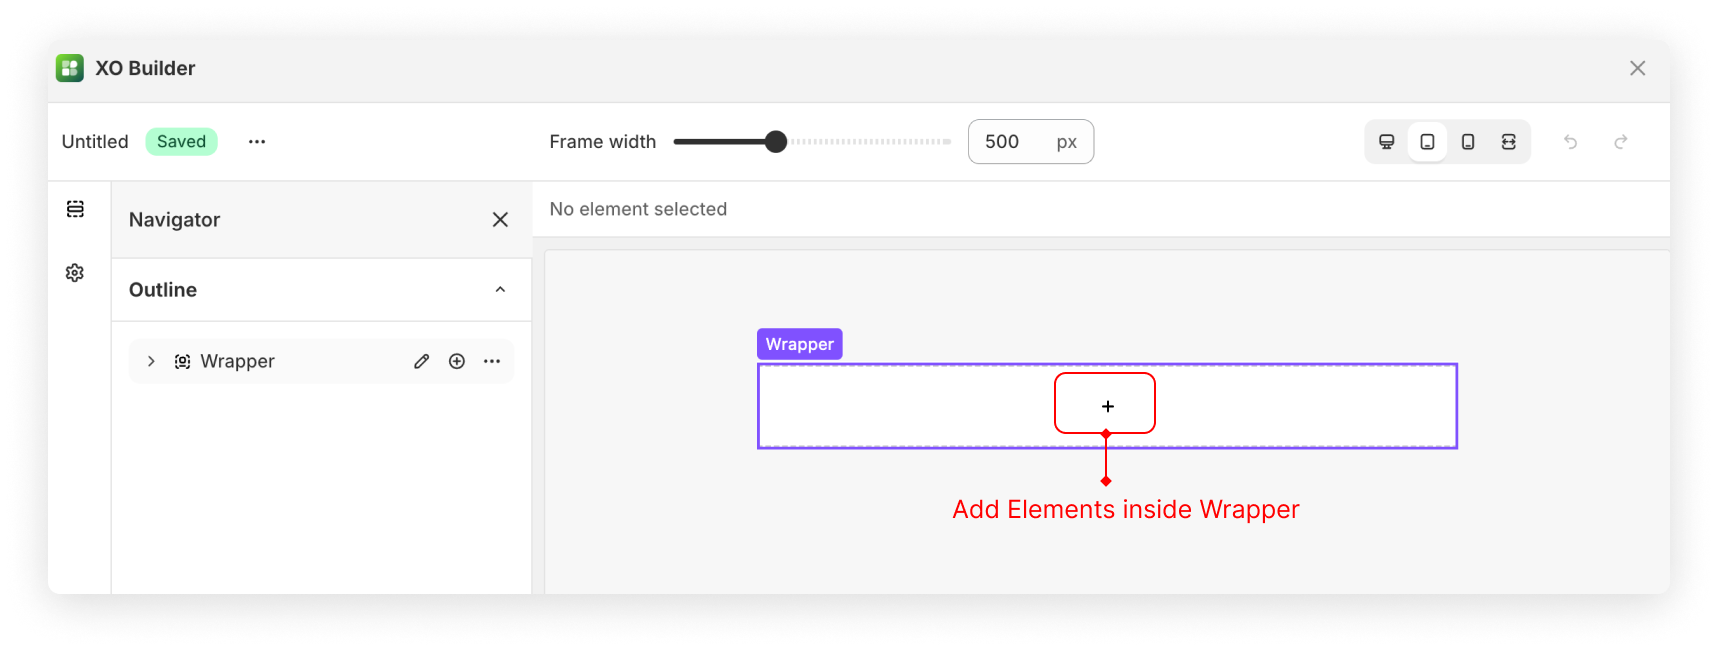
- On the block page, you’ll see a slider to adjust the frame width at the top. If you are building small blocks, such as a product card, you can drag it smaller to have proper viewport.
tip
This slider does not control the width of the block itself, but the width of the canvas/frame containing the block for editing purpose only
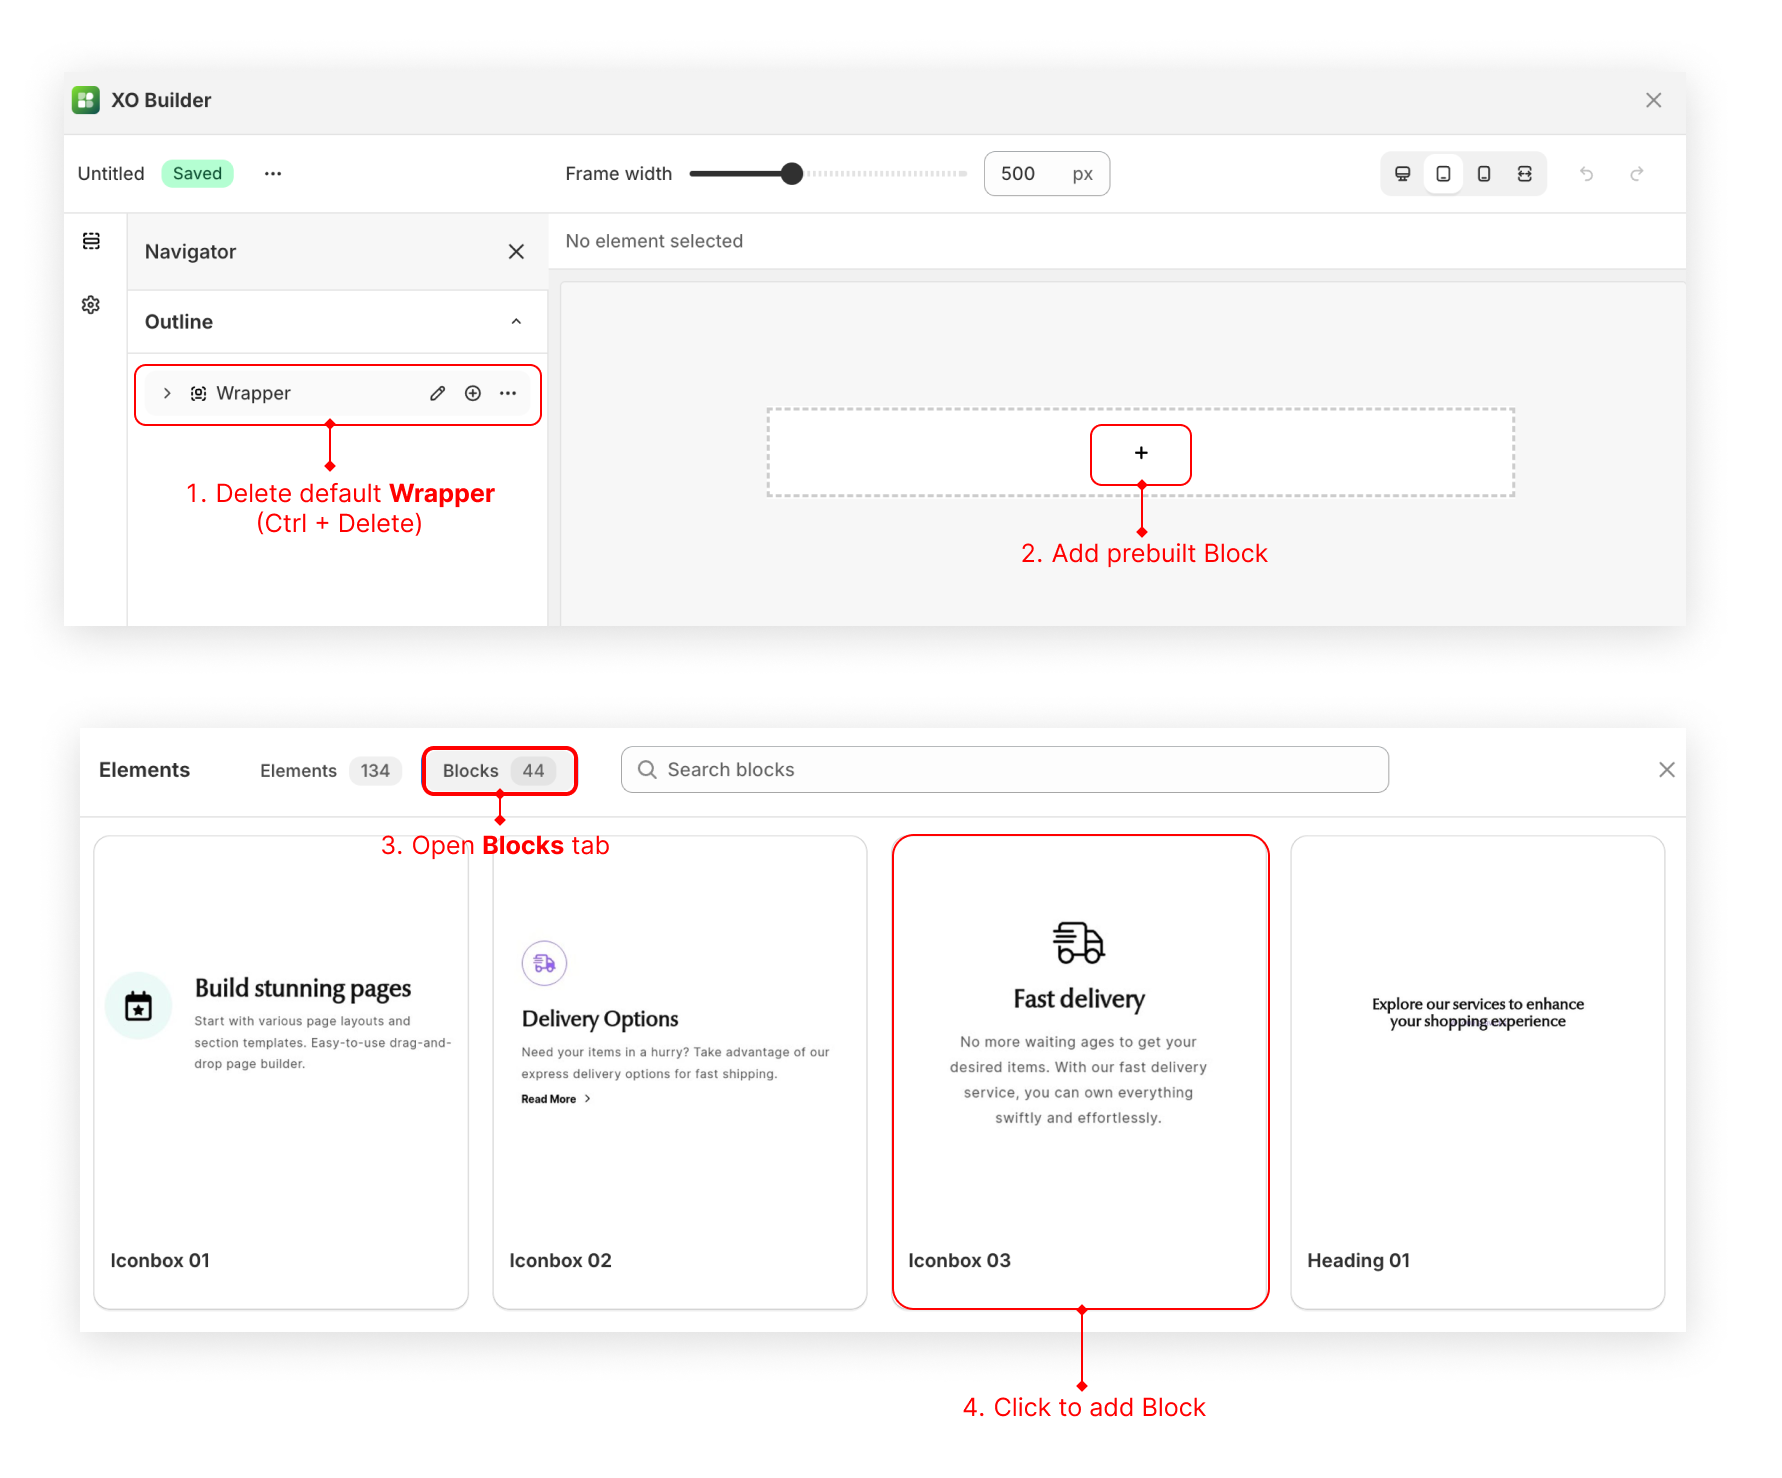
- Inside the Navigation Tab on the left, a wrapper will be added by default. If you want to build using a premade block and customize it, first delete the
Wrapper→ Click the+icon → Switch to theBlock tab→ Choose a block to add.
- On the other hand, if you want to build from scratch, it’s a good practice to build everything inside this wrapper to keep the structure tidy and easily adjust the block's max-width using the wrapper. Click the
+icon and start building using the element library.
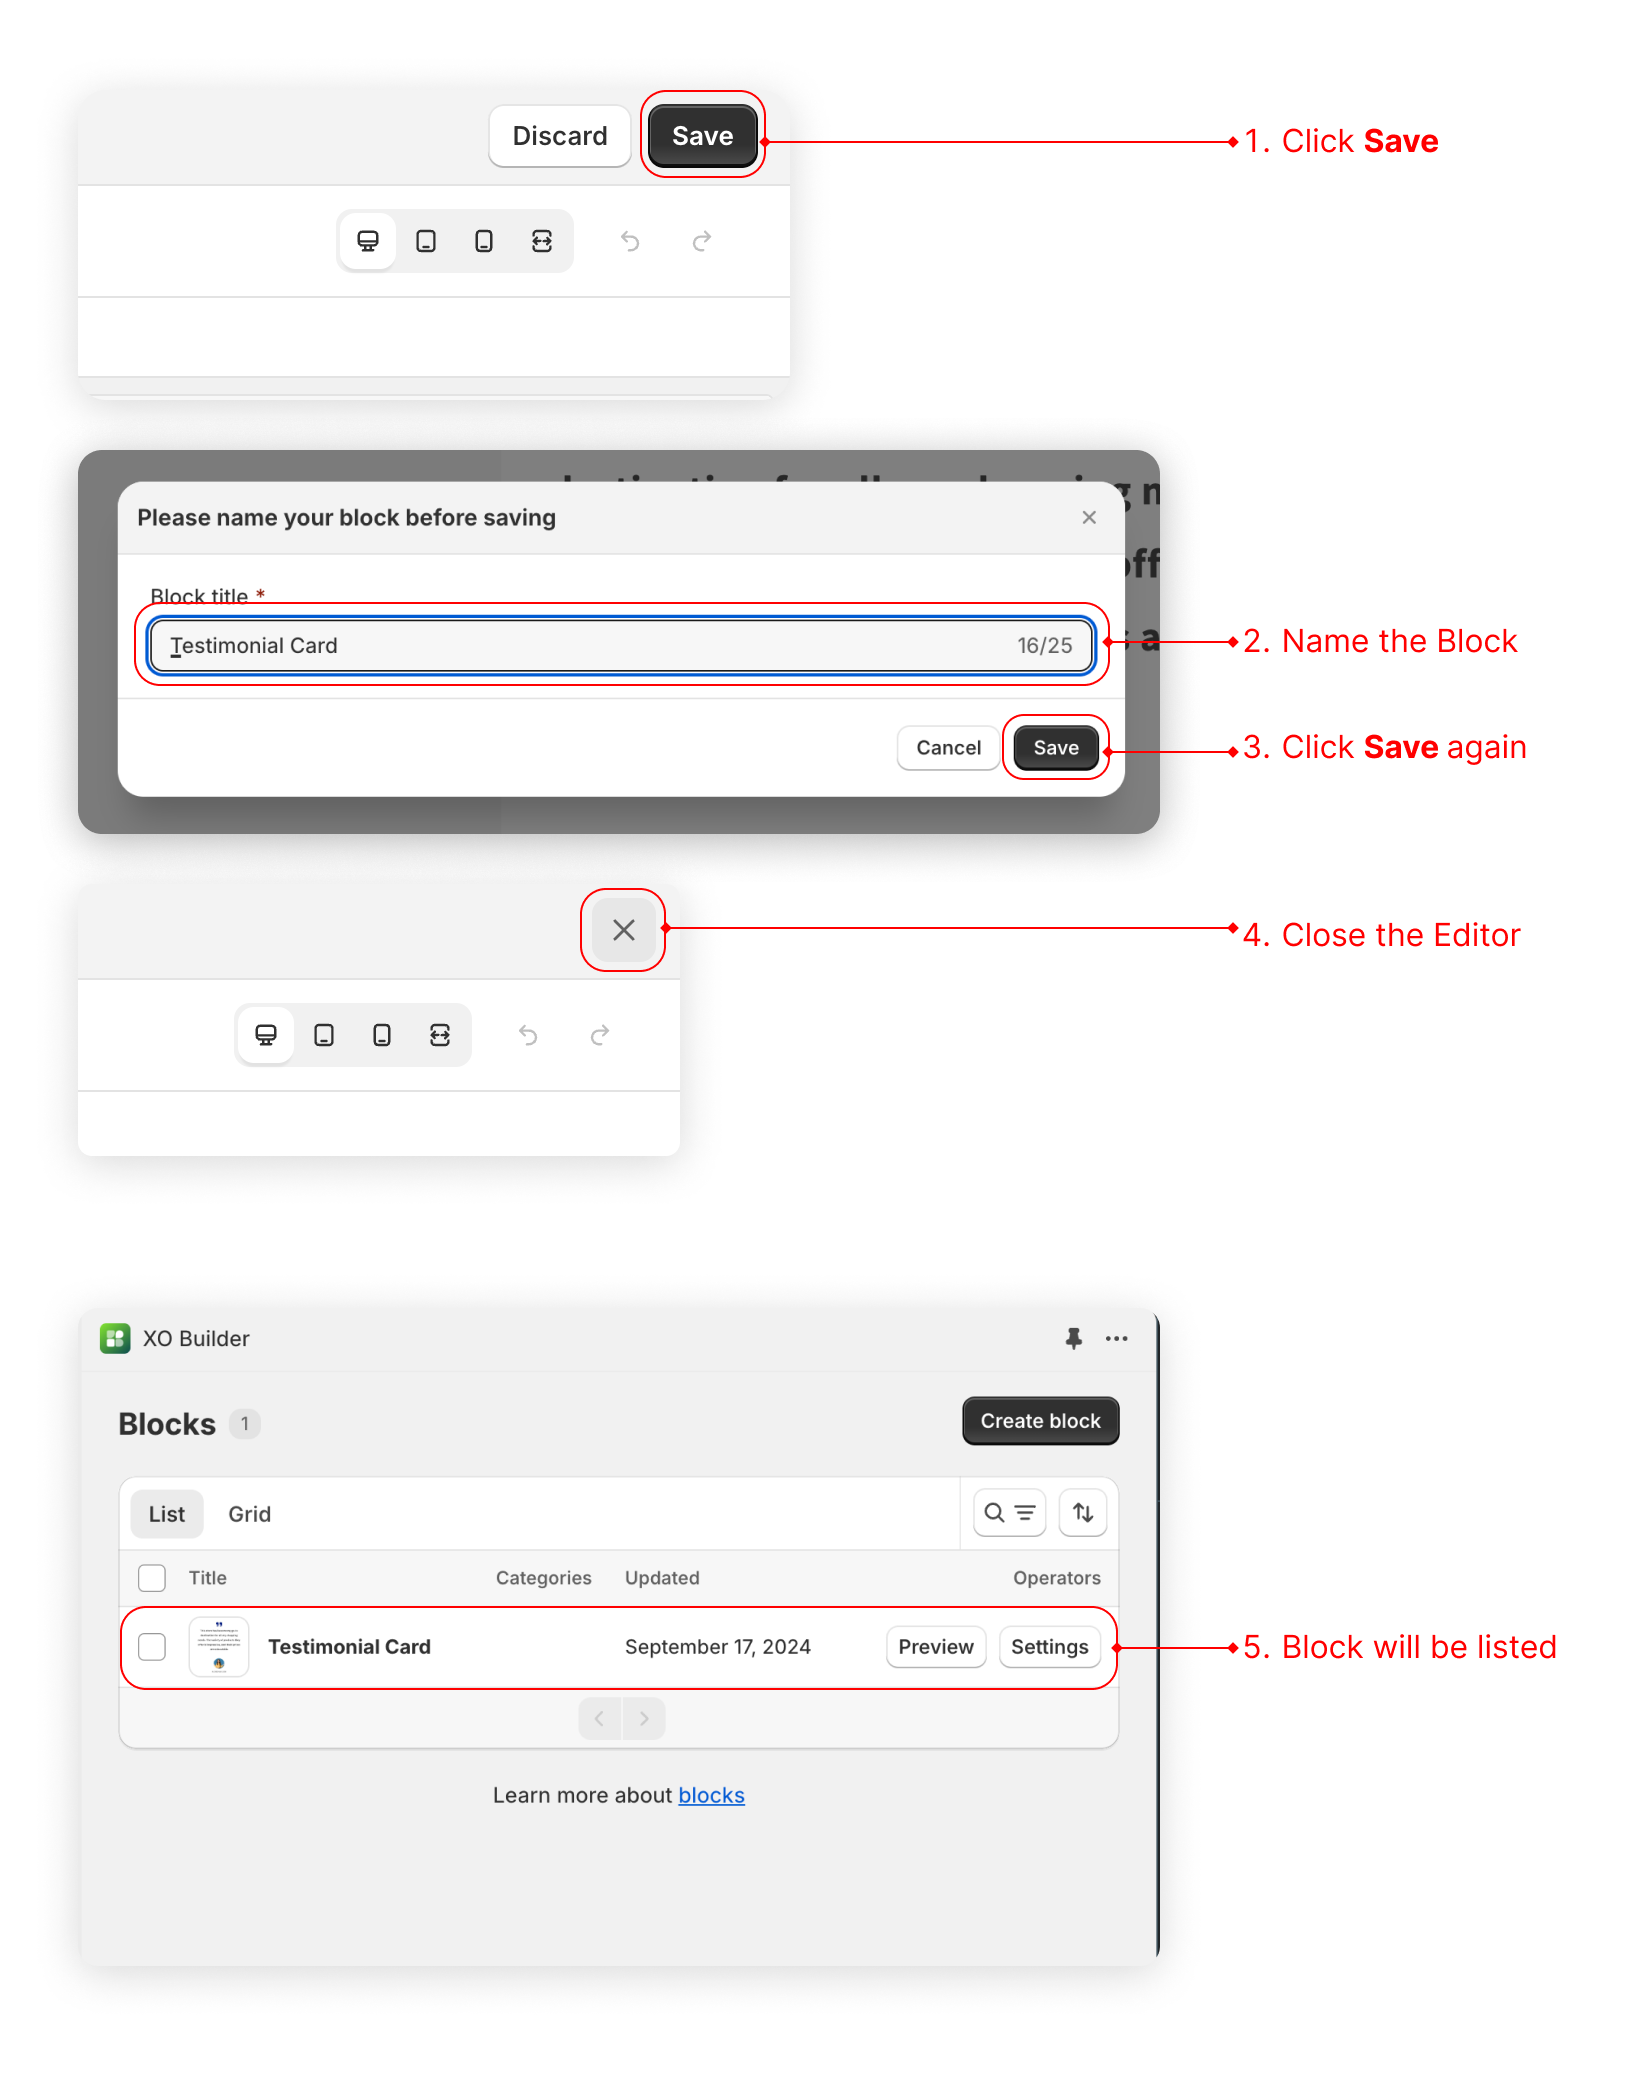
- When you are done editing, hit
Saveon the top left corner → Name the block → Click thexagain to close the Block Editing page. You will see the block listed in a list view.
tip
Saved blocks can only be used to create XO Builder’s Pages and Sections. You cannot export blocks to use in a Shopify theme.
Save Blocks from Page/Section
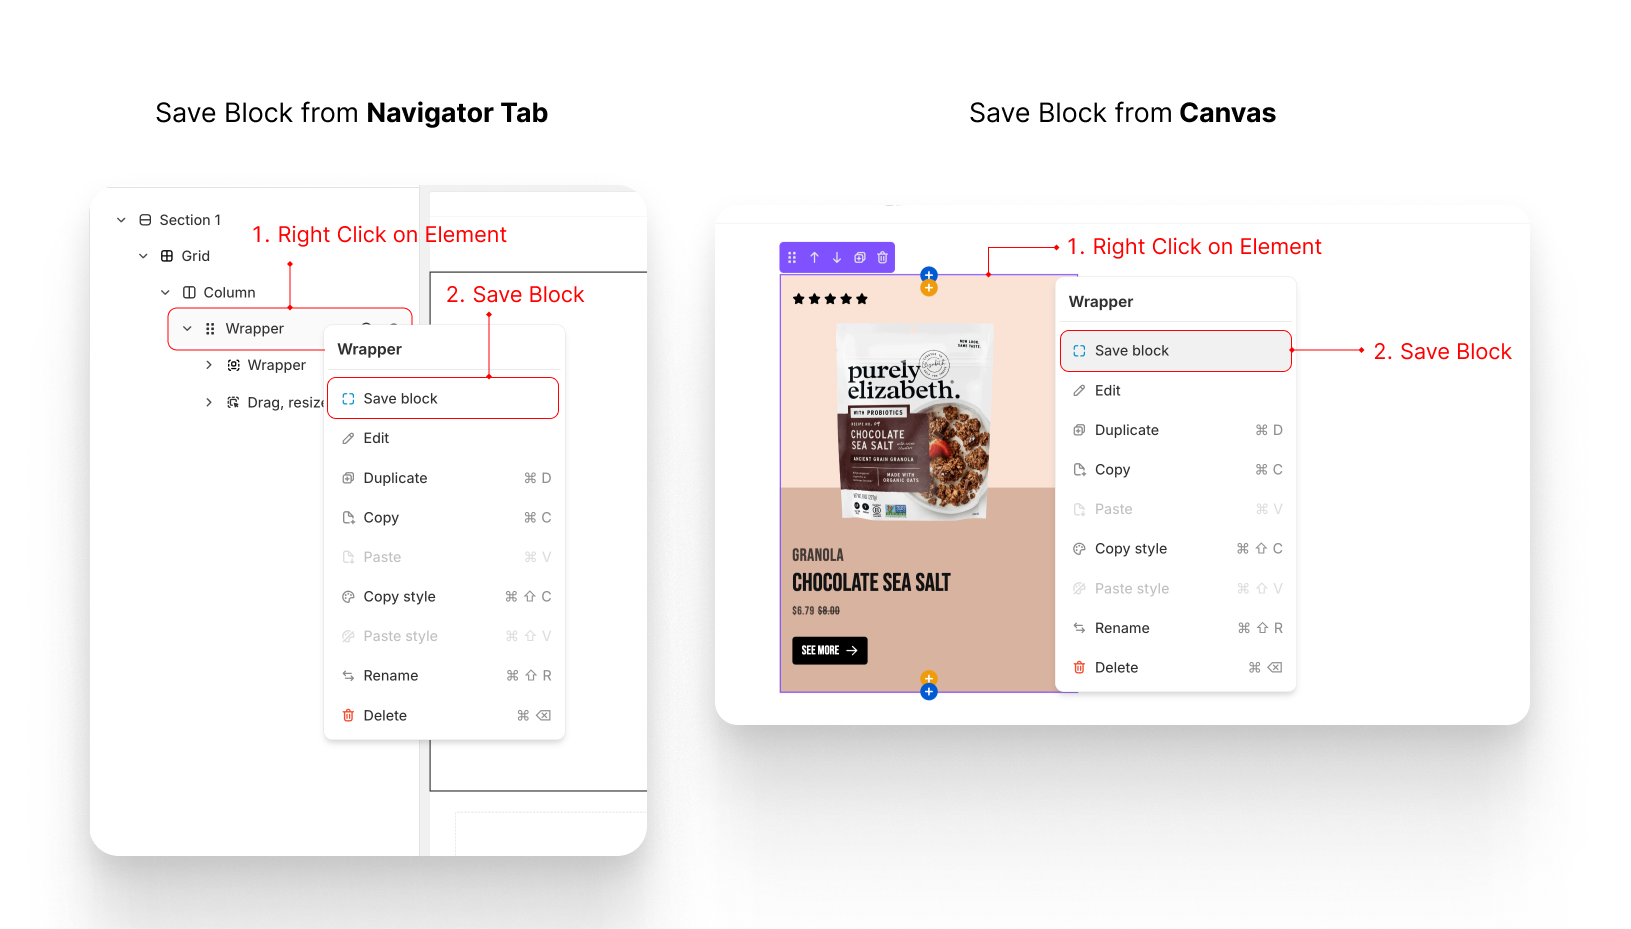
You can save any component as a block directly in the Page Editor or Section Editor by right-clicking and selecting Save Block. This is very convenient when you're building a page or section, allowing you to save a block for reuse in multiple places without leaving the interface.
Use Blocks
- Inside
Page/Section Editor - Click
+to add new Element - Open
BlocksTab - Click on any Block to add to page
Manage Blocks
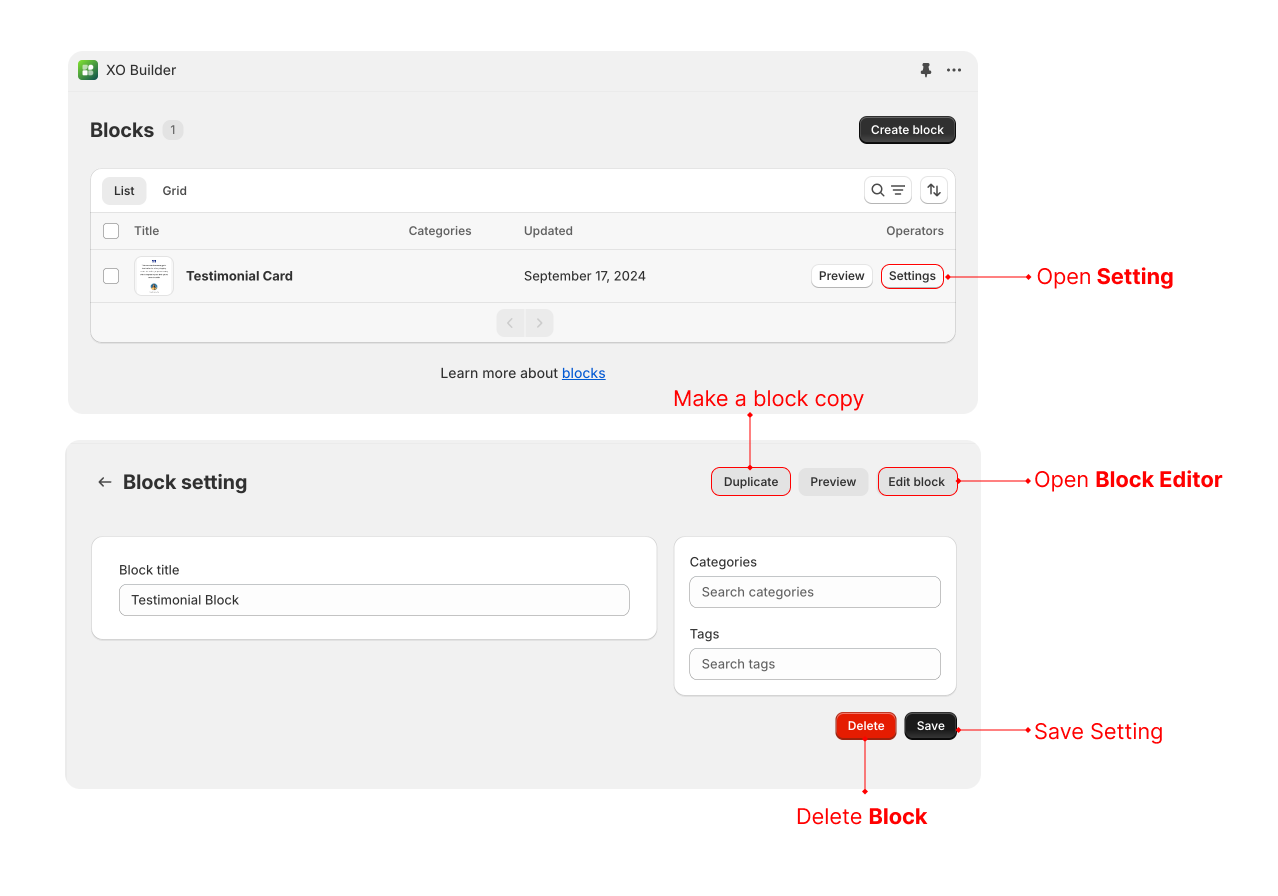
- From the
Blockslisting page, clickSettingon a block - Change
Name,Categories,Tagsand hitSave - Click
Edit Blockto open Block Editor - Click
Duplicateto make a copy of a Block - Click
Deleteto remove a Block