Mega Menu
Menga Menu allows you to create a header or drawer containing links to important pages or a dropdown menu with multiple links inside. This feature enables you to replace the default navigation of your theme with a custom-built one tailored to your needs.
Understand concept
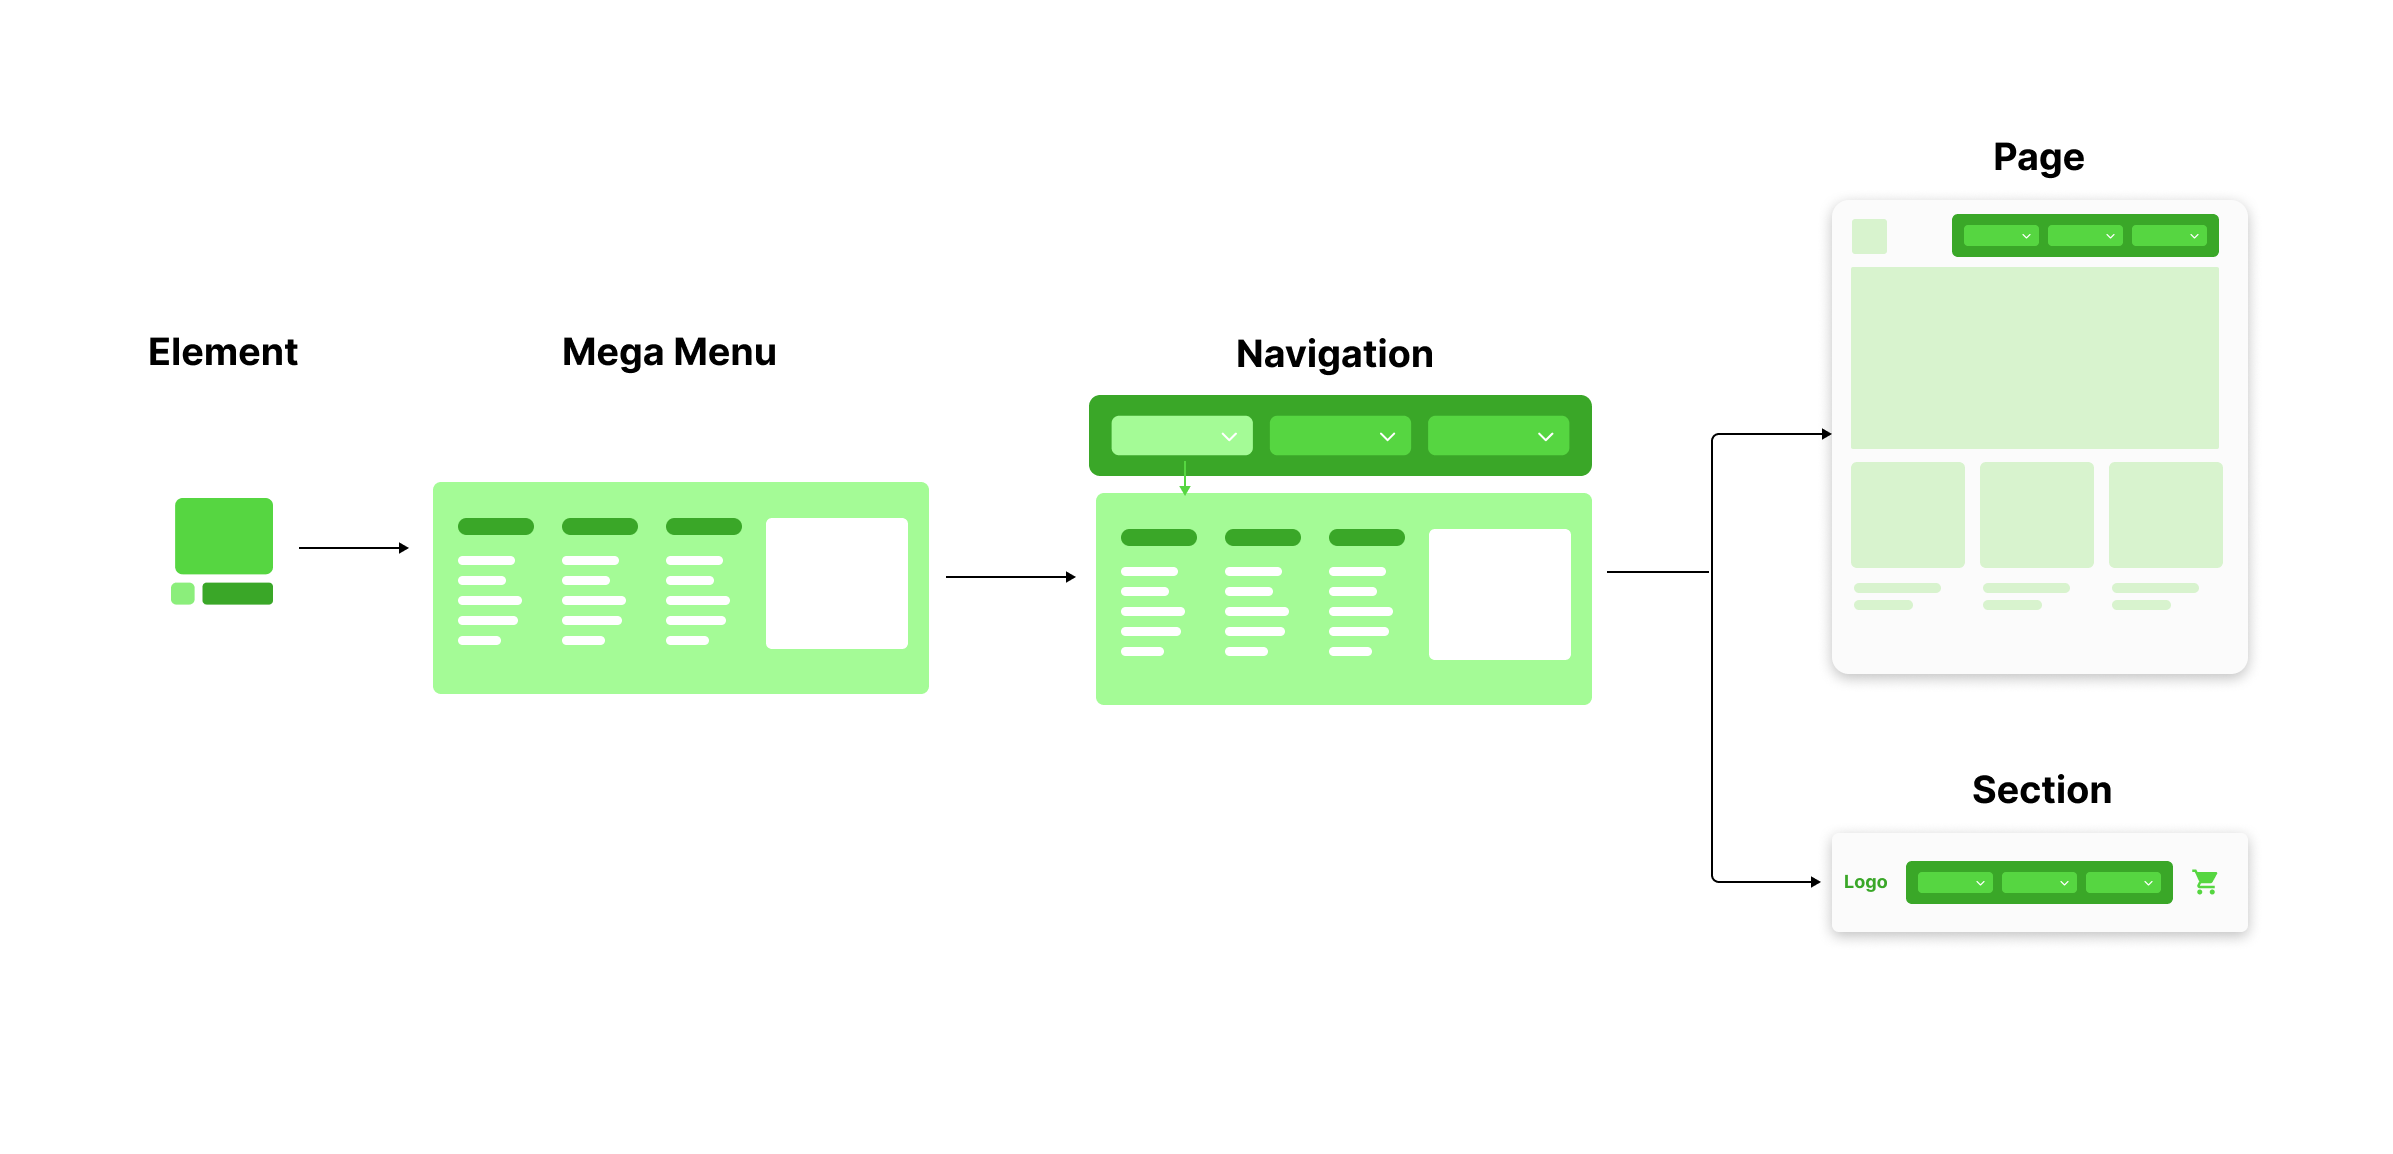
Mega Menu functions like a section that contains many elements inside. You can add multiple text elements, each with an action that links to various pages.
A saved Mega Menu can be added to navigation, but you cannot edit the Mega Menu directly within the navigation element. You can only add previously created Mega Menus.
The Navigation element itself cannot be used directly in a Shopify store. You need to create a section or page, and add your navigation element there. Publish that section/page, and then use it within your Online Store. Any changes made to the Mega Menu will automatically update in the Navigation and continue to reflect in the section or page that uses that navigation.
Create Mega Menu
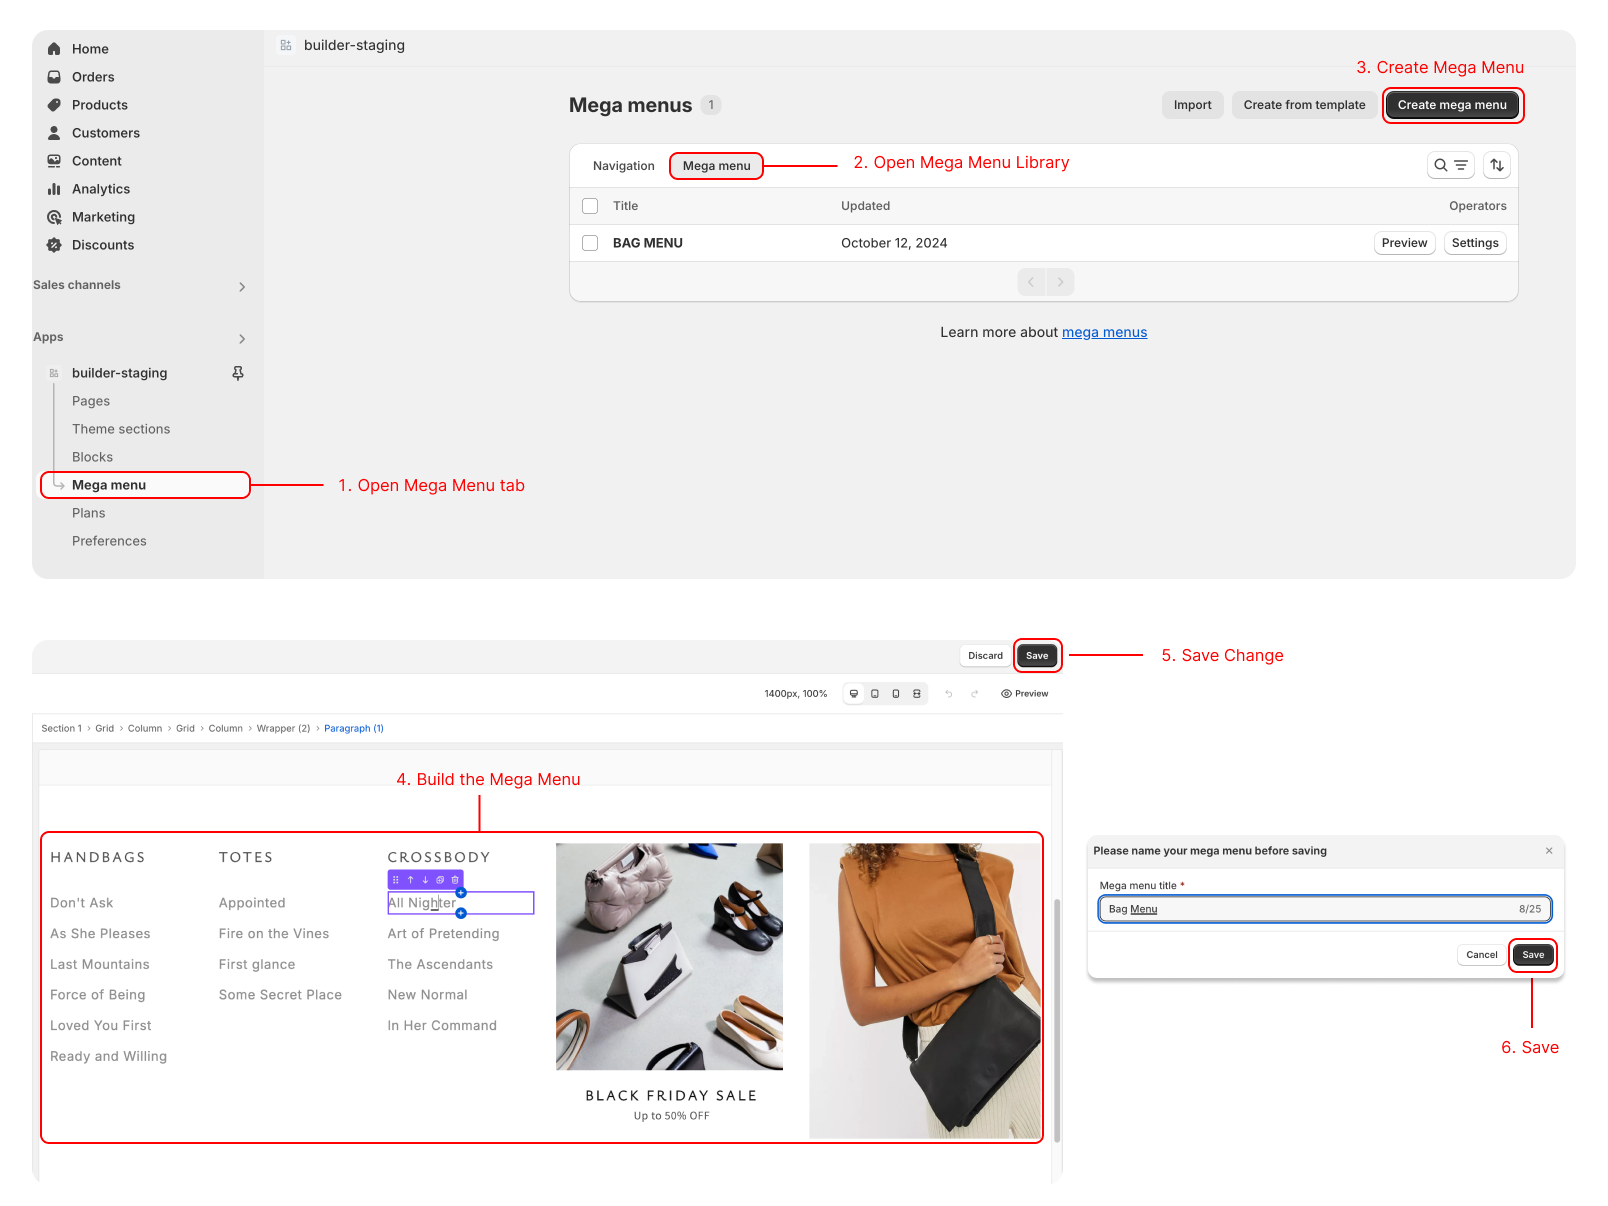
- Choose the
Mega Menustab - This tab contains two lists: Navigation and Mega Menu.Click on
Mega Menu - Click
Create Mega Menu. - The Mega Menu functions similarly to a section, allowing you to add layouts and elements inside to build.
- Hit
Saveand name the Mega Menu. - The newly created Mega Menu will appear in the list.
Create Navigation
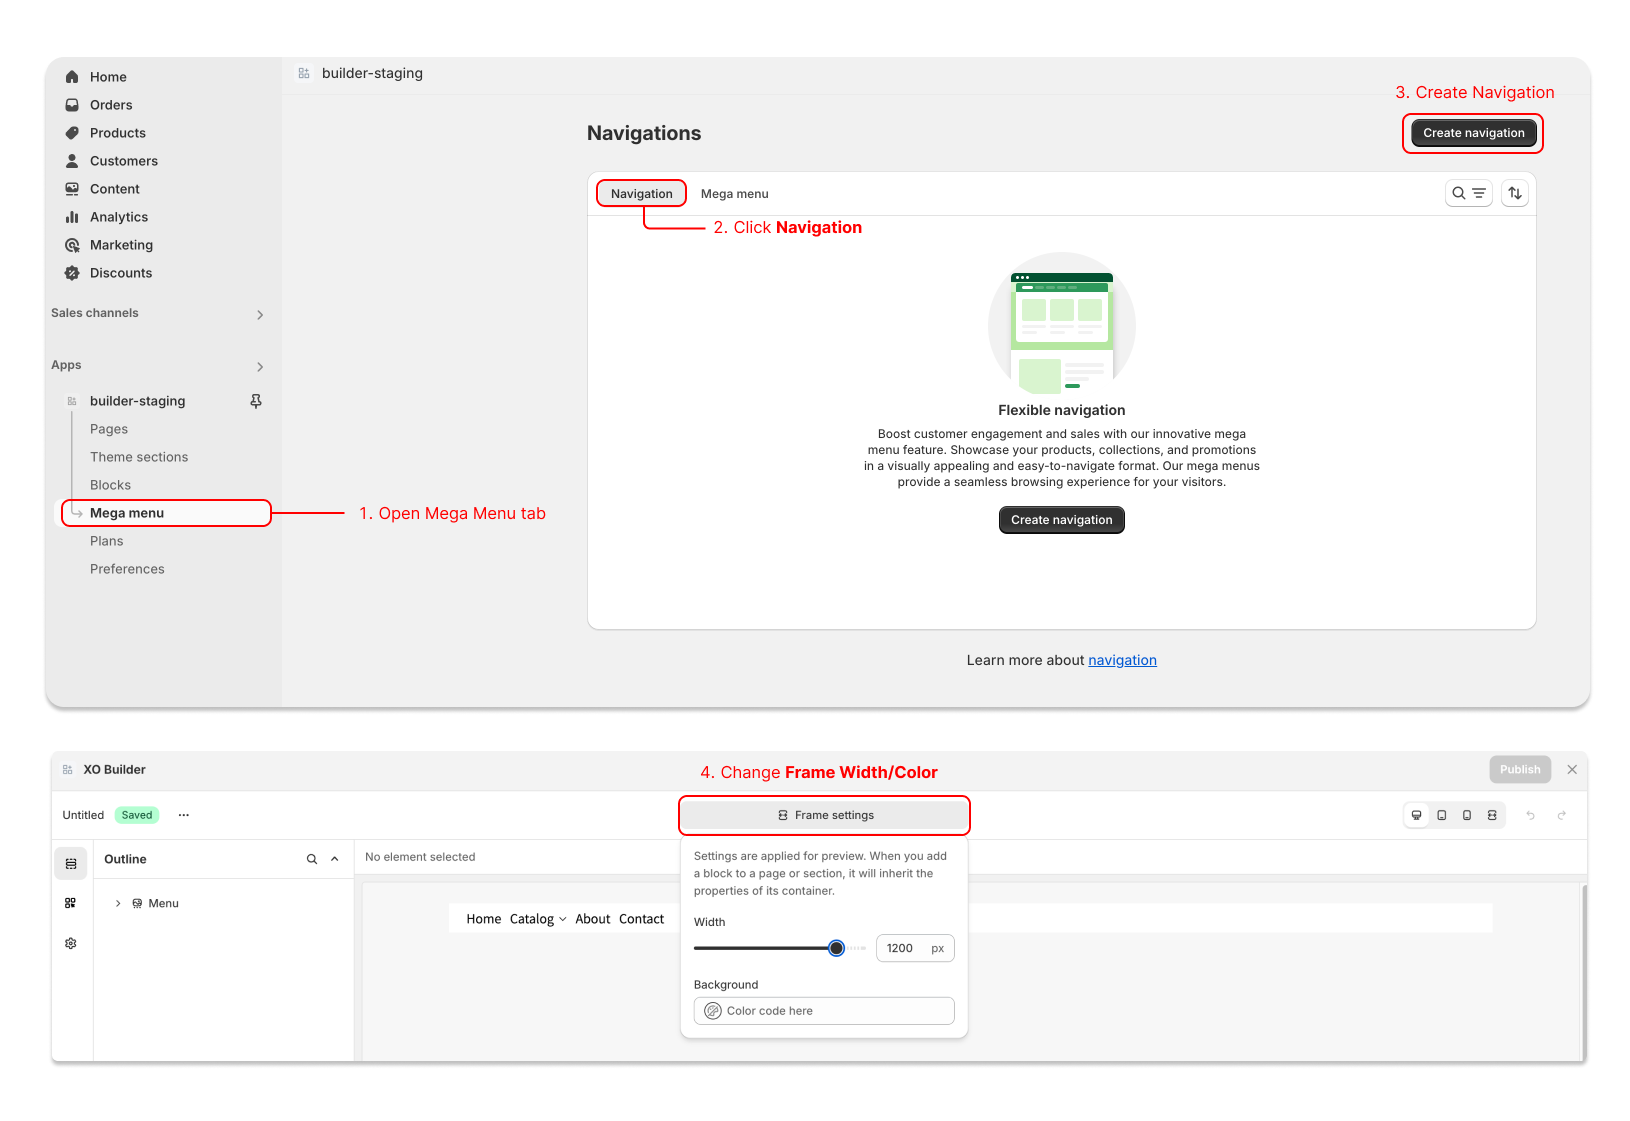
Open Mega Menus tab → Navigation → Hit Create Navigation → Adjust the Frame Setting (Width, Background), which is only for previewing purposes and not the actual settings for the navigation.
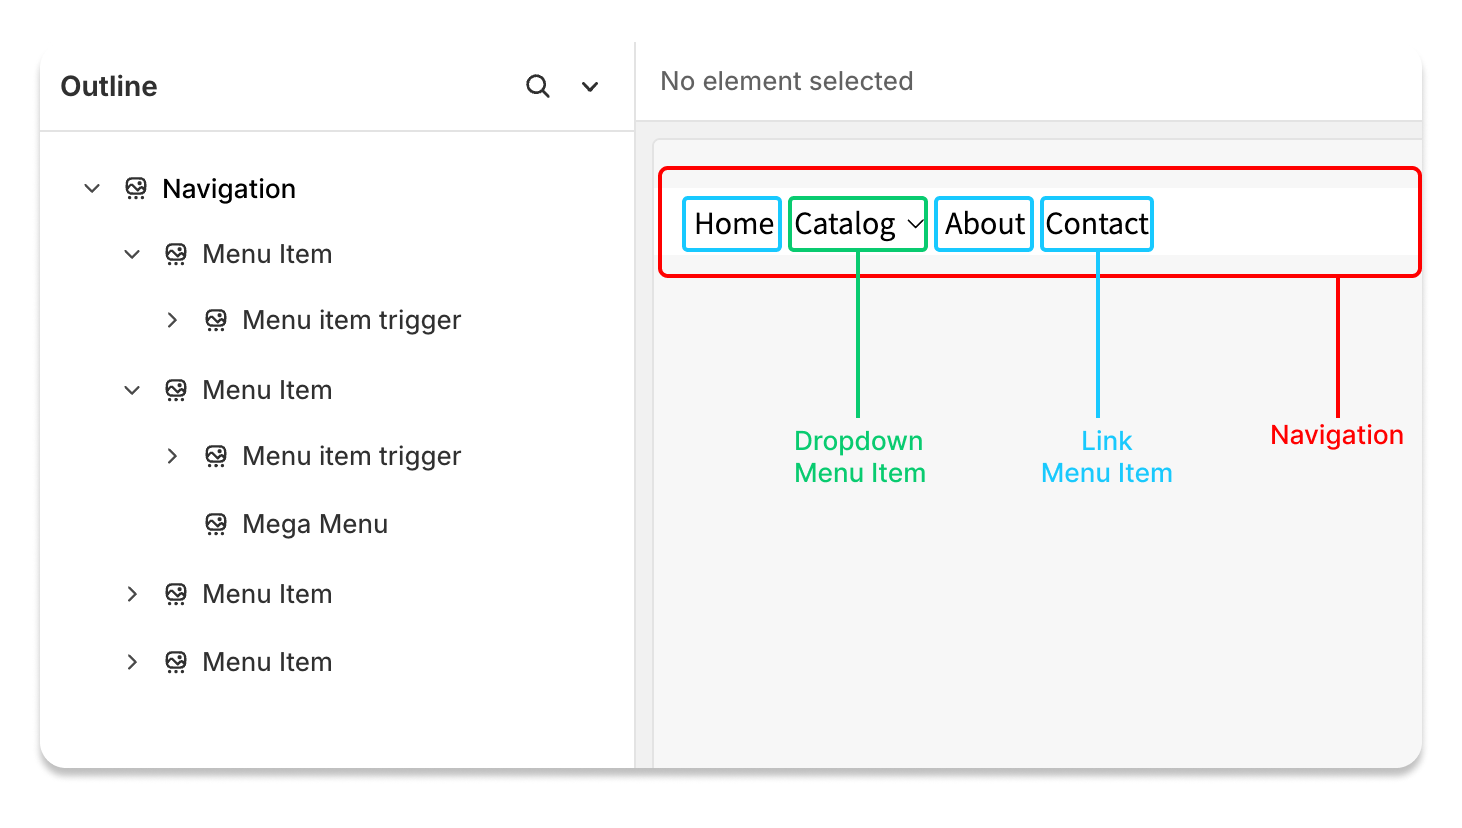
The Navigation contain multiple Menu Items. Each Item can be a direct link, or a trigger to open a saved Mega Menu. A Link-type Menu Item include only Menu item trigger. On the other hand, Dropdown-type Menu Item must includes both trigger and Mega Menu element.
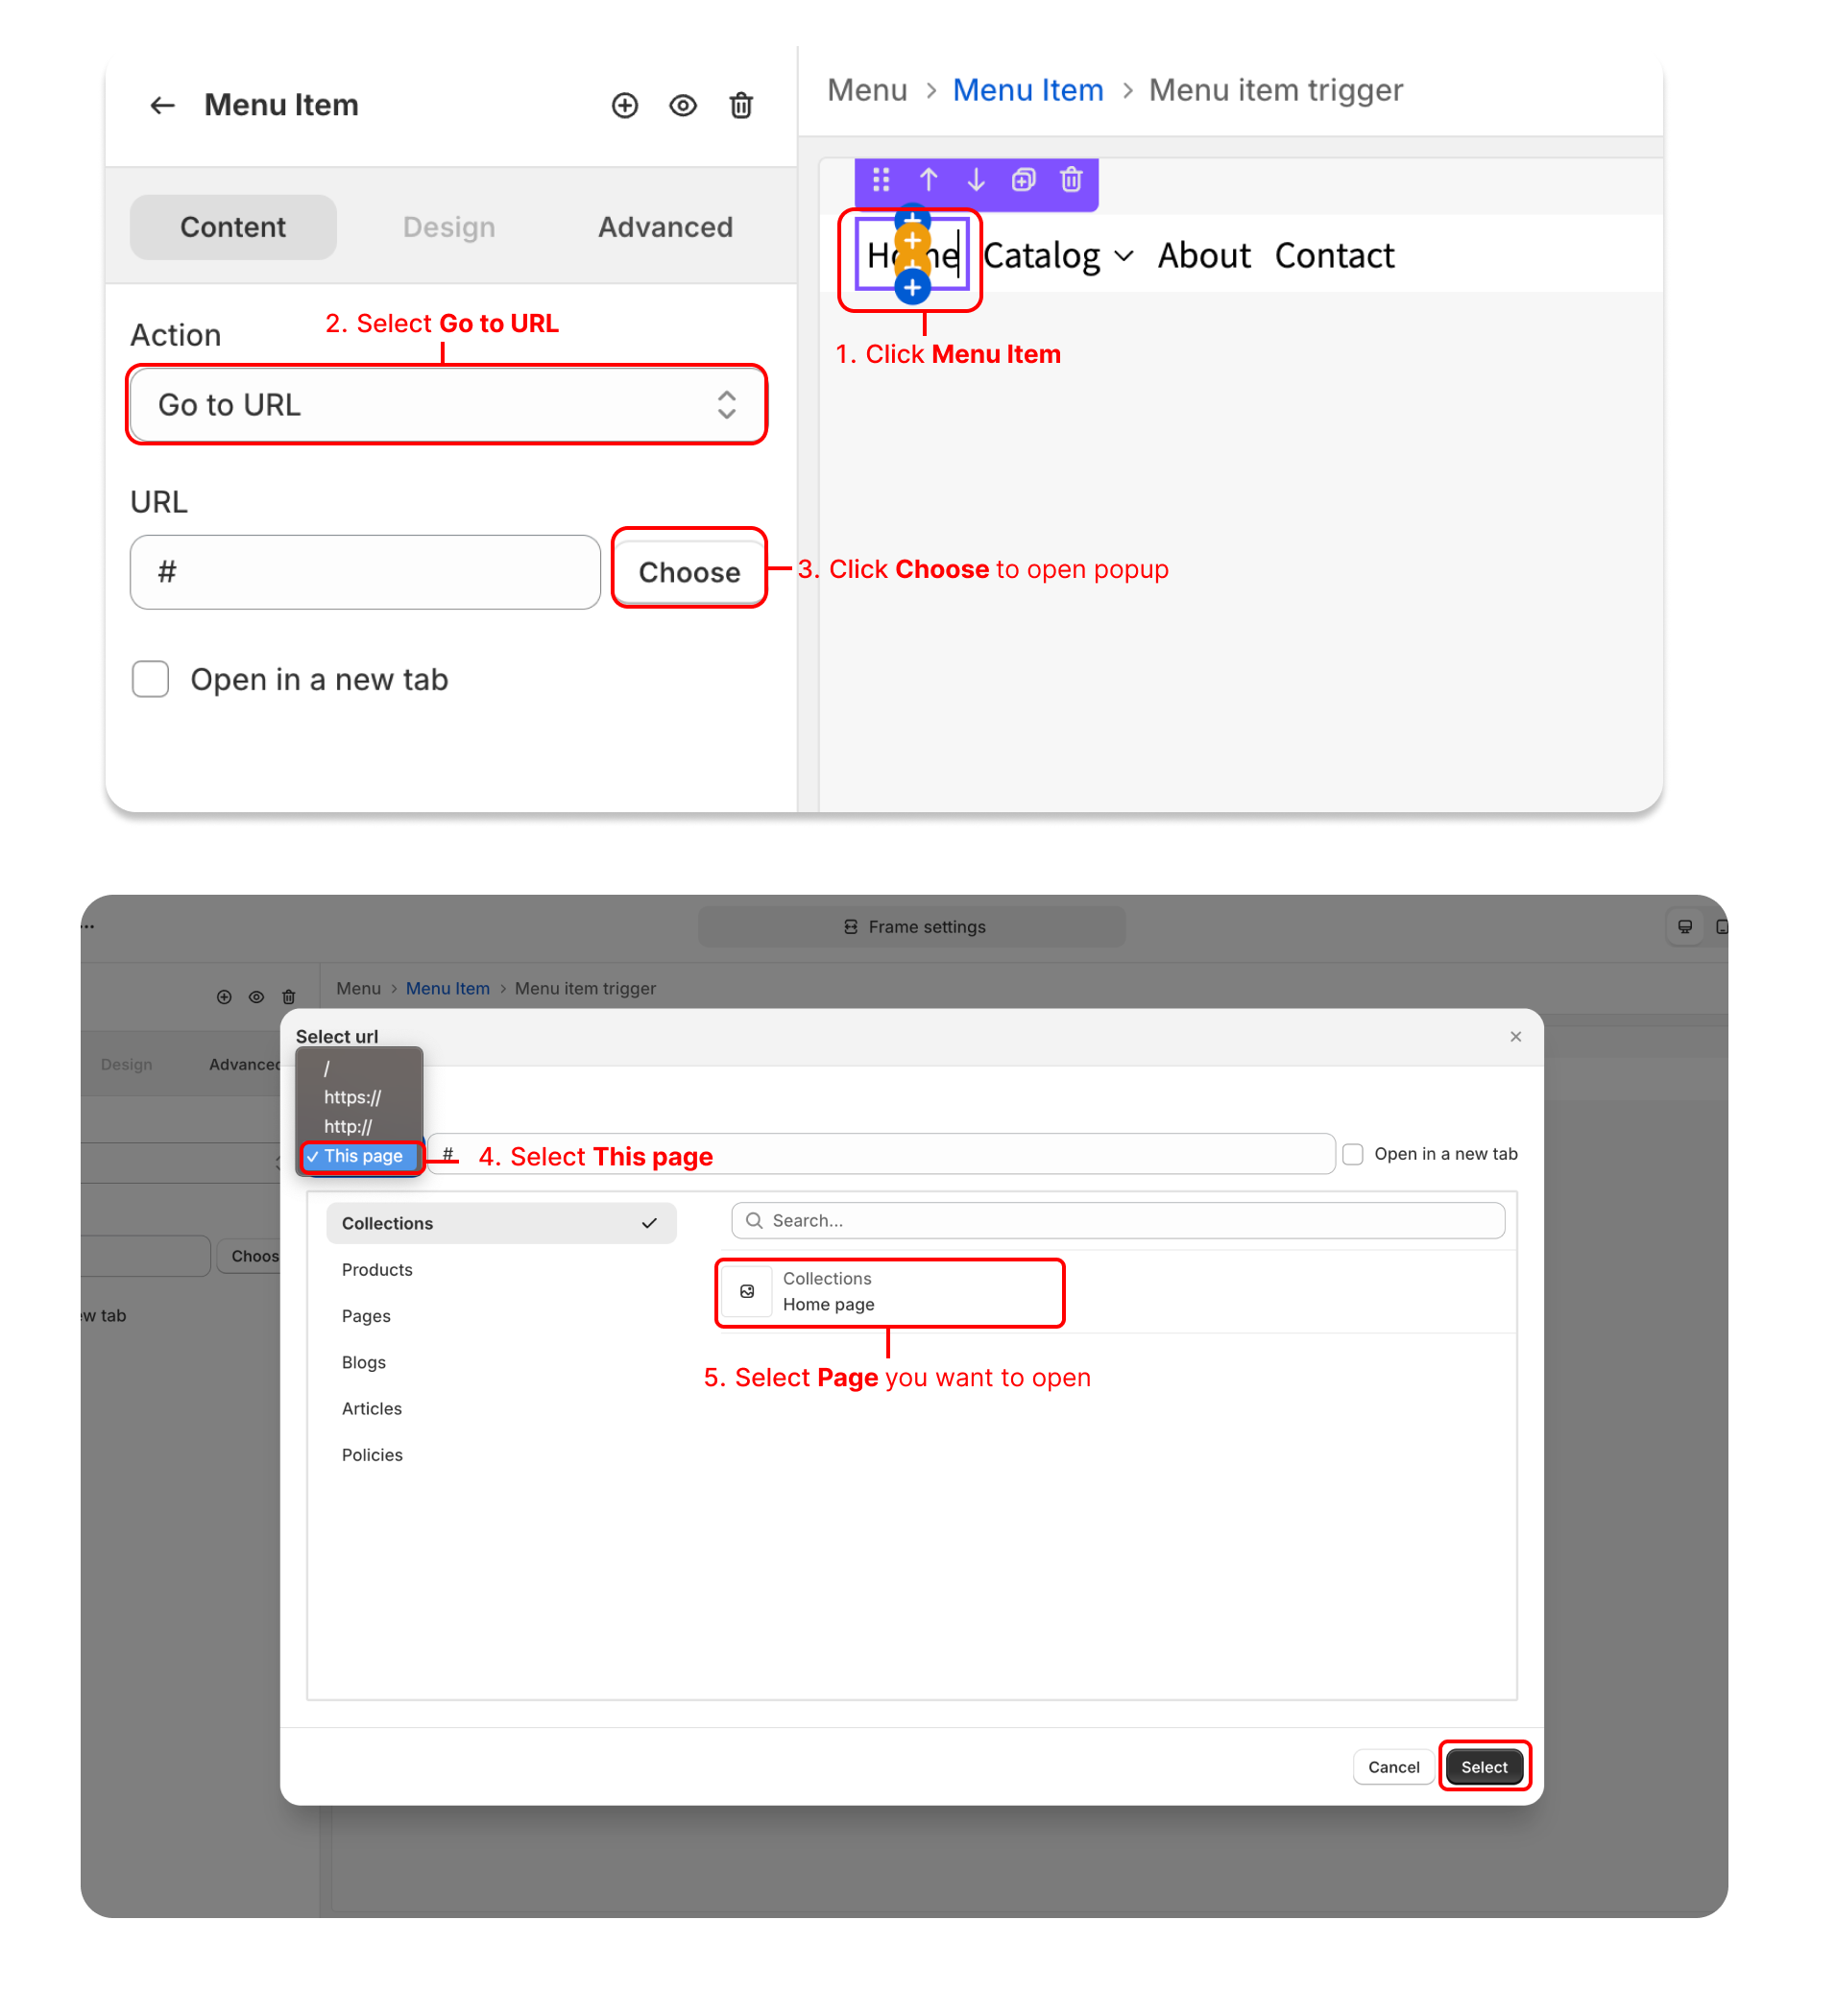 To make a link menu, click on
 Menu Item → Change Action to Go to URL → Click Choose → Select This Page and pick the page (product, collection, article,…) or https:// and type in the url of external site.
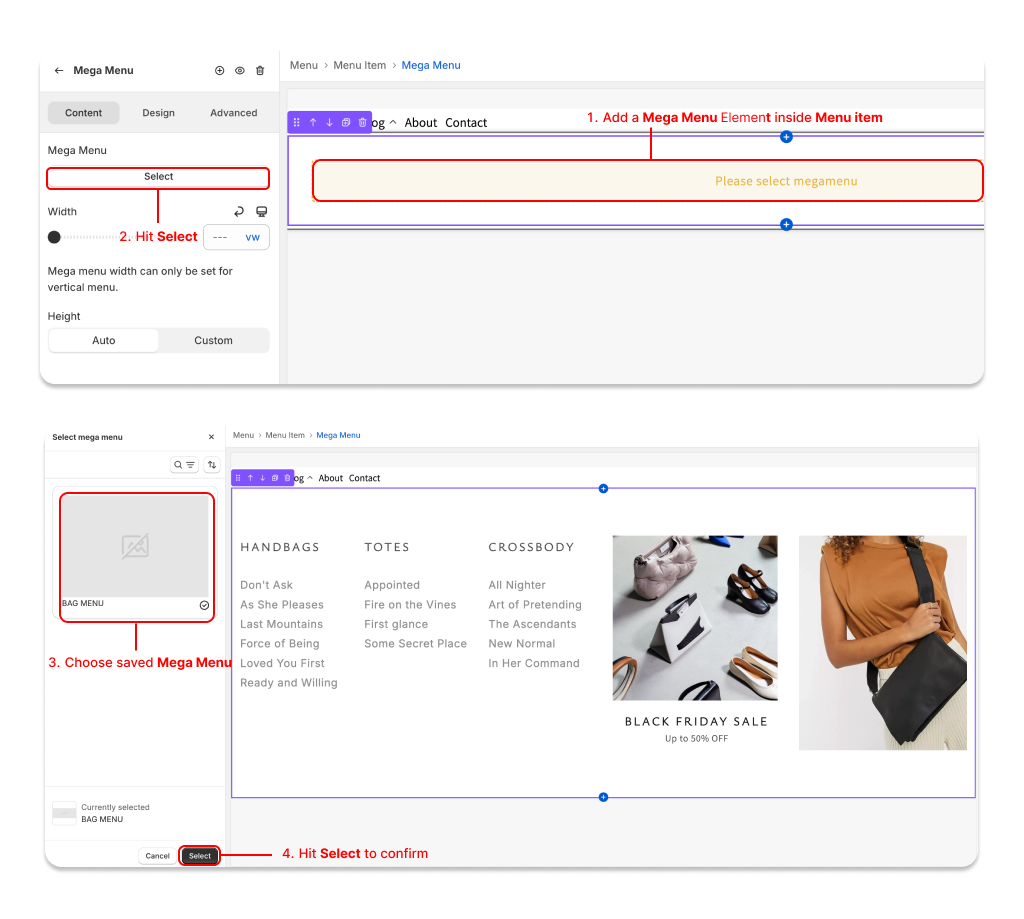 To make a dropdown menu, add a
 Mega Menu element inside Menu item. → Select → Choose your saved Menu preset → Select again → Change the Width and Height if you dont want the Mega Menu to expand to full viewport.
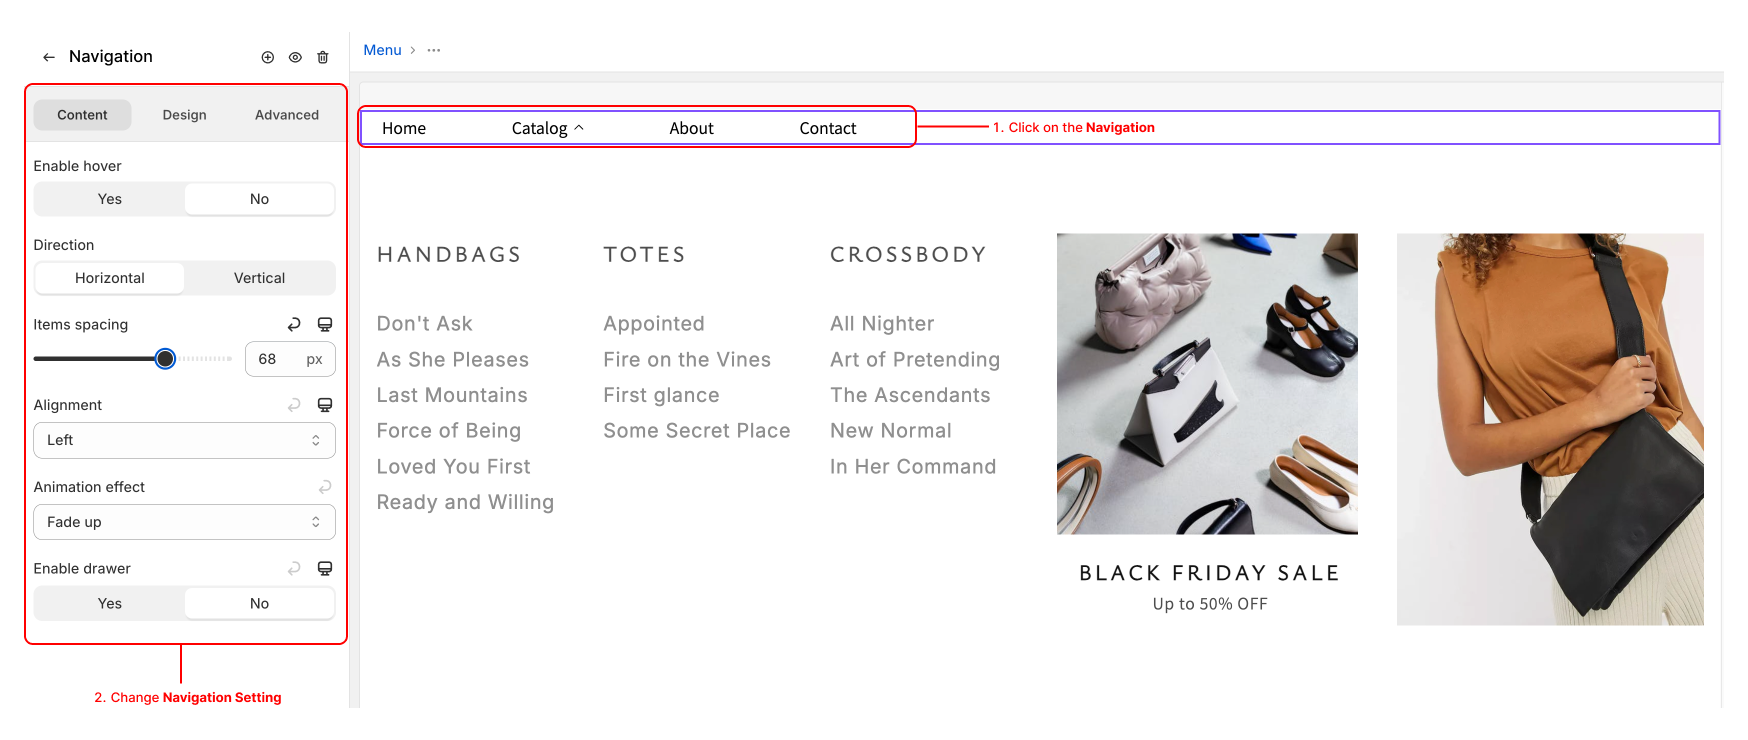 Click on
 Navigation element to see the setting
- Enable hover : Allow the Mega Menu to show with hover, not click.
- Direction: The direction of Menu Items.
- Item spacing: The gap between each Menu Item.
- Alignment: Distribute the items to Start/Cente/End/Space Between. Only available if the Direction is Horizontal
- Animation Effect: The appear animation of the Mega Menu when hover/click on the trigger.
- Enable drawer: Enable this allow you to transform the navigation to a drawer with a burger icon to open. you can click on
device iconand decide which screen-size will enable drawer. - Drawer position: The side in which drawer will hide.
Hit Save at the top right of Navigation Editor
Your Navigation Item will be listed in Mega Menus/Navigation
Manage Mega Menu/Navigation
You can find all the option in Mega Menu tabs.
Setting
- Click
Settings - You can
Duplicate, Change item’s title,PrevieworDelelein here - Hit
Saveto confirm title change
Export
- Select the Mega Menu/Navigation you want to Export
- Click
...button →Export - A pop up will appear, any media like images, video will not be exported → Hit
Export
Import
- Click
Import - Click
Upload files - Select Mega Menu/Navigation file with .xobuilder format from your local machine
- Check
I understand images will not be imported - Hit
import
Publish
Only Navigation can be published and used in Shopify Theme. Check out the Use Navigation down below.
Use Navigation
You can use Navigation as an Element to create XO Builder’s Pages and Sections. Inside Page/Section Editor, add an Element → Click onNavigation element → Choose Navigation → Select saved Navigation.
There are 2 way to use the navigation outside the XO Builder app / in your Shopify Theme:
-
Publish a section/page with a navigation element inside
-
Publish the navigation and copy the code. Paste it in the online store page editor