Gallery Card Listing
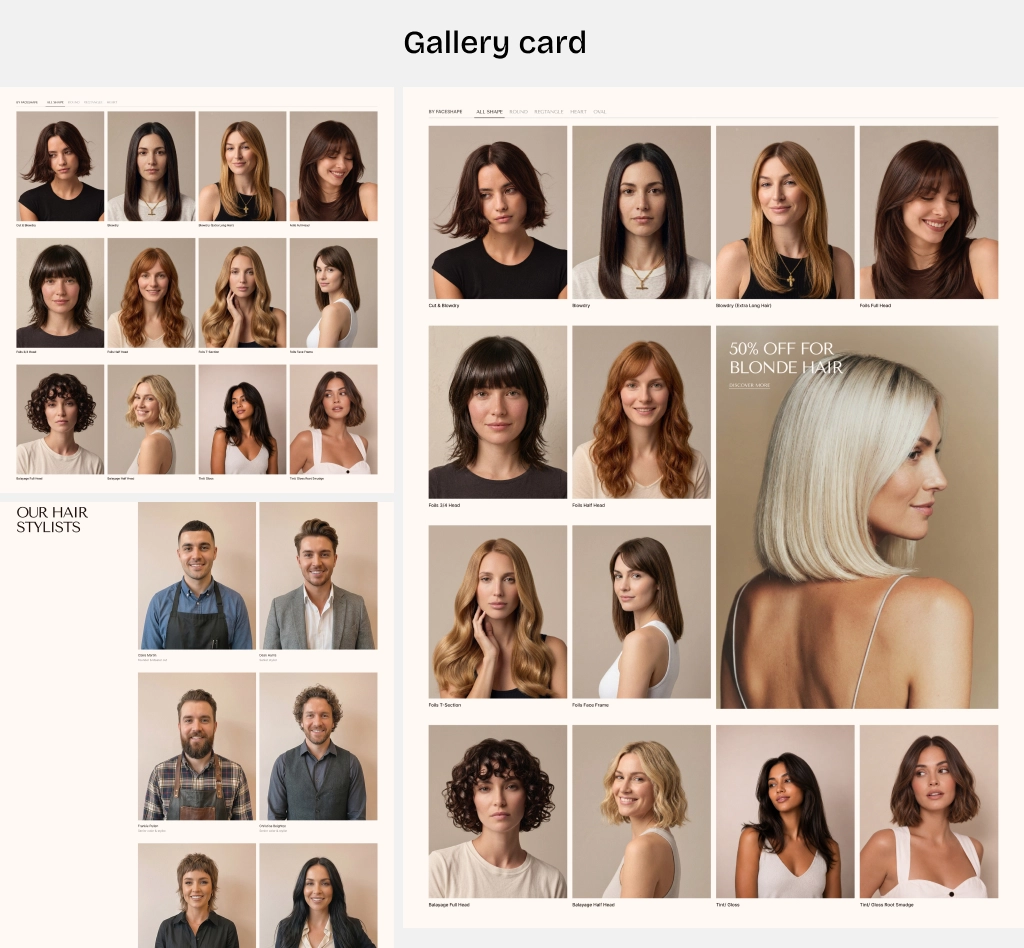
Gallery card listing allows you to create reusable gallery content and organize gallery items into tabs for easier management.
Step 1: Create Metaobject Definitions
From your Shopify Admin, go to Settings → Custom data → Metaobjects.
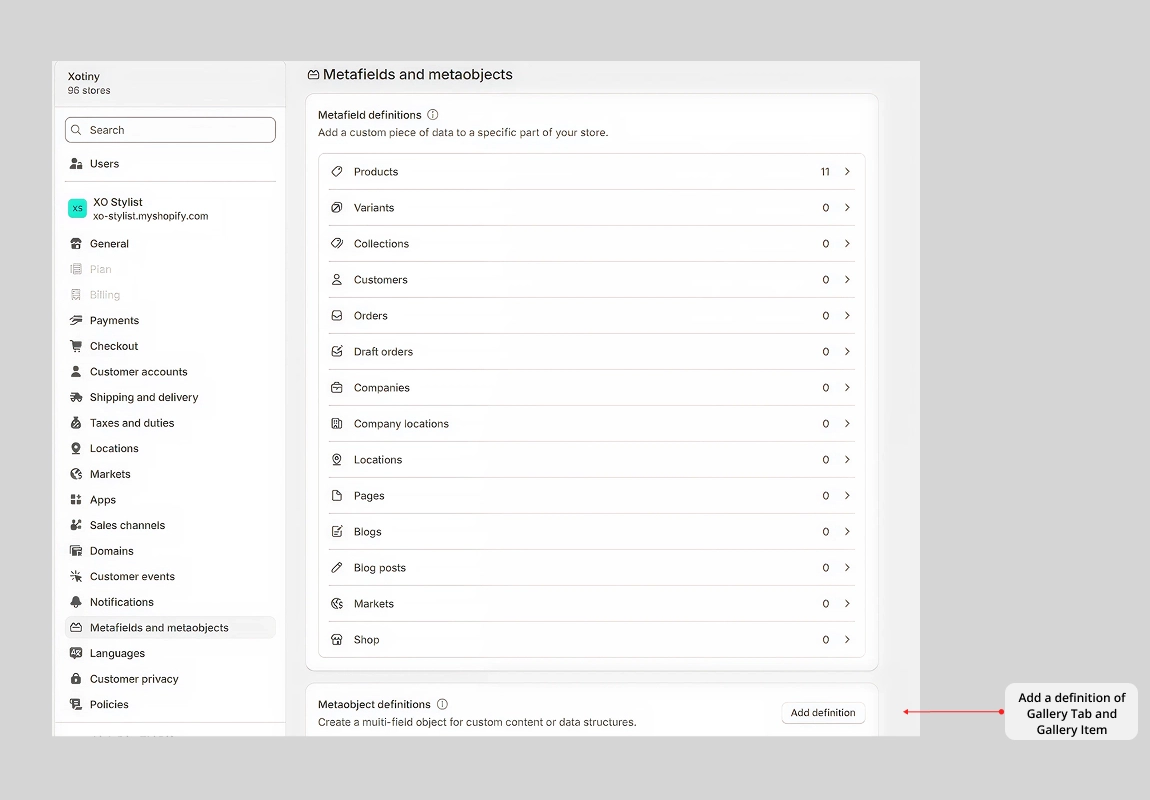
Create the following Metaobject definitions:
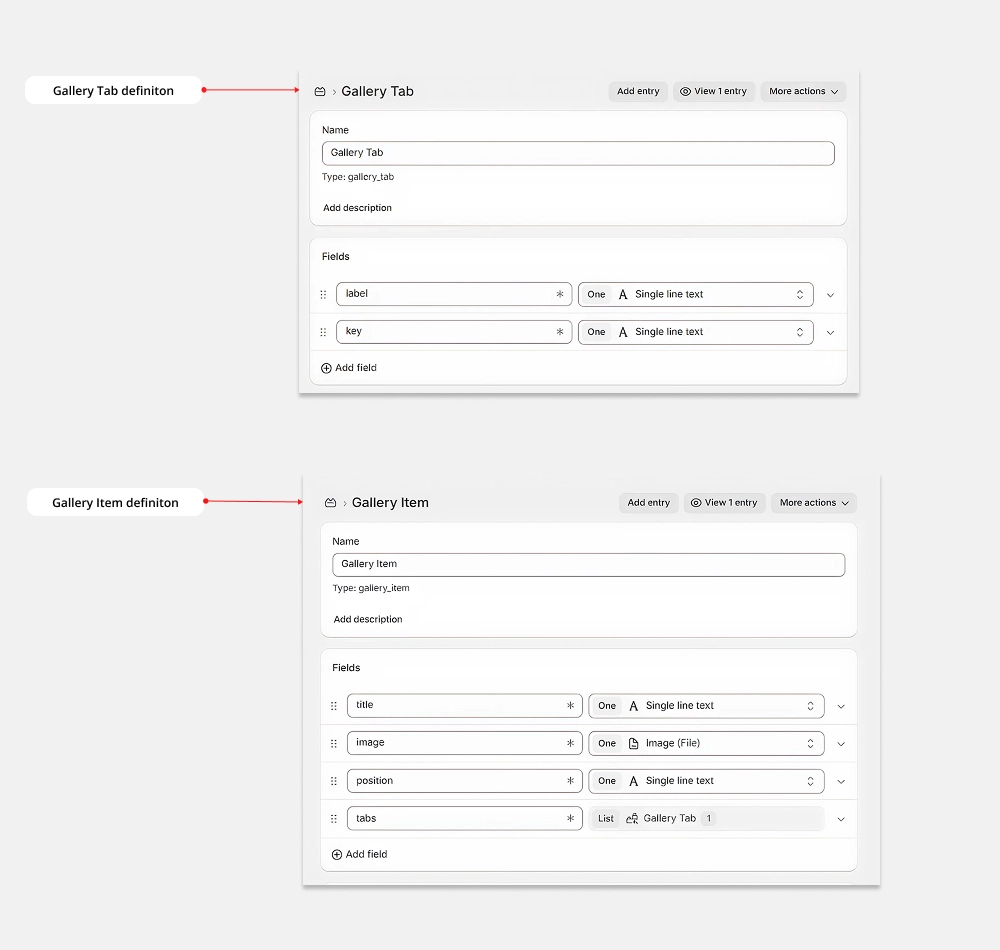
Gallery Tab
Add a definition named Gallery Tab, then add the following fields:
| Field Name | Type |
|---|---|
| Gallery Tab | Single line text |
| Label | Single line text |
| Key | Single line text |
Click Save.
Gallery Item
Add a definition named Gallery Item, then add the following fields:
| Field Name | Type |
|---|---|
| Title | Single line text |
| Image | Image (File) |
| Position | Single line text |
| Tabs | Select List of references and choose Metaobjects → Gallery Tab |
Note: You must add the Gallery Tab first before you can use Gallery Item. Gallery Item can only select tabs from the Gallery Tab that has already been created.
Click Save.
Step 2: Create Gallery Entries
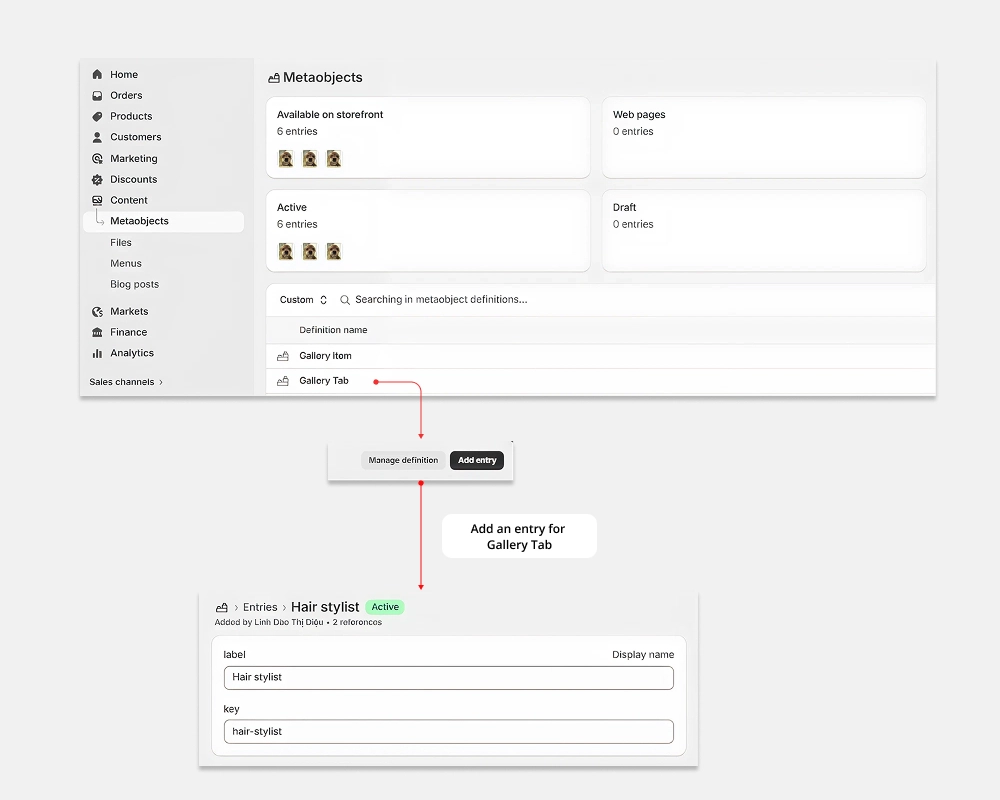
From your Shopify Admin, go to Content → Metaobjects. Create entries for both Gallery Tab and Gallery Item.
Create Gallery Tab Entries
- Open Gallery Tab and click Add entry.
- Label – The text displayed for the tab.
- Key – A unique identifier for the tab.
- Click Save.
Repeat this process to create multiple Gallery Tab entries if you want multiple tab options.
Create Gallery Item Entries
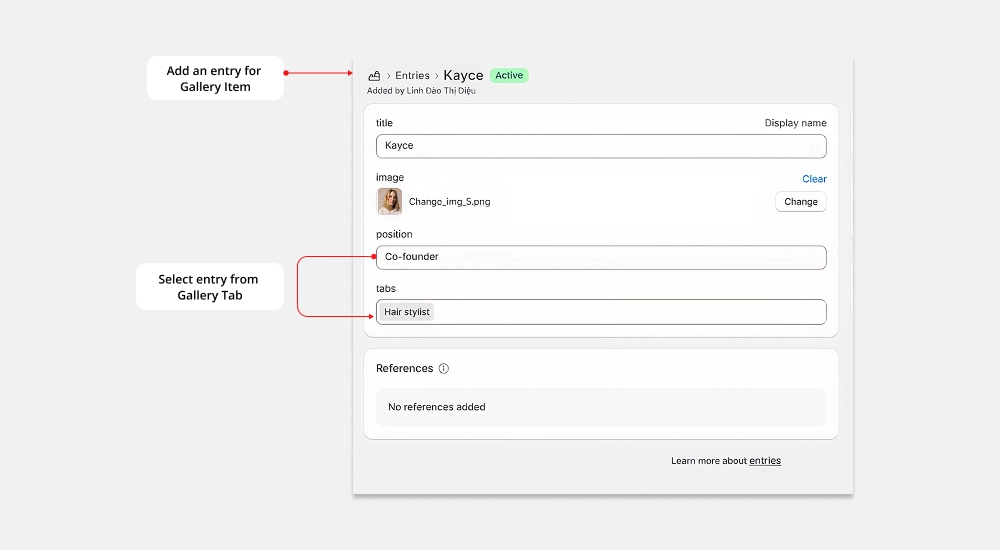
- Open Gallery Item and click Add entry.
- Title – The gallery item title.
- Image – Upload or select an image.
- Position – Enter the desired position value.
- Tabs – Select one or more Gallery Tab entries created previously.
- Click Save.
Repeat this process for all gallery items you want to display.
Step 3: Display Gallery Content
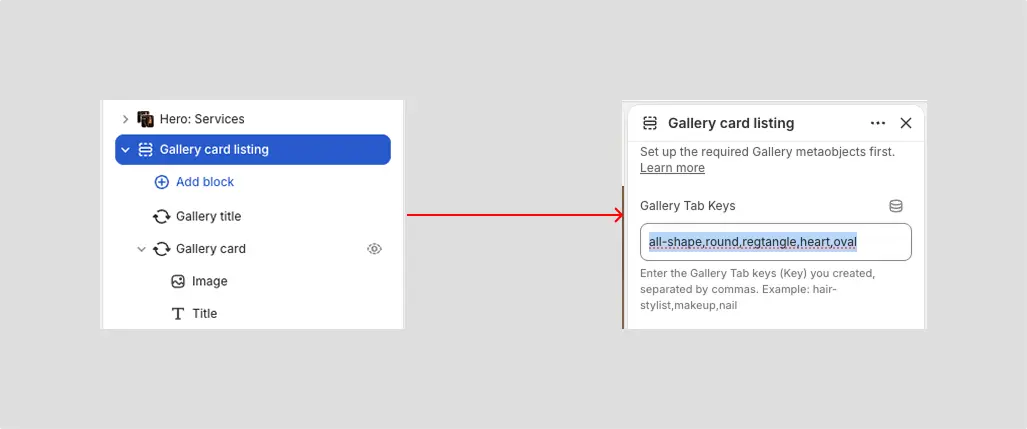
- Open the Theme Editor → Online Store → Edit theme.
- Navigate to the Gallery card listing section → then input the general tab keys as guided.
The gallery will automatically display all Gallery Item entries associated with the selected tab.