Metafield gallery
Want to show different images for every product without creating 100 separate galleries? With the Metafield Integration, you can connect a single XO Gallery to Shopify Metafields. Upload your media directly to your Product or Collection pages, and the gallery will update automatically.
Step 1: Create your Metafield in Shopify
First, we need to tell Shopify where you’ll be storing your images/videos.
- From your Shopify Admin, go to Settings > Metafields and metaobjects > Products (or Collections/Pages/Blog posts).
- Click Add definition.
- Name: Give it a name (e.g., "Gallery Media").
- Select type: Choose List of values and File.
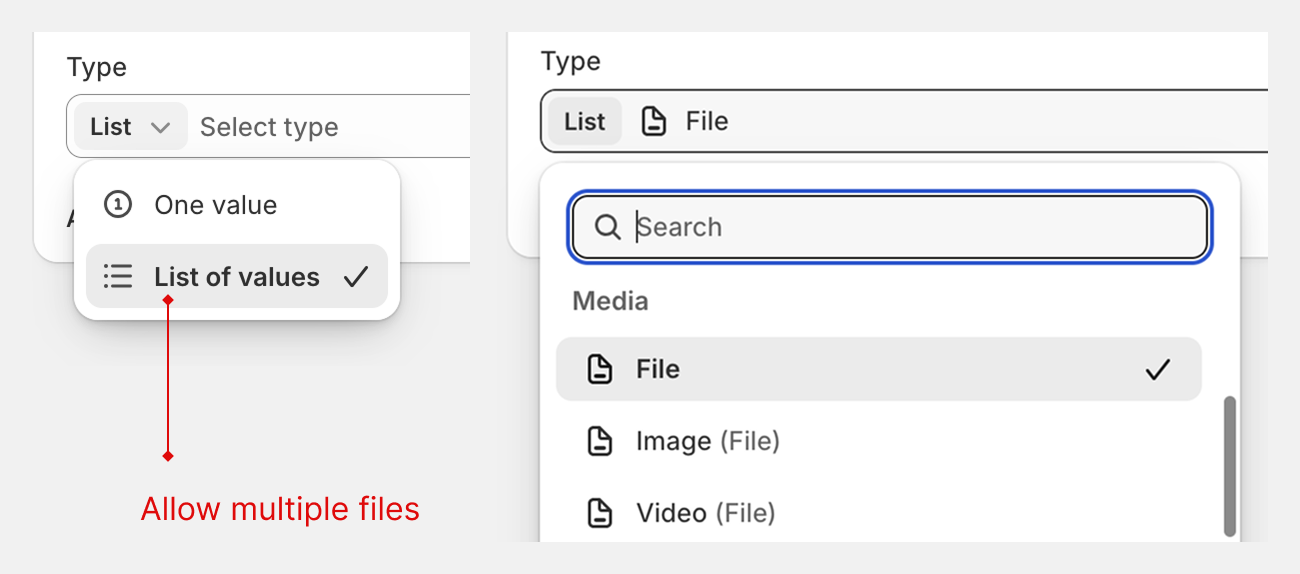
- Validation: Ensure you select "List of files" and set accepted file types to "Media" (this allows both images and videos).

- Click Save.
Step 2: Connect XO Gallery to the Metafield
- Open the XO Gallery app.
- Create a new gallery or edit an existing one (you can use dummy images for now to preview the layout).
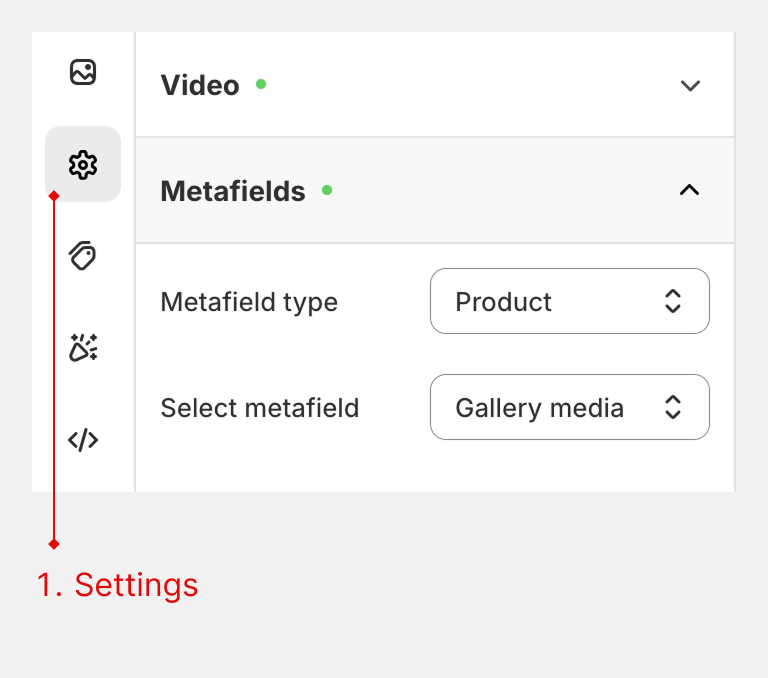
- Go to the Settings tab within the gallery editor.
- Locate the Metafield section.
- Under Source Type, select the object where you created the metafield (e.g., Product).
- Under Select Metafield, choose the definition you created in Step 1.
- Click Save.
Step 3: Add the Gallery to your Theme
- Go to Online Store > Themes and click Edit theme.
- Navigate to the page type you chose (e.g., Default Product page).
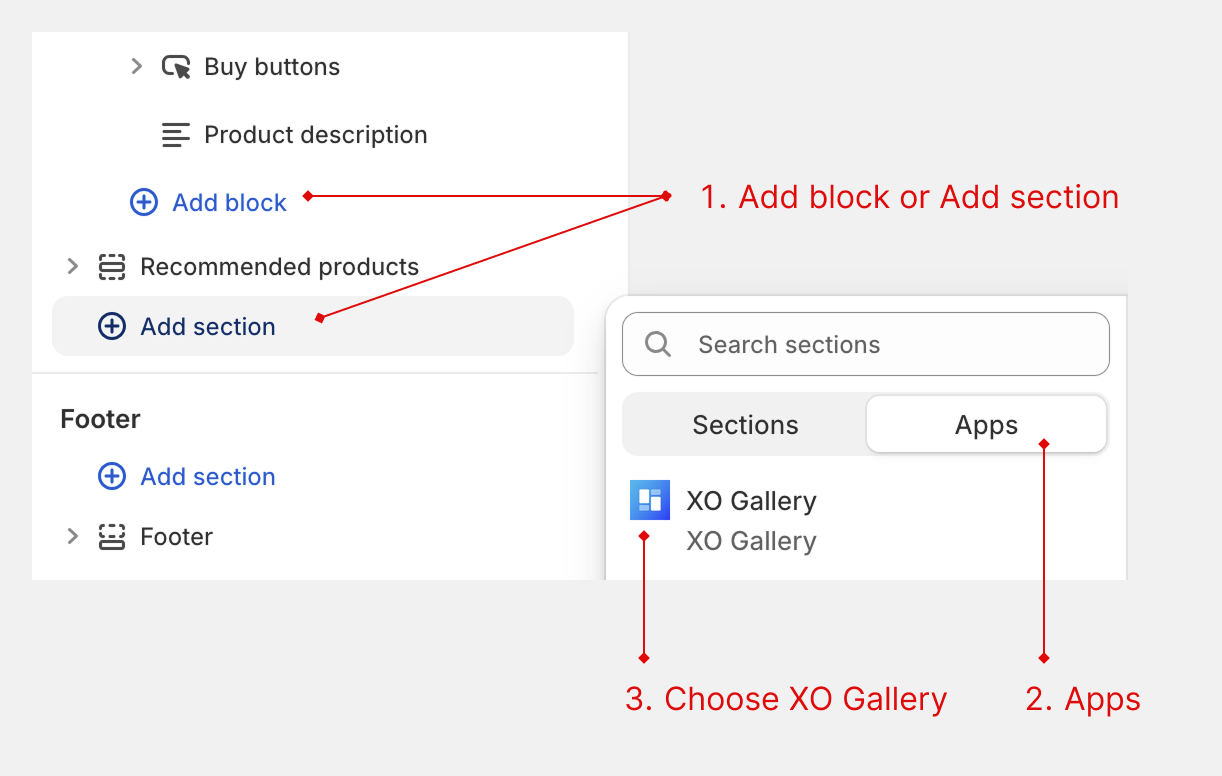
- In the sidebar, click Add block or Add section and select XO Gallery.
- In the block settings, select the Gallery you just configured.
- Click Save.
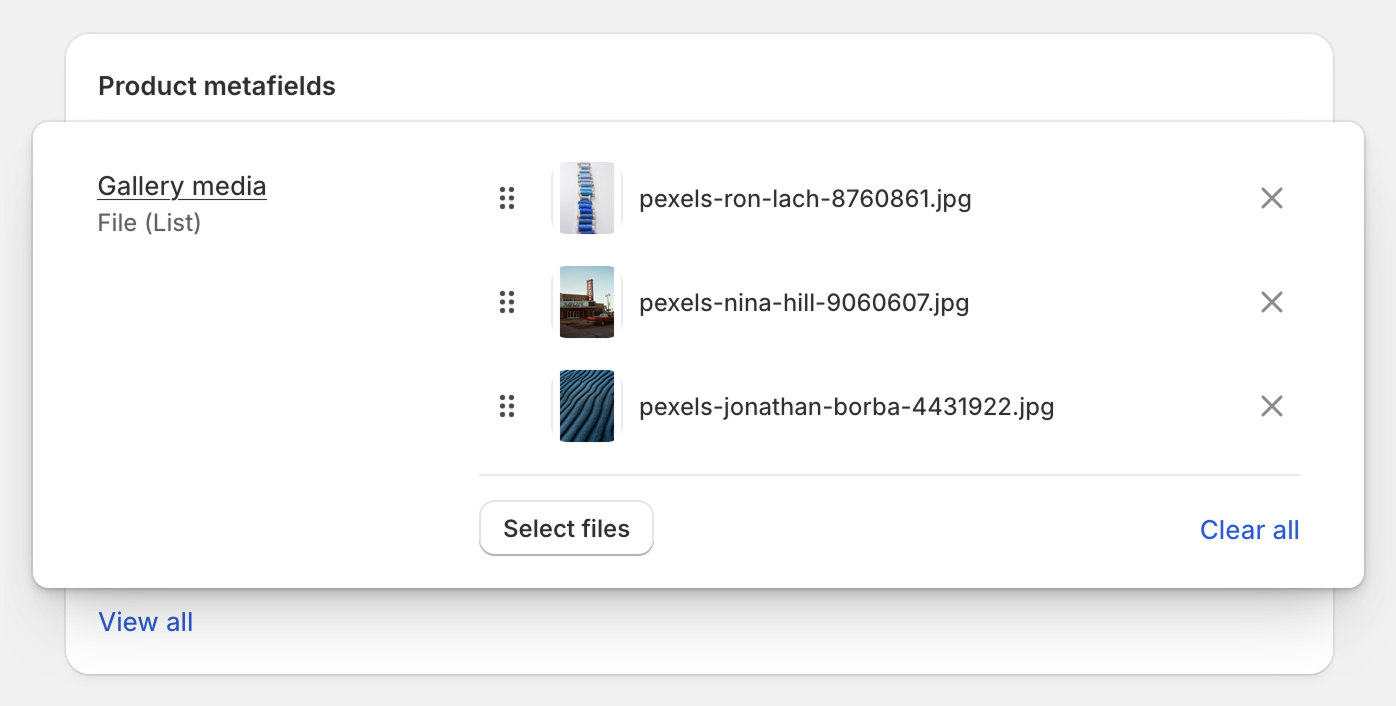
Step 4: Add Media to your Products
- Go to any Product page in your Shopify admin.
- Scroll down to the Metafields section.
- Upload your images or videos to the "Gallery Media" field.
- View your store—the gallery will now dynamically display the media specific to that product!