Custom font
Adding a custom font to your Shopify theme can enhance your store’s branding and aesthetics. Follow these steps to integrate a custom font into your theme.
What is a custom font?
A custom font is a unique typeface that isn’t included in Shopify’s default font library. Instead of using standard fonts from Shopify Library, you can upload and apply a custom font to our themes to create a distinctive brand identity.
Custom fonts allow you to:
- Match your brand’s style with a unique typography choice.
- Enhance the shopping experience with a more polished and professional look.
- Stand out from competitors by using a font that reflects your store’s personality.
How to add a custom font file to your theme
Follow these steps to integrate a custom font into your theme.
Step 1: Start editing the theme's code
- Install our theme to your store
- Open the theme's editor
- Click on the three dot button, then choose "Edit code"
Step 2: Add the font to the theme's asset
- Locate the asset folder
- Click on Add a new asset
- Upload your font file in .ttf or .woff, .woff2 format
For example, you can download a free font file from Google Font and then use the downloaded files.
Step 3: Create a file for the new font
- Click on the Create a blank file tab in the asset folder
- Create a file name stylesheet_font.css
- Insert the font codes into the file, for example:
@font-face {
  font-family: "Roboto-Bold";
  src: url("Roboto-Bold.ttf") format("truetype");
  font-weight: 700;
  font-style: normal;
}

@font-face {
  font-family: "Roboto-Medium";
  src: url("Roboto-Medium.ttf") format("truetype");
  font-weight: 500;
  font-style: normal;
}

@font-face {
  font-family: "Roboto-Regular";
  src: url("Roboto-Regular.ttf") format("truetype");
  font-weight: 400;
  font-style: normal;
}
In that:
- font-family: Insert your font file name, such as Roboto-Bold
- scr: Insert the full font file name (Roboto-Bold.ttf) and the format based on the type of file (.ttf = truetype, .woff = woff, .woff2 = woff2)
Step 4: Change the setting
- In the code editor, find a file named settings-adapter.liquid
For theme version smaller than 2.3.0, find the file named settings-adapter.liquid For them version from 2.3.0 upward, find the file named typography-adapter.liquid
- Find these following 2 lines to change the name of the font used for the theme:
- --font-heading-family
- --font-body-family
- Enter the name of the font after the : For example: --font-heading-family: 'Roboto-Bold';
For H1 to H6 headings, the theme allows you to choose a separate font style through Theme Settings.
Check which font style your H1–H6 headings are currently using, then locate the case font_heading_setting section in the same file.
If your headings are set to use Heading, replace the Google Font name in when 'heading'. Likewise, if they're using Body, Subheading, or Accent, simply update the corresponding section.
For example:
when 'heading'
  assign font = 'Roboto-Bold'
Step 5: Add the font to <head>
- In the code editor, find the folder Layout
- Open theme.liquid file
- Add
{{ 'stylesheet_font.css' | asset_url | stylesheet_tag }}inside<head>. For example, you can add before the style.css line.
Now, you should see that your font is shown on the theme. If you still have any issue, contact us at [email protected]
How to add the embed Google font codes to the theme
Follow these steps to add the Google embed fonts into your theme.
Step 1: Start editing the theme's code
- Install our theme to your store
- Open the theme's editor
- Click on the three dot button, then choose "Edit code"
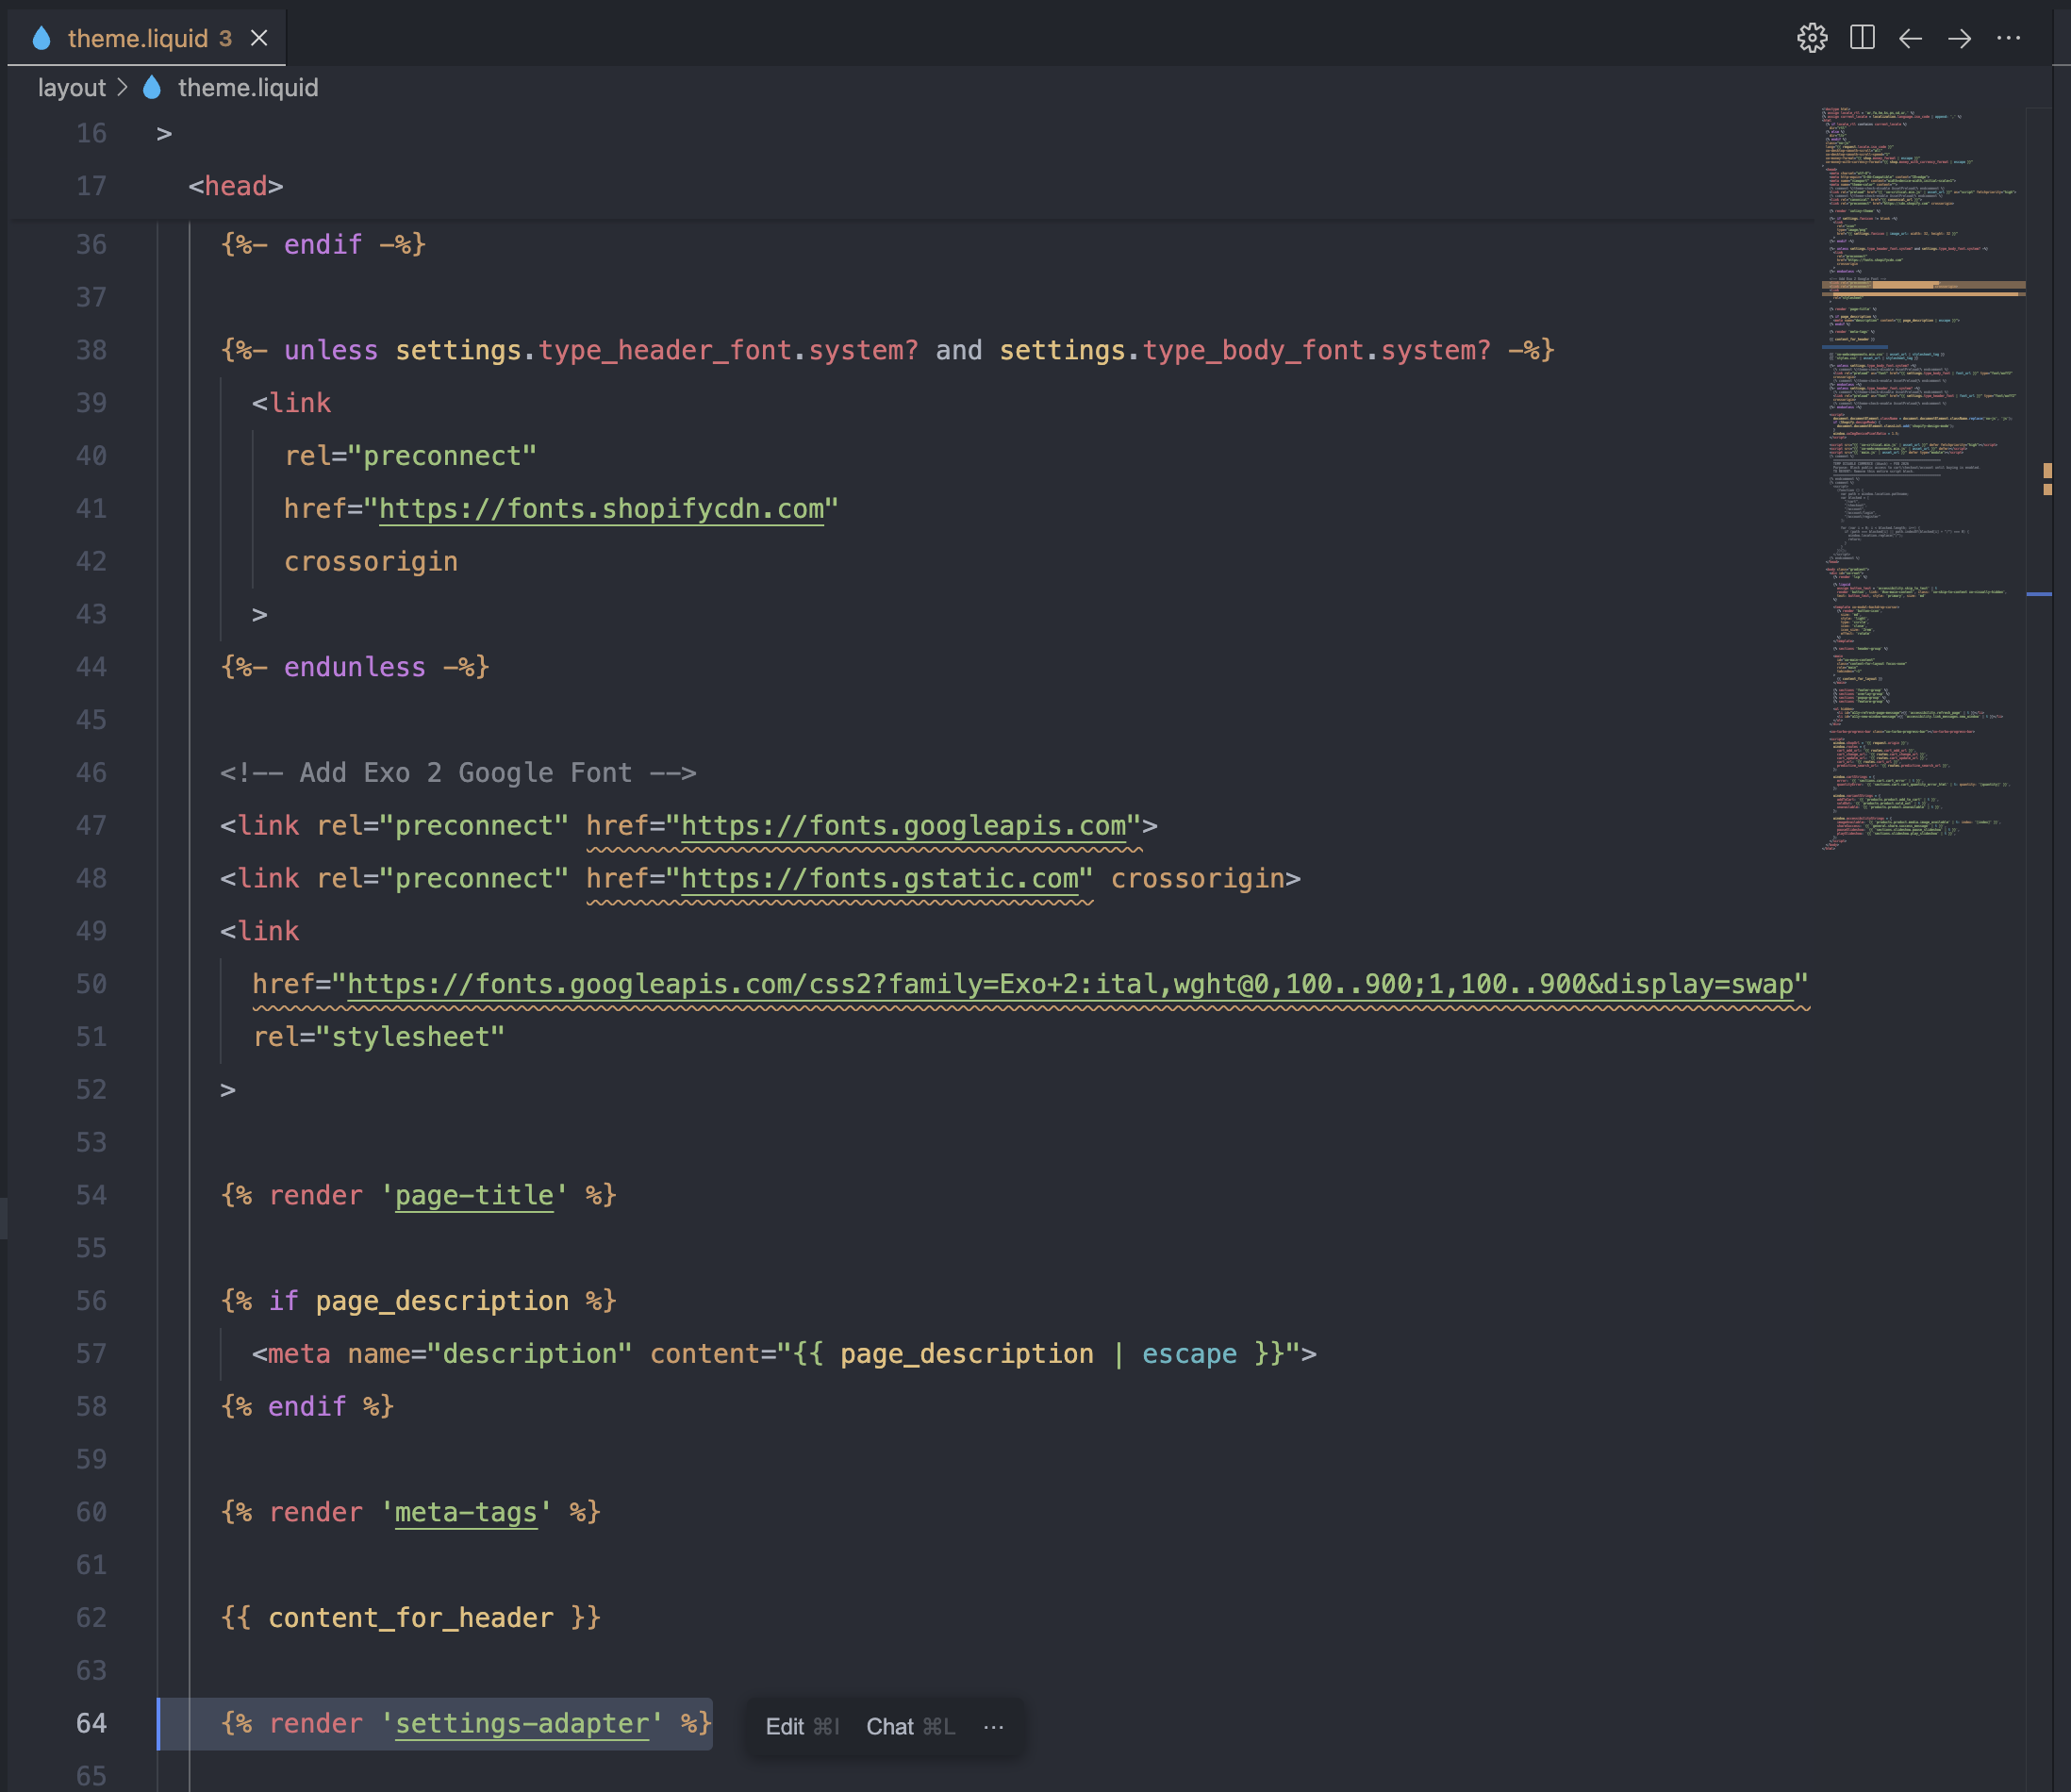
Step 2: Add the font code to the theme.liquid file
- Locate the Layout folder
- Open the file theme.liquid
- Paste the embed Google font code before the line of
{% render 'page-title' %}
Step 3: Change the setting
- In the code editor, find a file named settings-adapter.liquid
For theme version smaller than 2.3.0, find the file named settings-adapter.liquid For them version from 2.3.0 upward, find the file named typography-adapter.liquid
- Find these following 2 lines to change the name of the font used for the theme:
- --font-heading-family
- --font-body-family
- Enter the name of the font after the : For example: --font-heading-family: 'Roboto-Bold';
For H1 to H6 headings, the theme allows you to choose a separate font style through Theme Settings.
Check which font style your H1–H6 headings are currently using, then locate the case font_heading_setting section in the same file.
If your headings are set to use Heading, replace the Google Font name in when 'heading'. Likewise, if they're using Body, Subheading, or Accent, simply update the corresponding section.
For example:
when 'heading'
  assign font = 'Exo 2'
Now, you should see that your embed font is shown on the theme. If you still have any issue, contact us at [email protected]