Create your first gallery
Learn how to create and customize your first photo gallery in just a few minutes.
Step 1: Create a new gallery
- Open the XO Gallery app from your Shopify admin
- Go to Galleries menu
- Click Add Gallery
- Give your gallery a name (e.g., "Product Showcase" or "Brand Story")
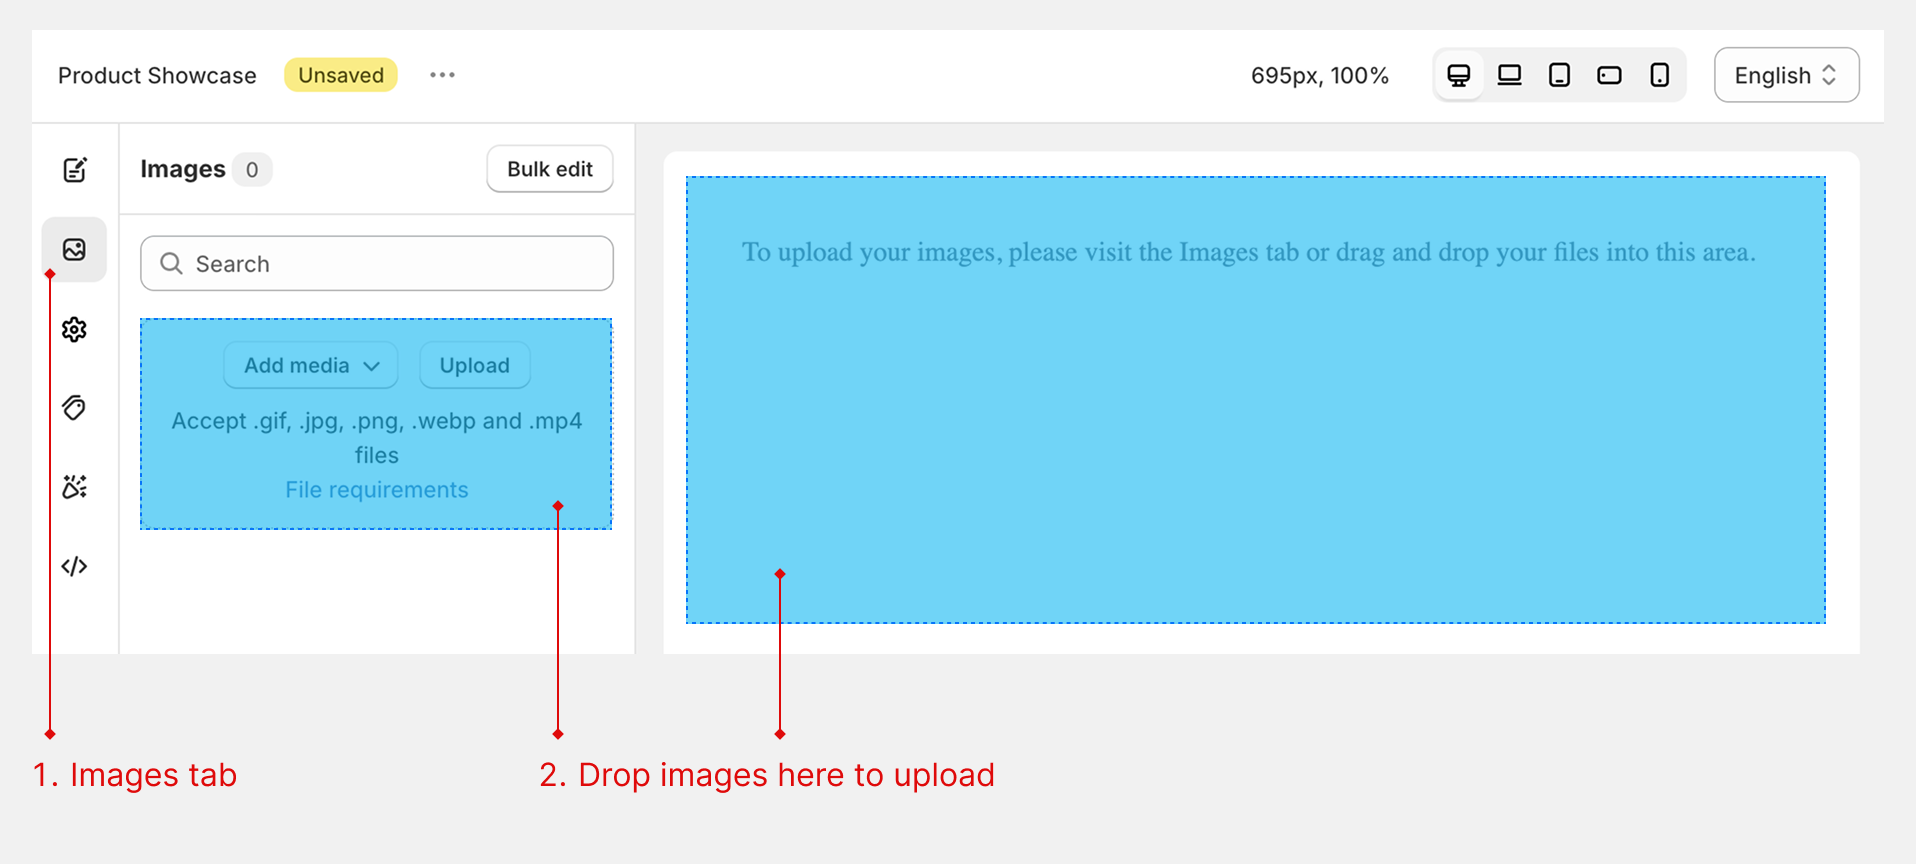
Step 2: Upload your images
- Drag and drop your images to the Images tab
- Select multiple images at once for faster uploading
- Wait for all images to finish uploading
Or you can add images from Shopify files, product images:
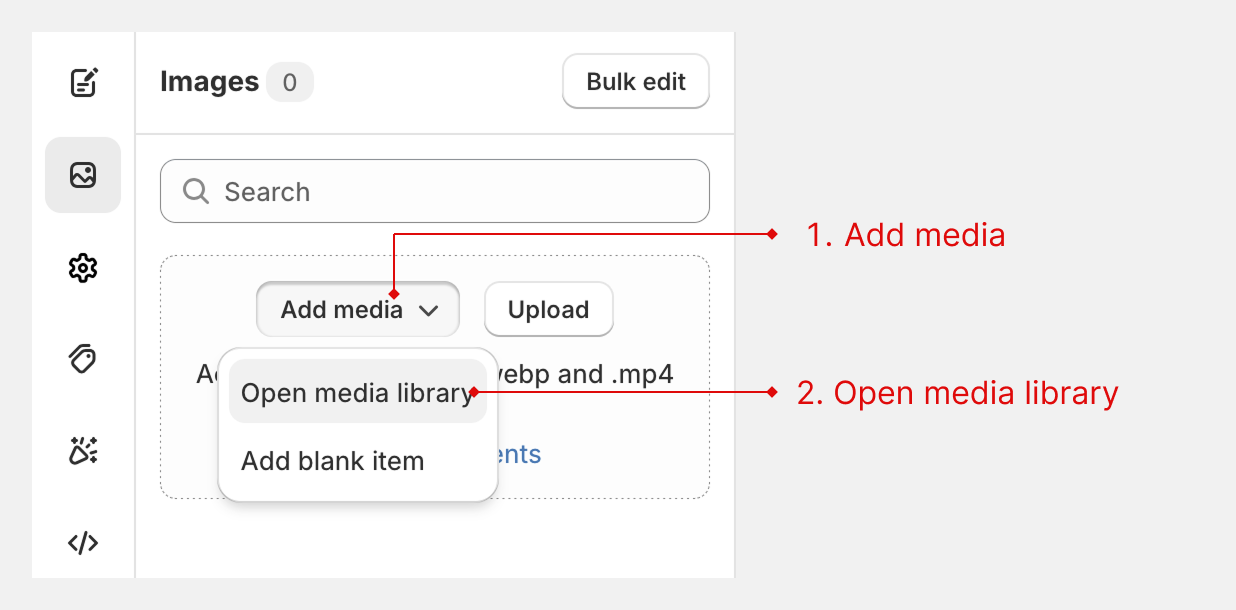
Image Requirements
- Maximum file size: 6 MB per image
- Supported formats: JPEG, PNG, WEBP, HEIC, GIF
- Maximum resolution: 20 MP (megapixels)
Step 3: Choose your gallery type
In the Settings > General, select your preferred layout:
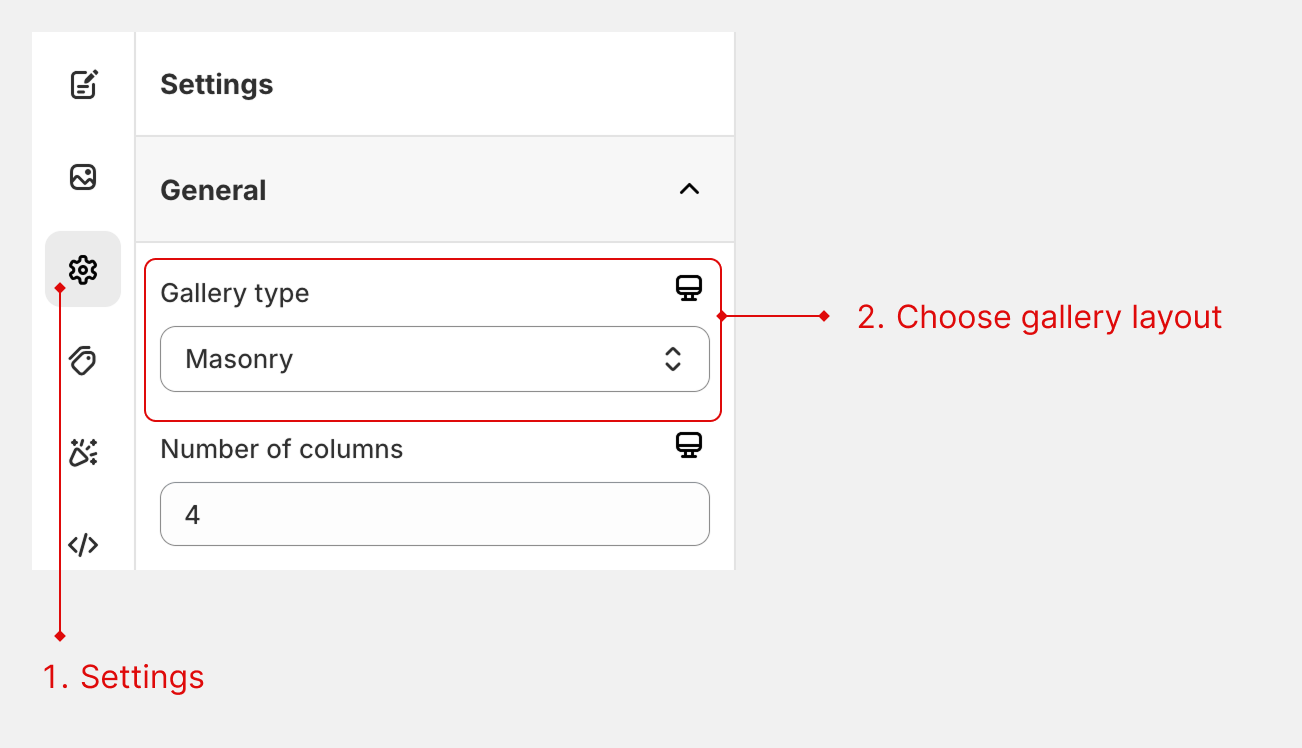
- Grid: Classic gallery layout that displays images in neat rows and columns. Each image can keep the same size or be customized to span multiple columns or rows for creative variation.
- Masonry: A dynamic, Pinterest-style layout that arranges images of different heights in natural-looking columns.
- Stack: Displays images in fixed-width columns that wrap to new rows automatically.
- Justified: Creates evenly aligned rows with consistent height, automatically adjusting image widths to fill each row perfectly. Inspired by the Flickr-style aesthetic for balanced, symmetrical galleries.
- Carousel: Lets visitors swipe or click through a series of images horizontally
- Slider: A carousel layout enhanced with thumbnail navigation. Thumbnails can be placed above, below, left, or right of the main slider for flexible and easy image browsing.
- Marquee: Displays images in a continuous horizontal scroll, creating a smooth looping motion.
tip
You can have different gallery type for devices. Just change your device and choose another gallery type
Step 4: Add basic customization
Reveal layer setup
Go to Design > Reveal layer: The Reveal Layer starts with a title field by default. You can add more fields such as description, button, images, or custom HTML, or remove the title field if not needed.
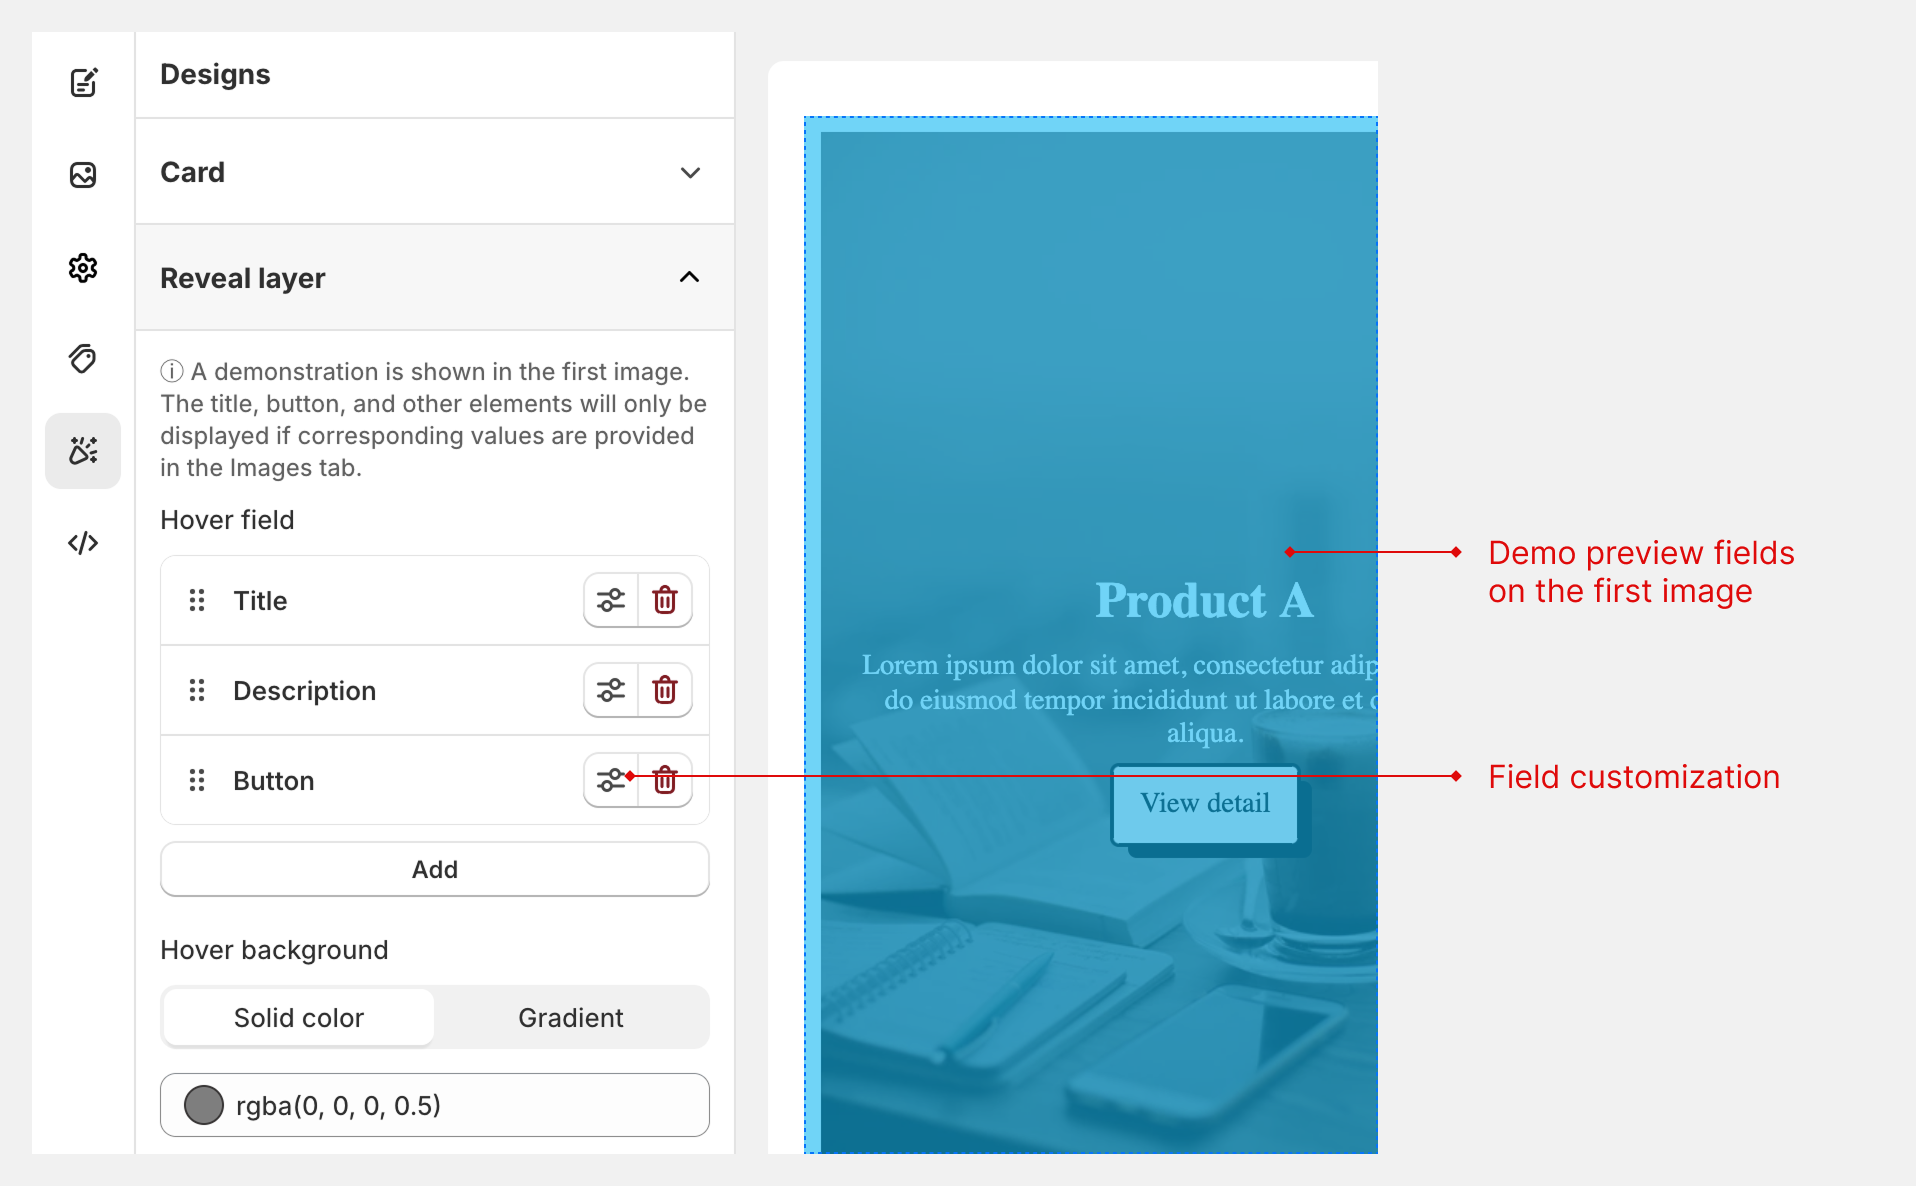
Filling field content
After configuring your fields, go to the Images tab.
- Click the edit icon on each image.
- Enter the title and description values that match your Reveal Layer setup.
- For a button, assign a link URL to make it appear when hovering over the image.
Step 5: Save your gallery
- Click Save to store your gallery
- Your gallery is now ready to be published!
🎉 Congratulations! You've created your first gallery. Next, learn how to publish it to your store.